
Follow the steps to set up the multiplayer server:
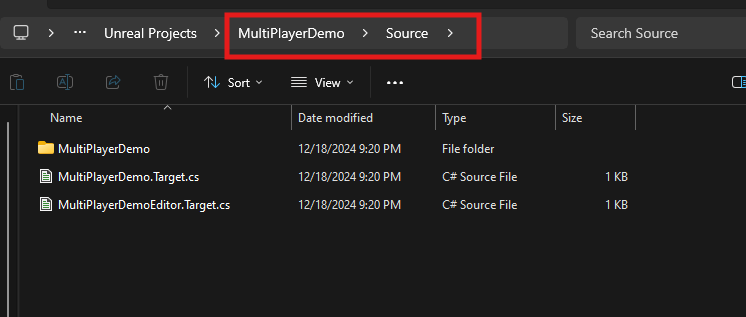
Step 1. Navigate to Source folder
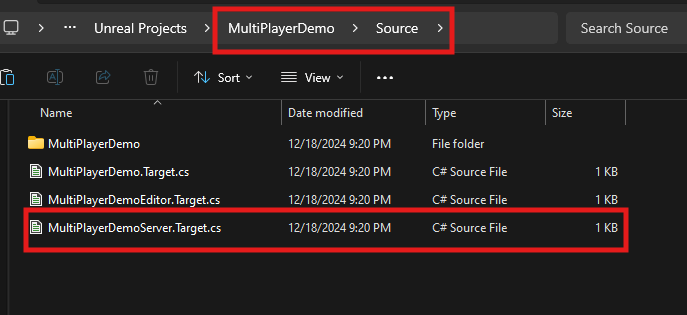
Step 2. Create a new file and name it as YourProjectNameServer.Target.cs
Make sure to replace YourProjectName with the actual name of your project.
Step 3. Open the YourProjectNameServer.Target.cs file in any text editor, add the following code, and save it
Make sure to replace YourProjectName with the actual name of your project.
// Fill out your copyright notice in the Description page of Project Settings.

using UnrealBuildTool;
using System.Collections.Generic;

public class YourProjectNameServerTarget : TargetRules
{
	public YourProjectNameServerTarget(TargetInfo Target) : base(Target)
	{
		Type = TargetType.Server;
		DefaultBuildSettings = BuildSettingsVersion.V2;

		ExtraModuleNames.AddRange( new string[] { "YourProjectName" } );
	}
}
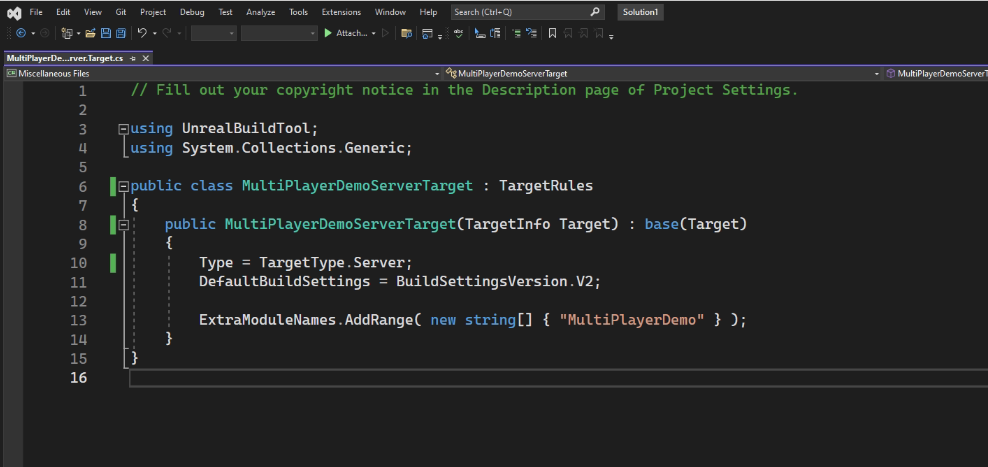
Don't forget to save the file from your editor after making the changes.
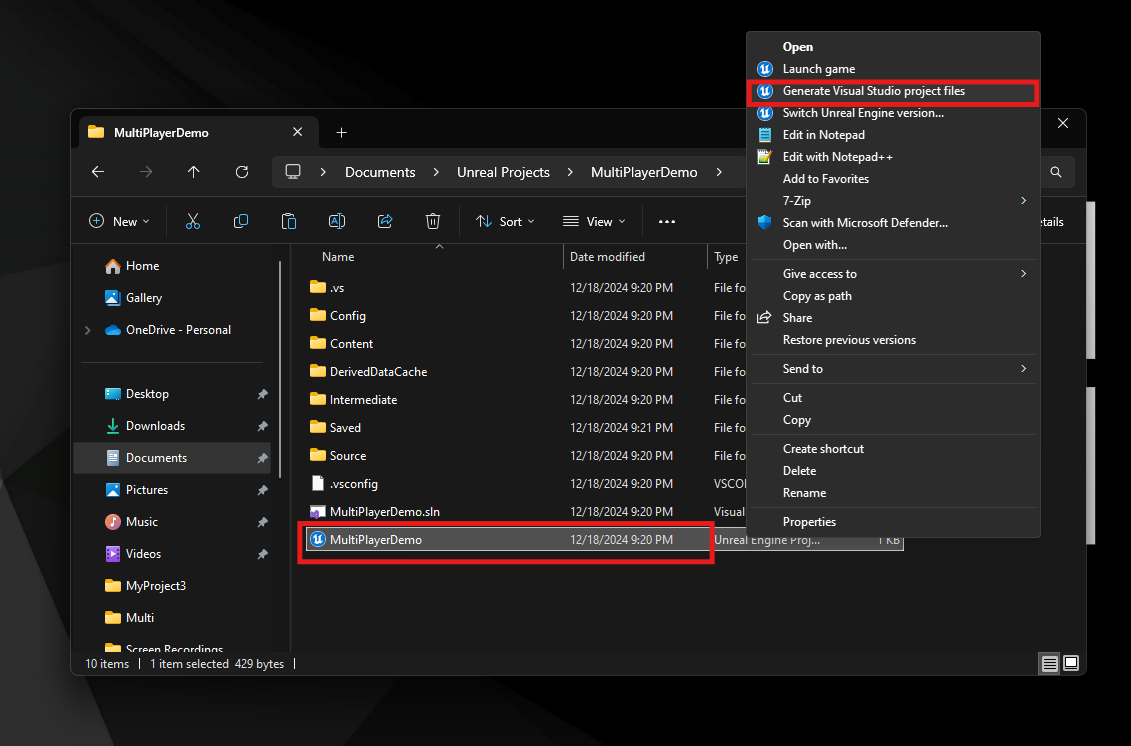
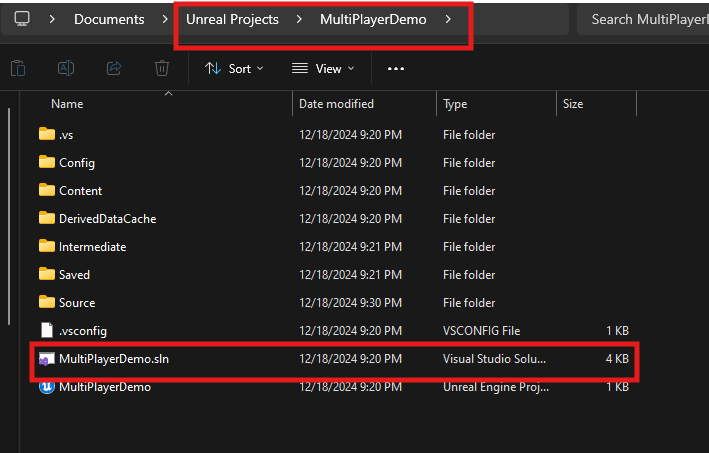
Step 4. Right-click the .uproject file of your Unreal Engine project and select Generate Visual Studio project files.
Step 5. Double-click the .sln file to open the project in Visual Studio.
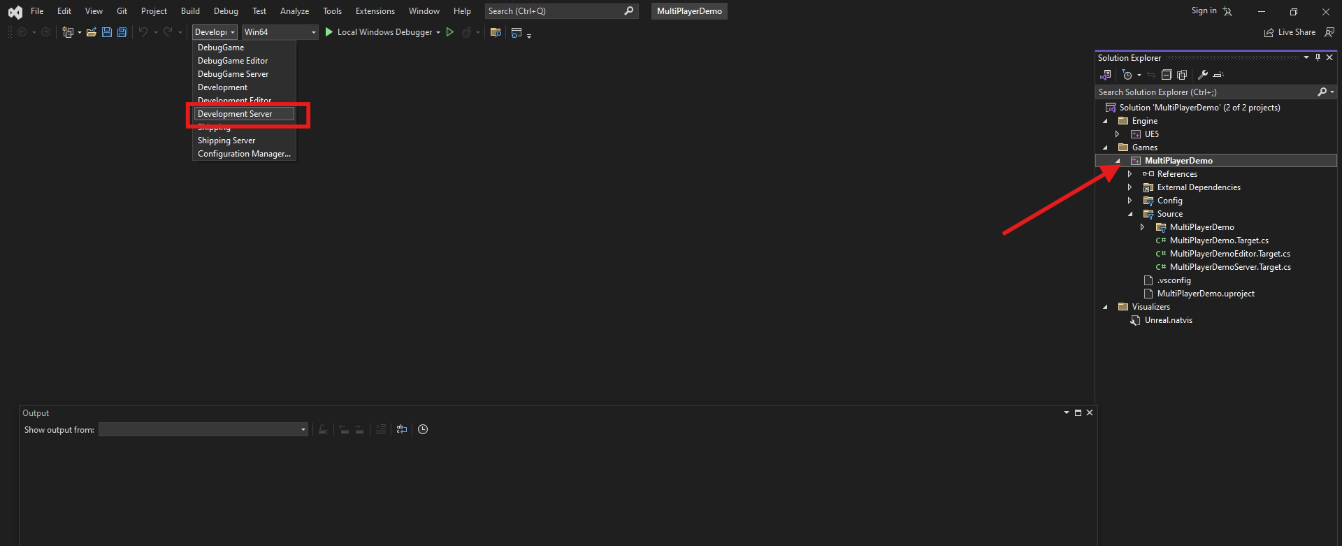
Step 6. Set the configuration to Development Server and build the project by pressing Ctrl + B
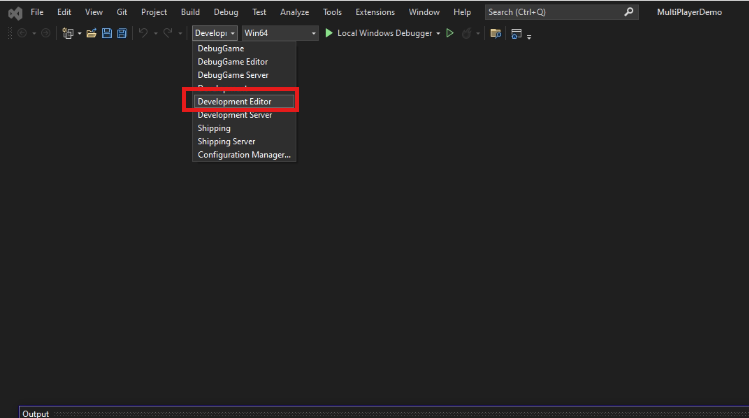
Step 7. Once the build is successful, switch the configuration to Development Editor and build the project by pressing Ctrl + B. Then press F5 to open the project automatically.
Step 8. Navigate to project settings

Step 9. Select Maps and Modes
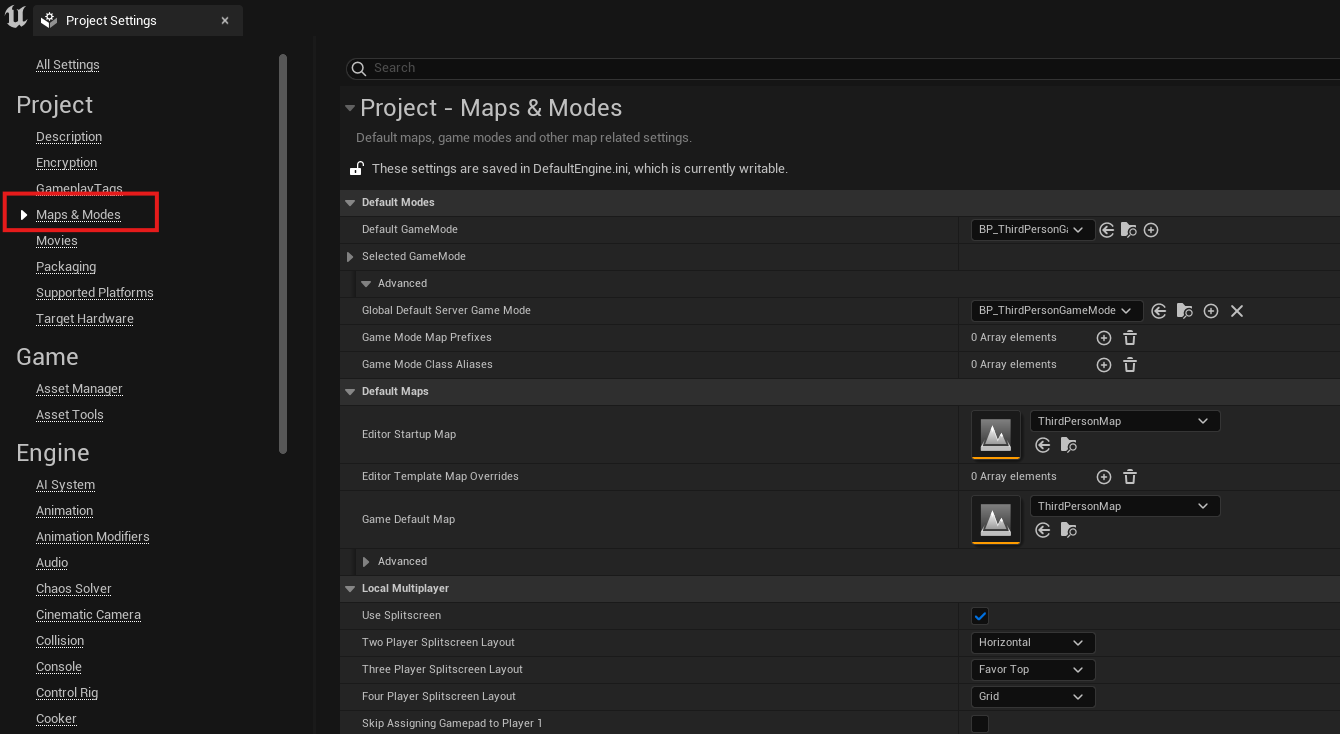
Step 10. Configure Maps and Modes
-
Global Default Server Game Mode: Set the same game mode as the Default Game Mode.
-
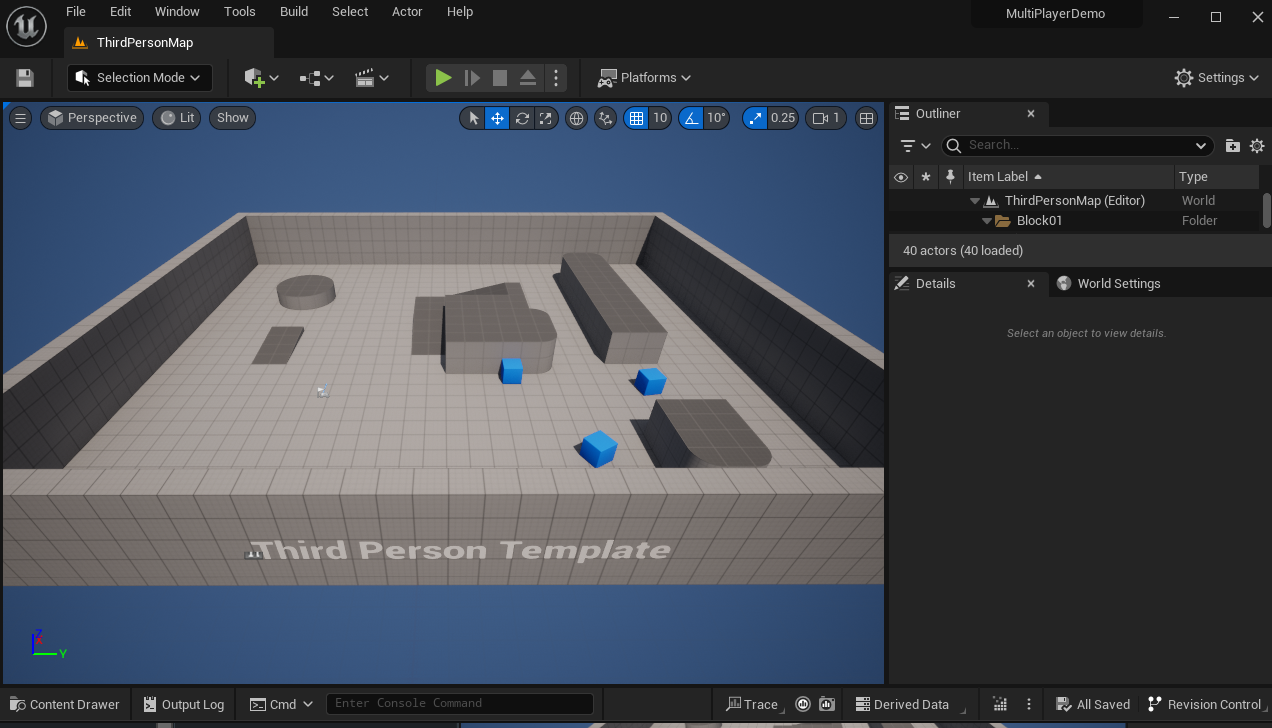
Server Default Map: Set as ThirdPersonMap
If you are using VRTemplateMap, then set Server Default Map as VRTemplateMap.

Need help?
If you need any assistance, feel free to reach out through any of the following channels:
🛠️ Support Portal: Contact Our Support Team
💬 Discord Community (Faster Support): Join Our Discord Community
📧 Email Support: support@eagle3dstreaming.com
Follow us on:
Facebook | GitHub | LinkedIn | YouTube