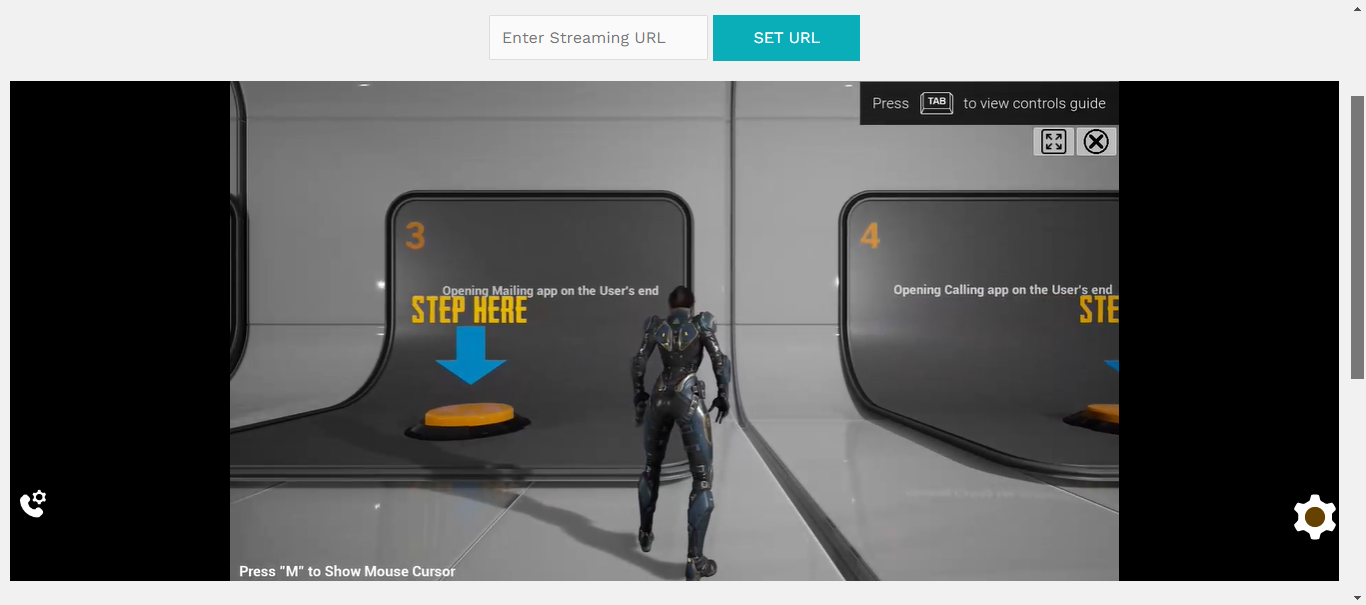
Embed Streaming within WordPress Webpage
Demo Site: https://test.akhi-kajol.com/
Step-1:
From your dashboard go to Plugins → Add New Plugin and search “iframe“.
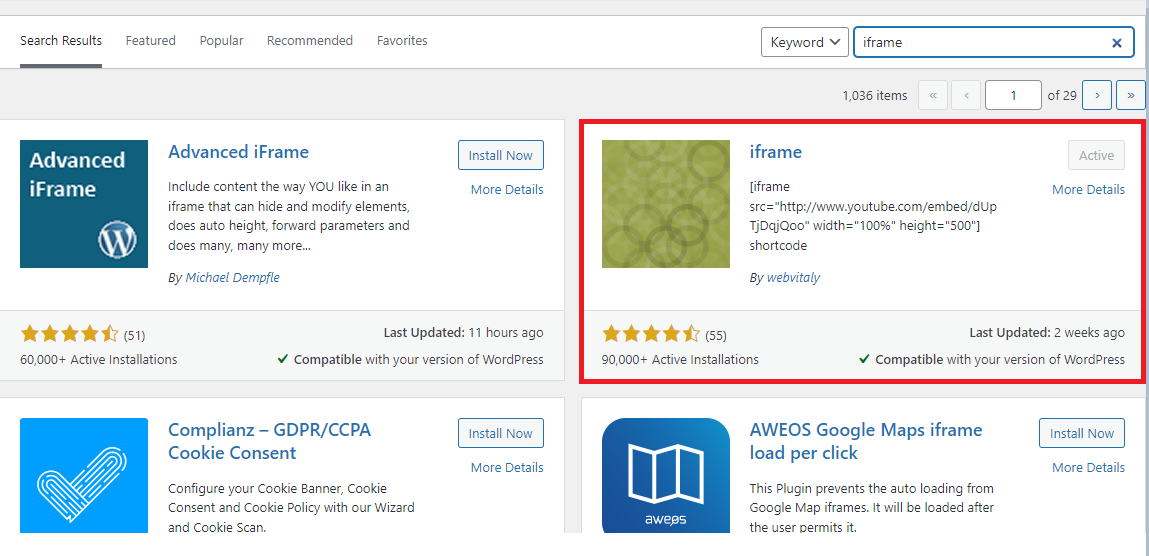
Install and activate the plugin marked in the image above.
Step-2:
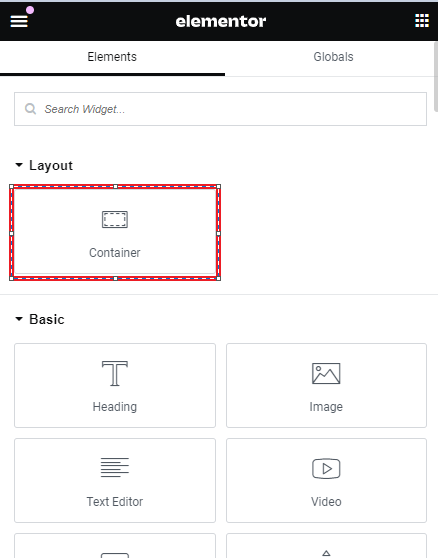
Go to Pages and click on the page you want to embed the iframe in. Then click on Edit with Elementor.
Then add a container widget for your iframe element.
Step-3:
Add a shortcode widget to the previously created container.

Step-4:
Enter the following shortcode in the shortcode widget. Replace src attributes value with your own streaming URL.
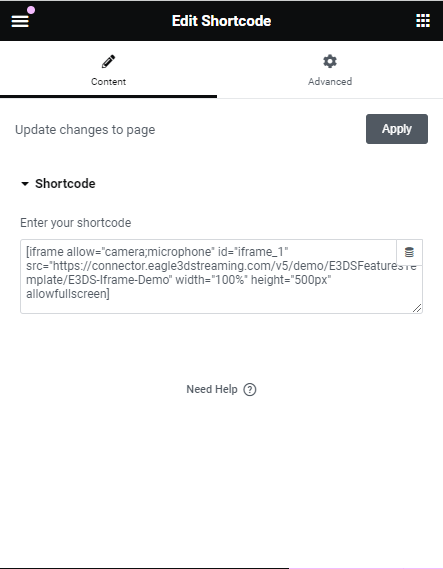
Sample Shortcode:
[iframe allow="camera;microphone" id="iframe_1" src="https://connector.eagle3dstreaming.com/v5/demo/E3DSFeaturesTemplate/E3DS-Iframe-Demo" width="100%" height="500px" allowfullscreen]Step-5:
Now apply all the changes and the stream should start.
Communicate with Your App:
Step-1:
First you’ll need to add a plugin to use javascript in your website. Go to Plugins → Add New Plugin and search “simple custom css and js“.
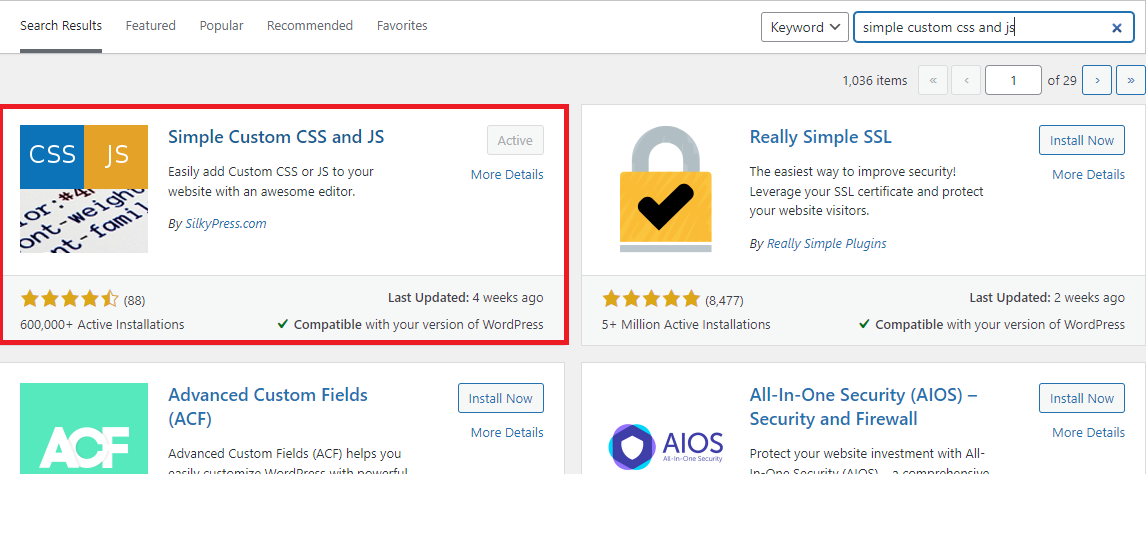
Install and activate the marked plugin.
Step-2:
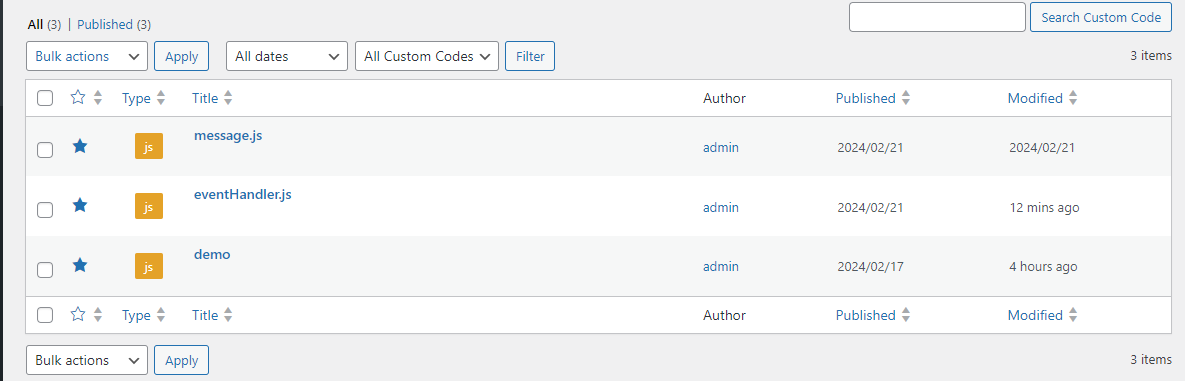
Go to Dashboard → Custom CSS $ JS → Add Custom JS. Now add the title of the javascript file. You can get the necessary javascript codes here: https://github.com/e3ds/E3DS-Iframe-Demo/tree/wordpress-demo-js
Add all three javascript files one by one and publish them. After publishing you can go to All Custom Code to view all your javascript files.
Step-3:
Now go back to your page and add another container. Inside that container add an HTML widget.
Edit HTML to add buttons with click handlers in your webpage.
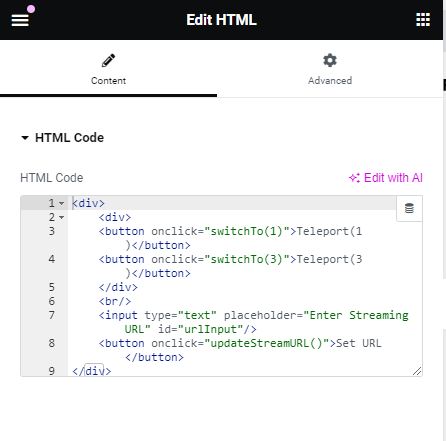
Sample HTML:
 <div>
    <div>
    <button onclick="switchTo(1)">Teleport(1)</button>
    <button onclick="switchTo(3)">Teleport(3)</button>
    </div>
    <br/>
    <input type="text" placeholder="Enter Streaming URL" id="urlInput"/>
    <button onclick="updateStreamURL()">Set URL</button>
</div>
Here, switchTo() and updateStreamURL() functions are defined inside demo.js file.
function switchTo(val) {
	console.log("=== Registered switchTo action, Value is: ", val);

	let descriptor = {
		Teleport: val
	};
	//emitUIInteraction(descriptor);
	let obj ={
			cmd: "sendToUe4",
			value: descriptor,
	};
	document.getElementById("iframe_1").contentWindow.postMessage(JSON.stringify(obj), "*");
}

function updateStreamURL(){
	const url = document.getElementById('urlInput').value;
	document.getElementById("iframe_1").src = url;
}
Step-4:
Receiving data from Unreal App to the parent webpage
After sending the data we will receive a response the the unreal app. This response can be caught by using window.e3ds.onEvent function. Here’s an example of that -
window.e3ds.onEvent("increaseSessionExpireTime", (data) => {
	alert("Increasing session expire time: " + data.value);

});
Useful Events:
See this document for Useful Events.
Need help?
🛠️ Contact our Support Team
💬 Join the Community on Discord
Follow us on:
Facebook | GitHub | LinkedIn | YouTube