Multiplayer Demo
Demo link:
connector.eagle3dstreaming.com/v5/demo/E3DSFeaturesTemplate/E3DS-Iframe-Demo?exeLunchArgs=-boothno=1
This document provides developers with a zero-coding approach to hosting a multiplayer server with simple management. It is continually evolving, and we will work to ensure it aligns with all Eagle 3D-specific features that we release.
The provided demo serves as a starting point. However, there may be use cases where the requirements of the UE application exceed the capabilities demonstrated by Eagle 3D Streaming.
In such cases, Eagle 3D is pleased to operate under a professional services agreement, where we will define a scope of work and execute it according to your specifications.
However, we cannot provide dedicated support for the multiplayer demo to develop additional capabilities.
If our free servers are not online then this demo's multiplayer part might not work.
In that case, reach out to support@eagle3dstreaming.com or request a paid server.
Instructions
To demo our multiplayer, follow the steps below:
Launch the following demohttps://iframe.eagle3dstreaming.com/ in two separate devices (mobile/desktop/….) with an internet connection and browser.
Walk the character to booth 12 and step on the yellow cylinder protruding from the center of the booth to portal into the multiplayer system demo.
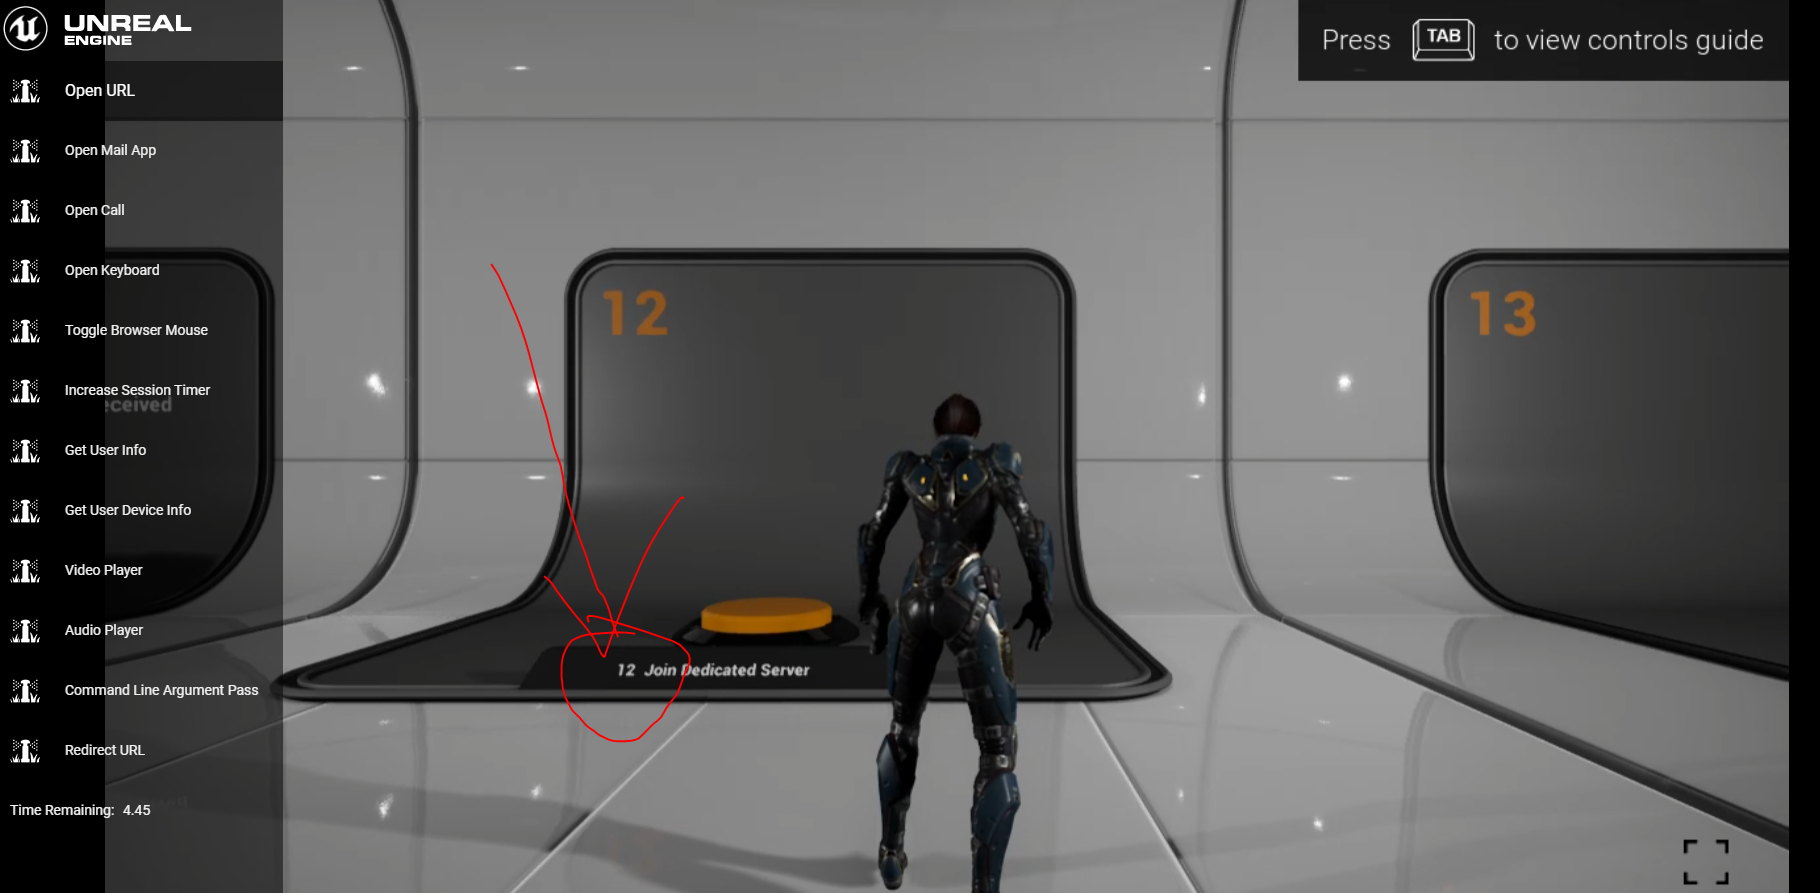
Image 1. System demo: Go to booth 12 (bring some water, it’s a bit of a long walk, or use the teleport buttons on the left panel!)
This specific map inspires developers on what can be achieved with Unreal Engine and Eagle 3D Streaming platform.
1. STARTUP SCREEN
The user is presented with a Player Selection screen, where he can select different avatars and add a name tag, which will be visible above the player in the multiplayer environment.
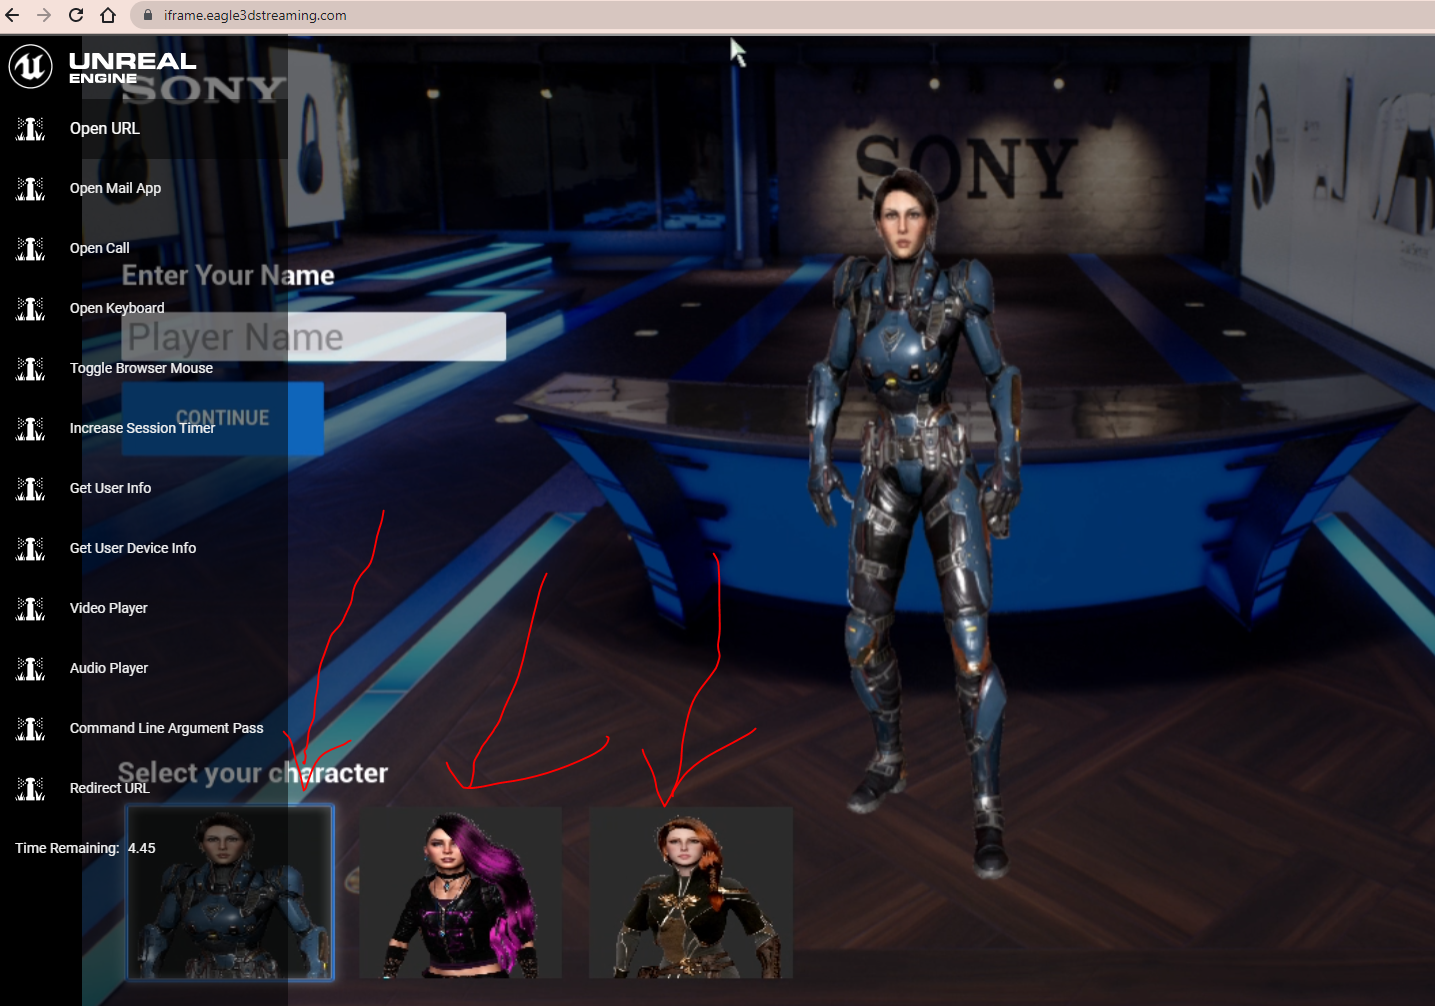
Image 2. Startup screen: Player Selection screen
2. MULTIPLAYER ENVIRONMENT
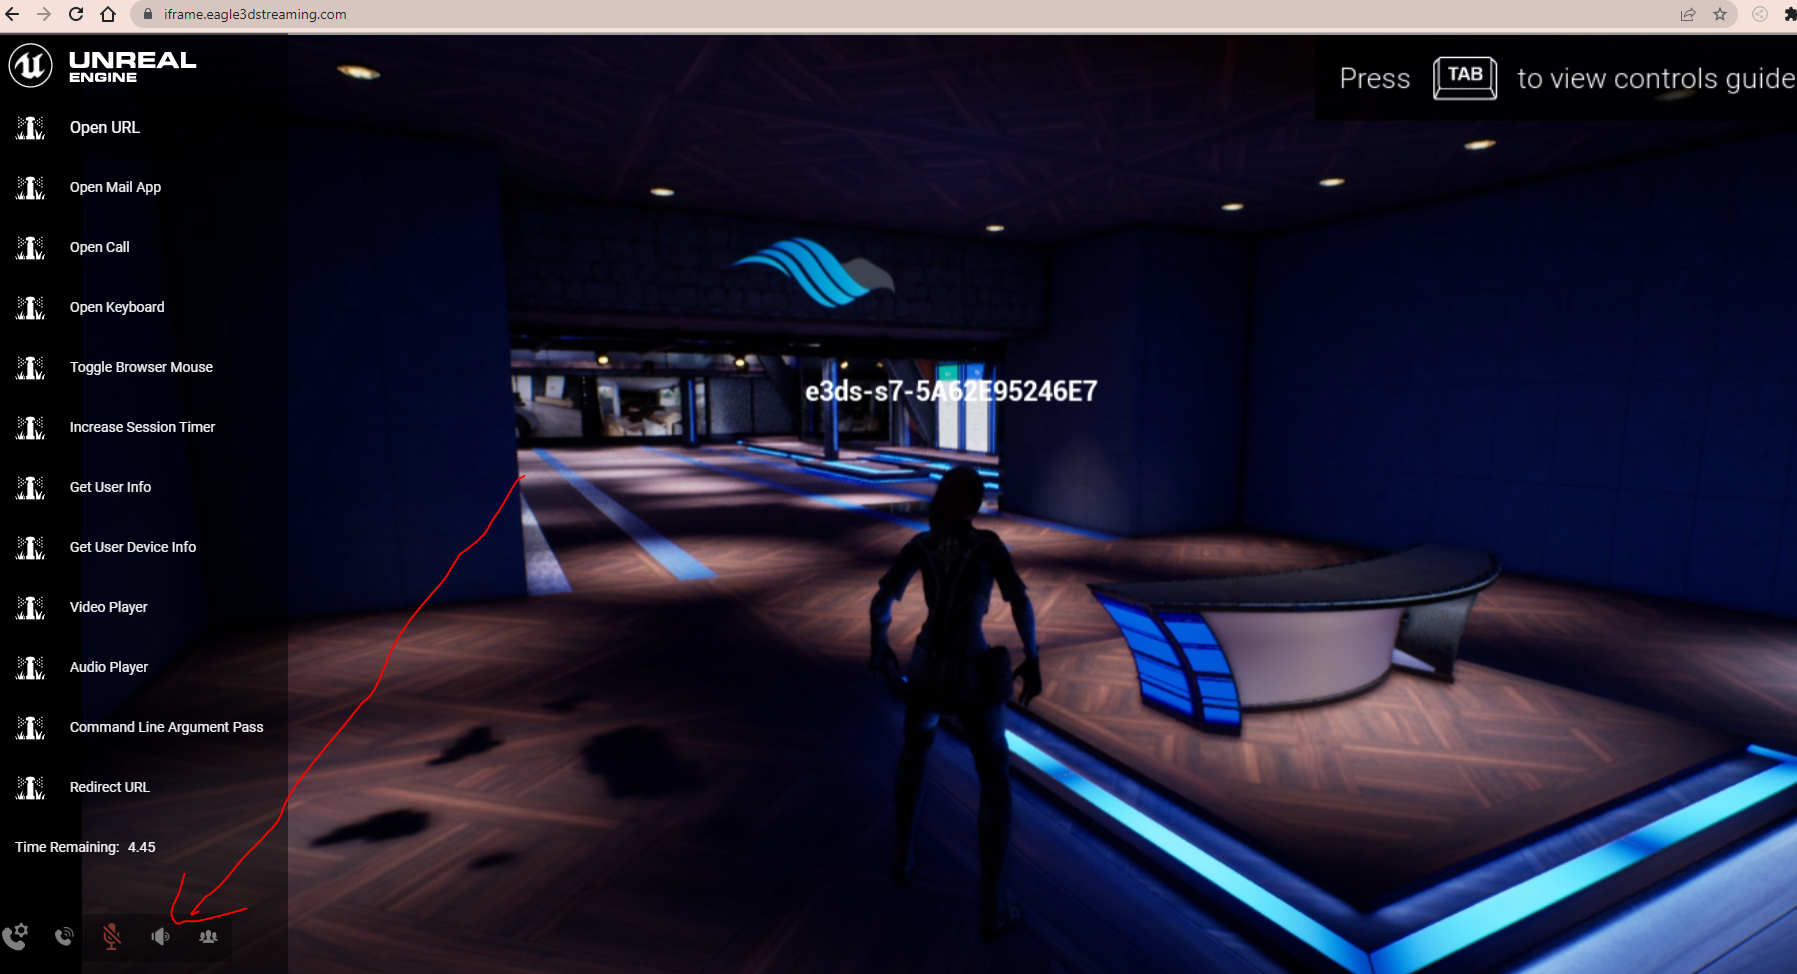
Image 3. Multiplayer environment: VoIP Panel
Repeat the process of going to booth 12 and stepping on the yellow cylinder from a second device or browser tab to see another avatar in the same space.
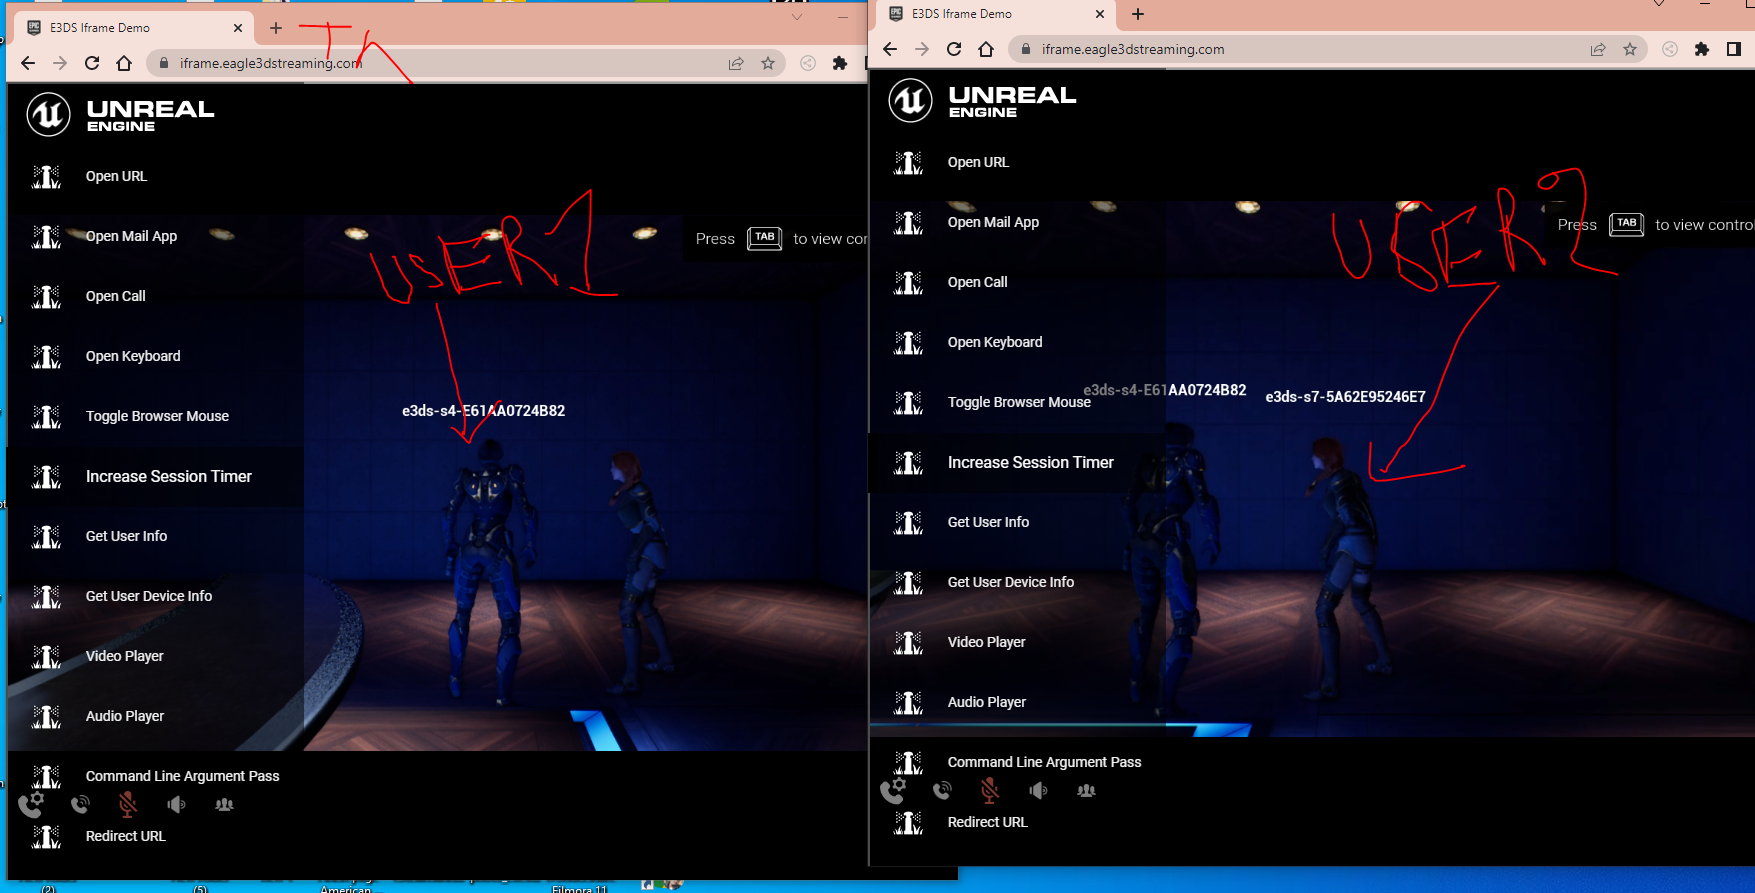
Image 4. Multiplayer environment: 2nd device
3. SETUP
Now that you have seen the demo, you can also use Eagle’s Multiplayer Template as a starting point to add Multiplayer into your project using a Dedicated server.
In order to do this, you will first need:
The Dedicated server: can be hosted on the Eagle 3D Streaming infrastructure by following this document or within your own infrastructure.
Both options can be utilized within Eagle’s system, provided they have a static IP address that is accessible over the internet. If you are hosting your own dedicated server, a static IP address is required for that server.
Currently, dedicated server hosting on the Eagle 3D infrastructure is free; however, this will change in the future. Please note that free hosting does not guarantee 24/7 service availability. If your server is offline, it may indicate that our server resources have been exceeded due to high demand from other clients also utilizing the free service.
For guaranteed paid dedicated server hosting, please contact support@eagle3dstreaming.com.
The client build: It is uploaded to the Eagle Streaming Platform and is hardcoded to connect to our machine.
This connection code can be found in the Maps/Main map level blueprint of the Eagle 3D Streaming Features Template UE Project https://bitbucket.org/Eagle3DStreaming/e3dsfeaturestemplate/
4.CODE ANALYSIS
First, grab the full source code of the UE4 project from this repository:
https://bitbucket.org/Eagle3DStreaming/e3dsfeaturestemplate/
DEDICATED SERVER PACKAGE GUIDE :
There are great resources available on the internet to guide your process of packaging a dedicated server build:
https://www.youtube.com/watch?v=zNUxzl8Dcb4&ab_channel=Flopperam
https://docs.unrealengine.com/4.27/en-US/InteractiveExperiences/Networking/HowTo/DedicatedServers/
Once you host the server, pass the IP address to the Parameters To Pass to App field (CmdLineParameter field) of your streaming Config (see Image 5 below) such as:-dsipaddress=yourIP:Port
To get to 'Parameters to Pass to App' where to pass the IP address, follow the steps below:
Go to your Control Panel > Step 2: Config Selection > Edit > Developer Options.
Click Save and Broadcast to apply the instructions to your app.
Details on how to create a new Config are here.
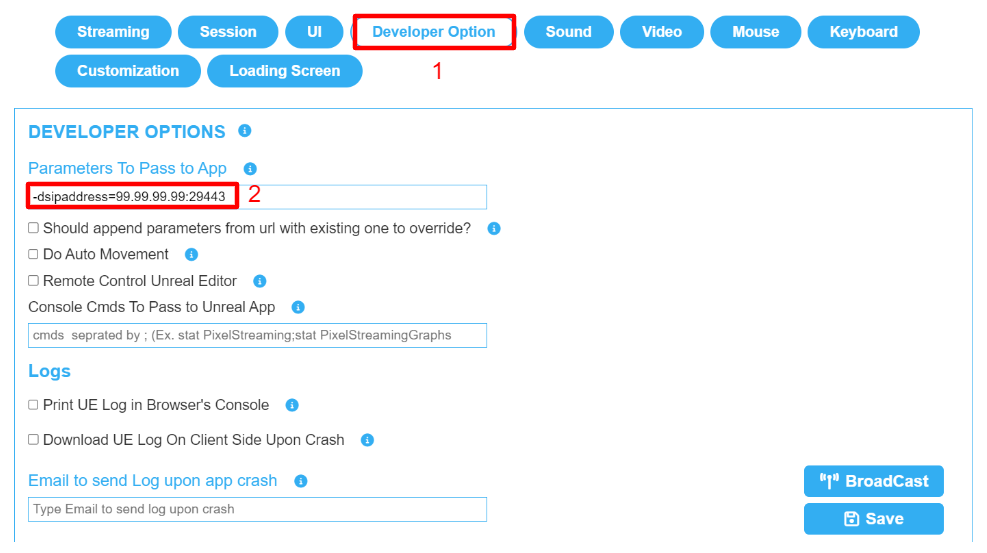
Image 5. Parameters to Pass to App
The code that will process this value can be found here:
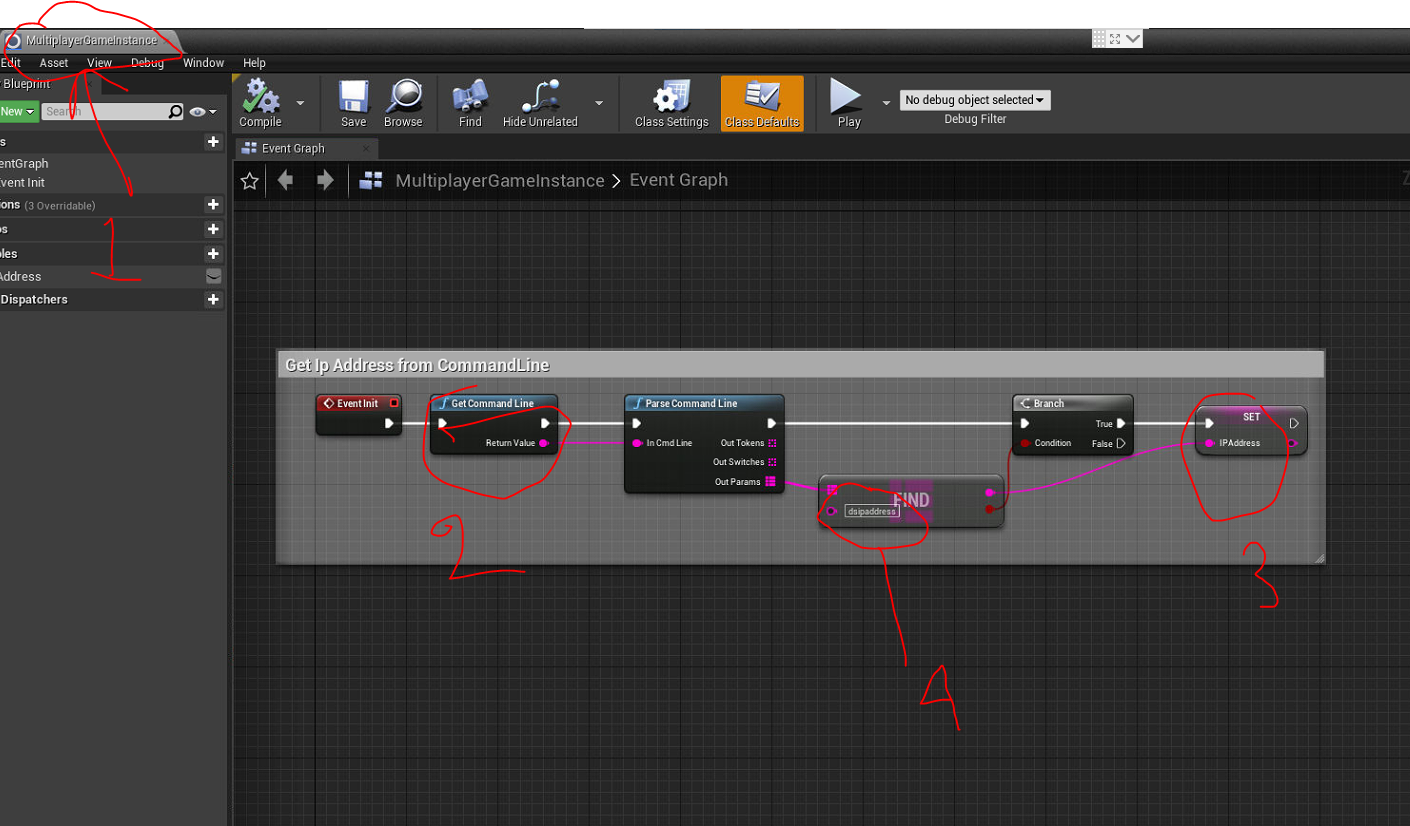
Image 6. Code analysis: Code
This value (1) is used to generate this (2):
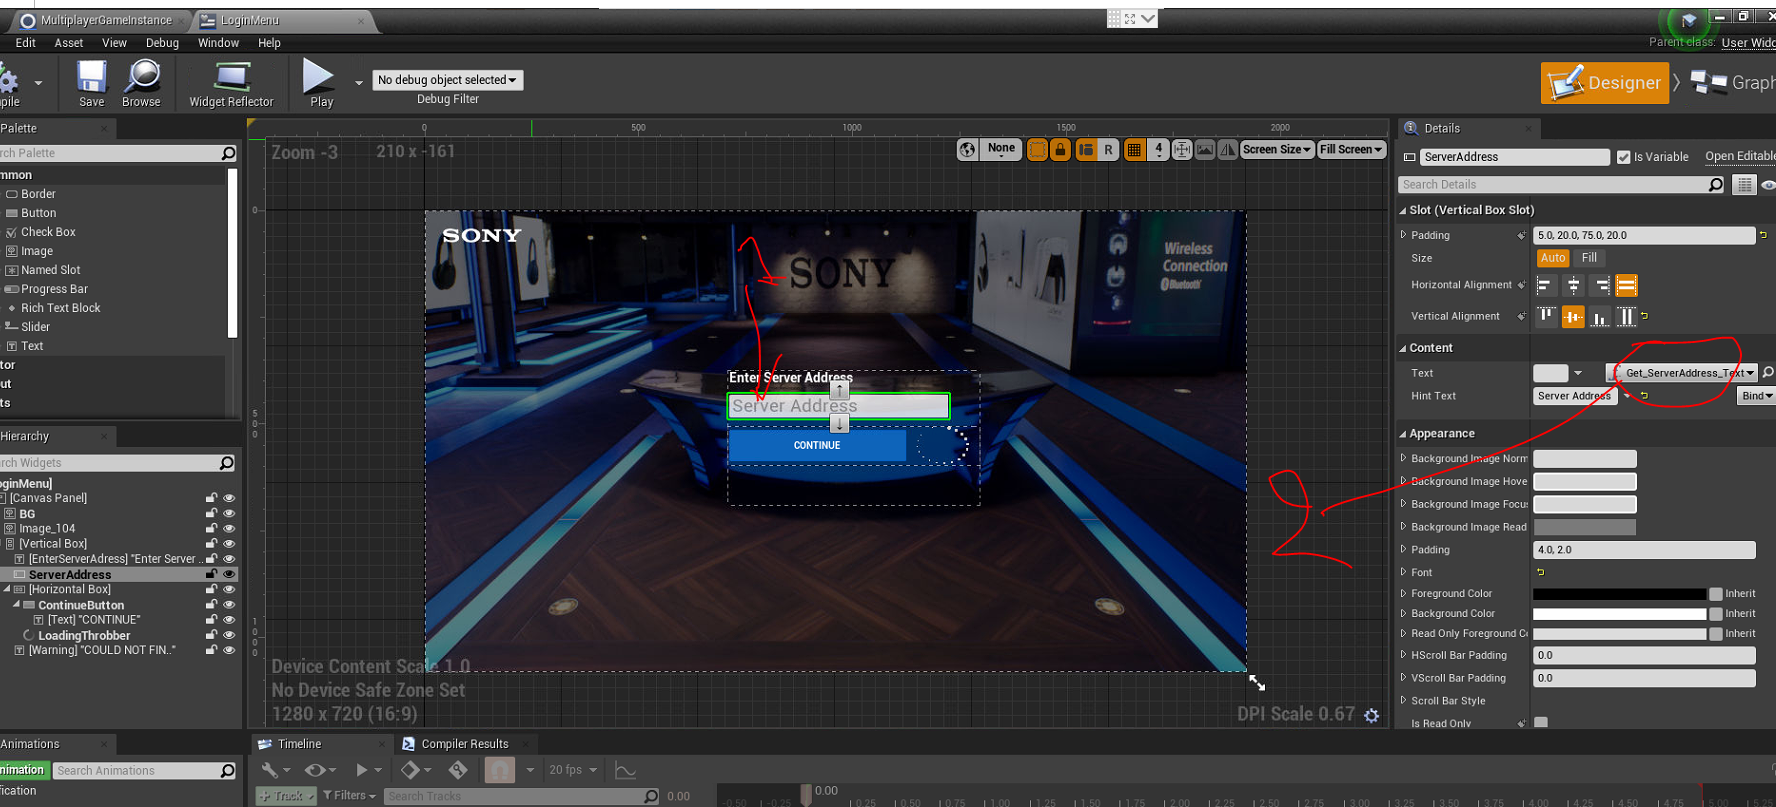
Image 7. Code analysis: To generate this
Which produces this window when you step into the yellow portal in map1:
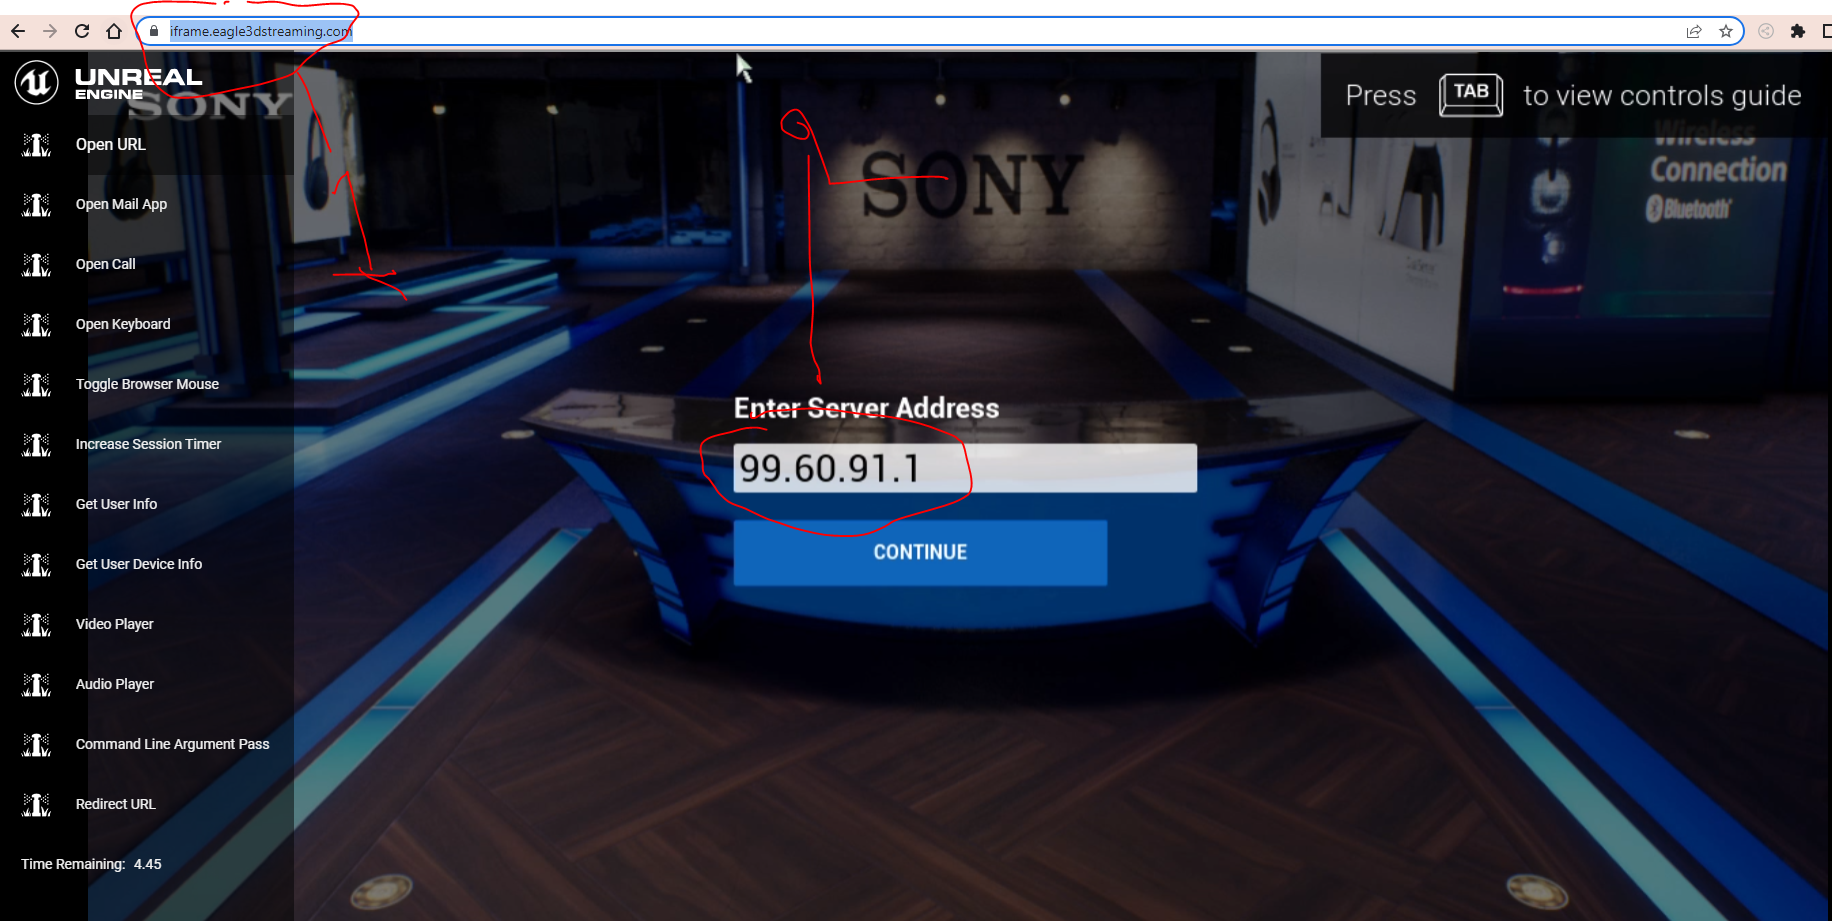
Image 8. Code analysis: portal in map1
This IP address getting used to connect to the dedicated server pointing by the IP address:

Image 9. Code analysis: IP address
When the stream starts this code, the client will run and connect to STATIC IP ADDRESS mentioned “Server IP”.
4. DEDICATED SERVER PACKAGE GUIDE
https://docs.unrealengine.com/4.27/en-US/InteractiveExperiences/Networking/HowTo/DedicatedServers/
https://www.youtube.com/watch?v=zNUxzl8Dcb4&ab_channel=Flopperam
5. ADDITIONAL RESOURCES
https://www.youtube.com/watch?v=09yWANtKmC8&ab_channel=UnrealEngine
Common issues
Issue 1:
Black screen (see screenshot below).

Image 10. Issue: Black Screen
Cause of the issue:
The Build is not able to connect to the server.
The reasons could be:
The dedicated build is not running (follow this document to see how to start a server App)
The machine where the dedicated build is running may have some connectivity issues (e.g. firewall permissions, IP address issues, etc.).
Issue 2:
After connecting to the server, the Camera or pawn get stuck somewhere (see screenshot below).
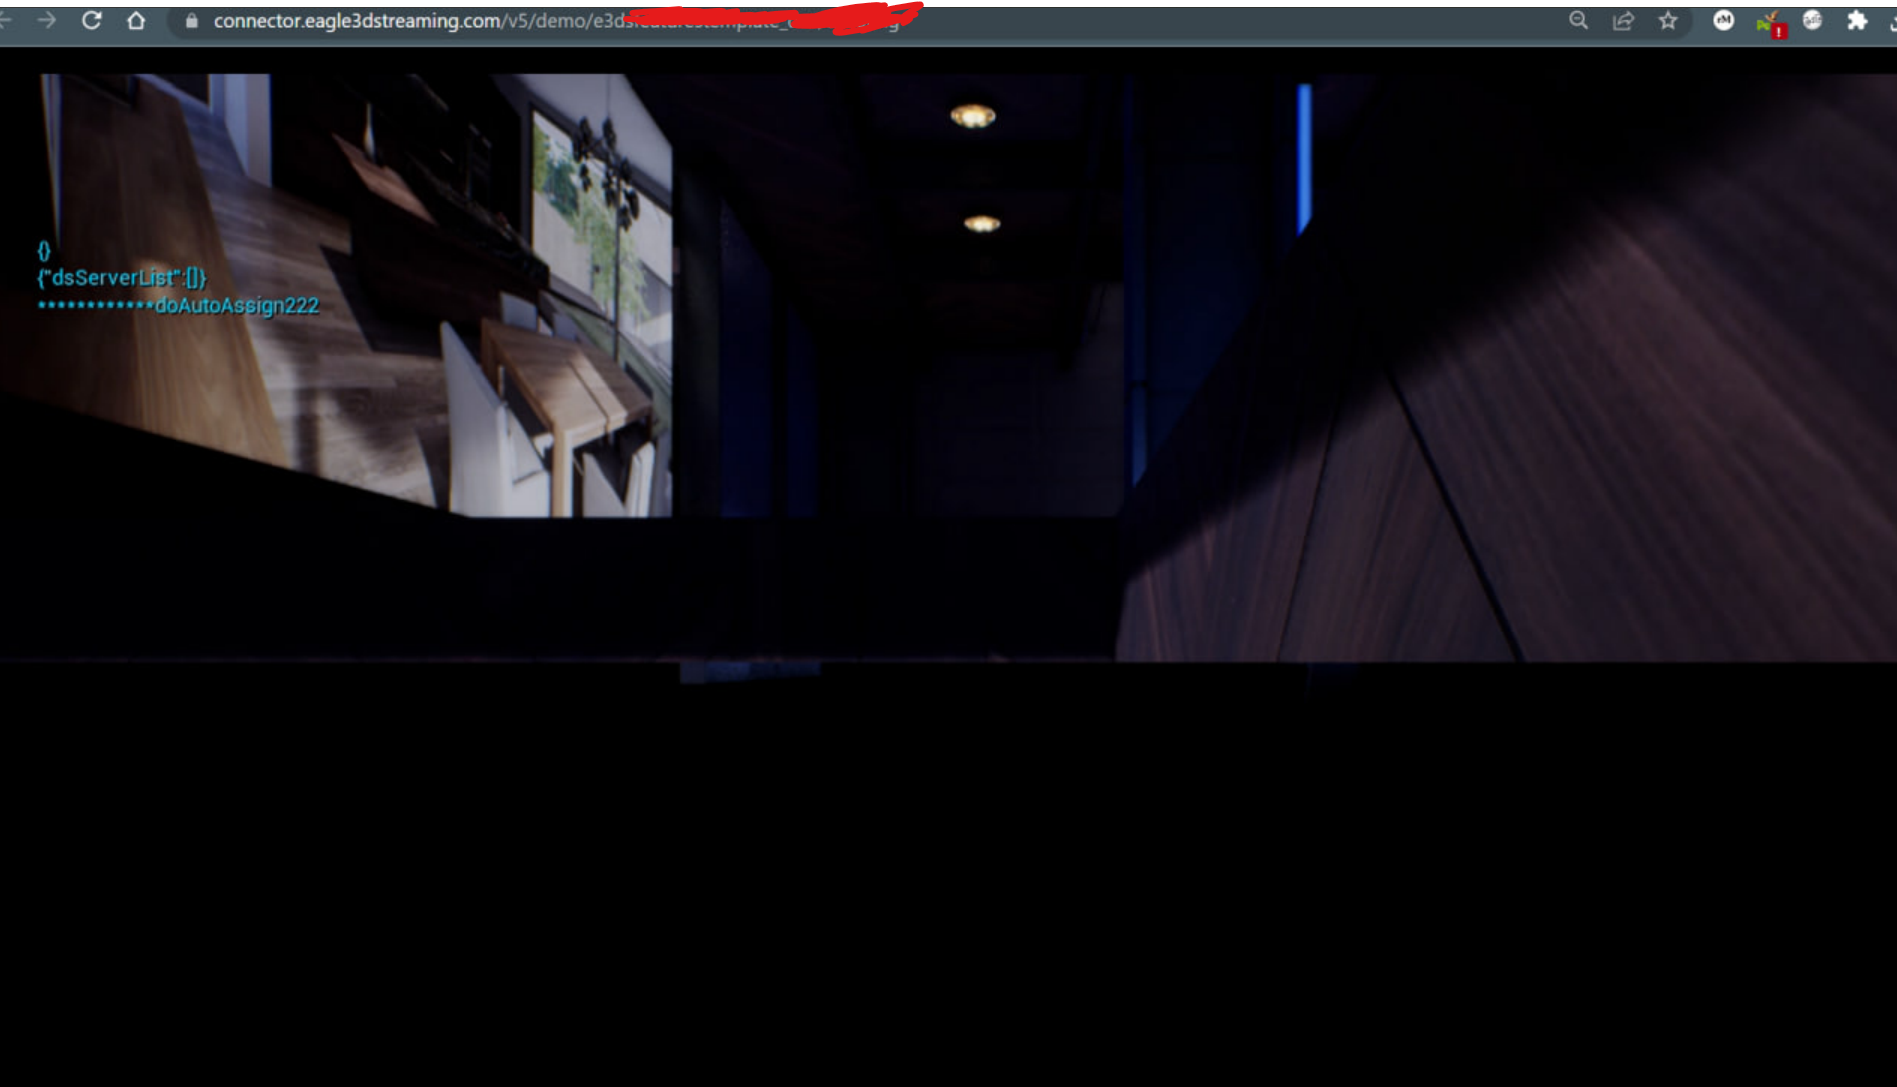
Image 11. Issue: Camera or pawn stuck
Cause of the issue:
Your game version and Dedicated server version are not the same.
Eagle 3D Streaming recommends:
When you Package your game, Package the dedicated server as well, Deploy them and connect them together.
To upload a dedicated server App and start it, refer to this document.
Need help? Contact Support
Submit a new request at E3DS support portal.
Requests sent on weekends will not be addressed until the following business day.
