Step 2: Select a Config
Create a new Configuration, Edit, Save and Broadcast it (optional) from the Old Control Panel.
Prerequisites
For this document, you need :
Access to the Control Panel ;
Instructions
1. Create a Config
You don't have to Create a new Config for every new Application.
If you already have a Config that suits your new App just select it.
a. Click the Add icon
Go to : Control Panel > STEP2: Config Selection > Add
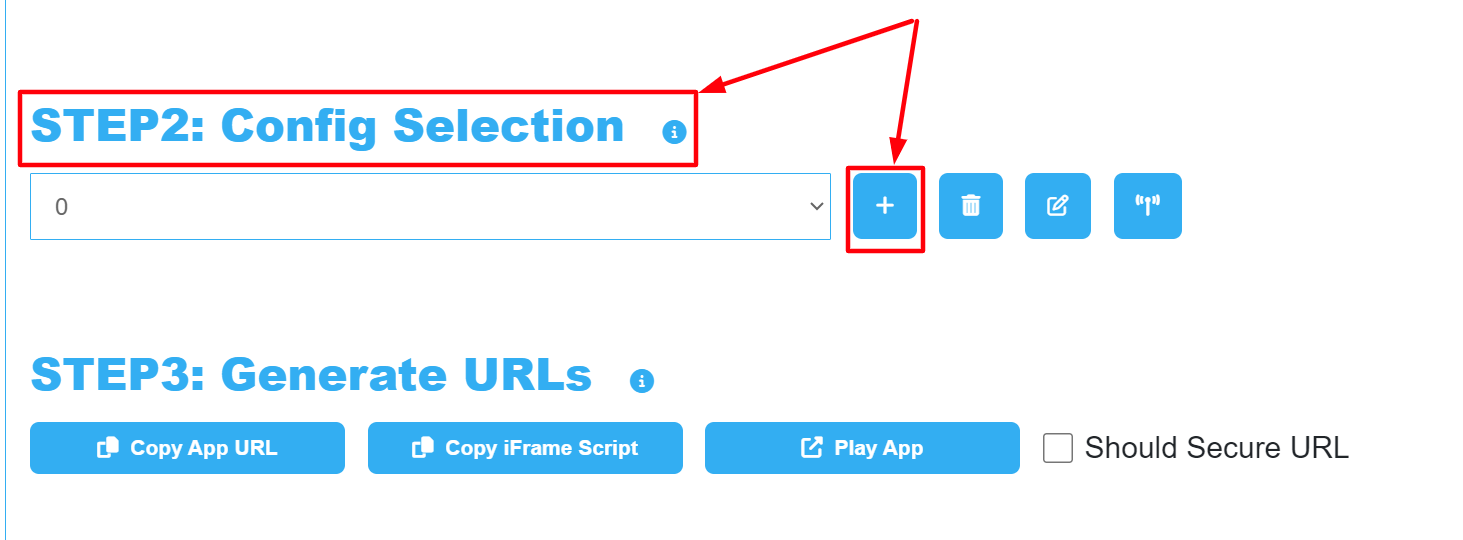
Image 1. Add Config
b. Type the name of the new Config
Enter your Config name in the text field and click Add.
No spaces are allowed in the Config name.
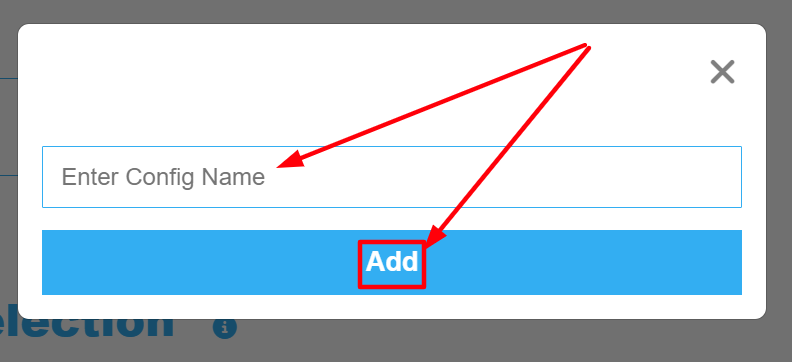
Image 2. Enter a Config Name
2. Delete the Config (Optional) 🗑️
Click the Trash can icon to delete the Config.
Go to : Control Panel > Step 2: Config Selection > Select the Config from the Drop Down Menu > Delete.
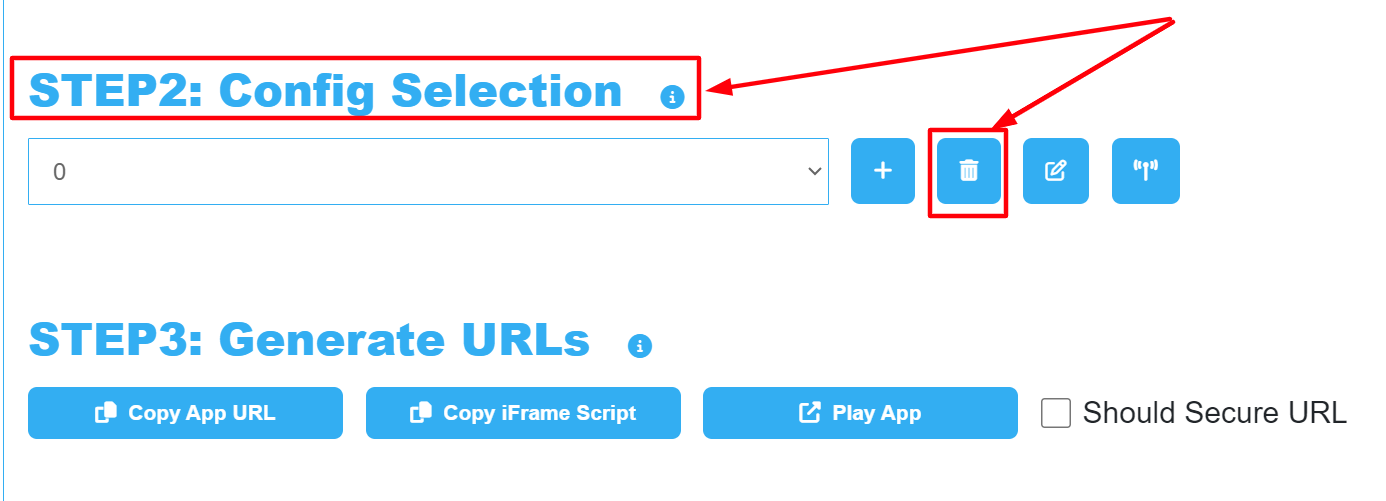
Image 3. Delete the Config
If invalid characters are entered in the name of the Config, or if you delete the Config and then open the URL of your App with the deleted Config in the URL.
An error will occur when you Play your App.
Error message: ´Config does not exist. Contact Developer!´
You should delete that Config and Create a new one with valid characters.

Image 4. Error message due to invalid Config name characters
3. Edit your Config
See this document.
4. Save your Config
After editing your Configs, save the changes.
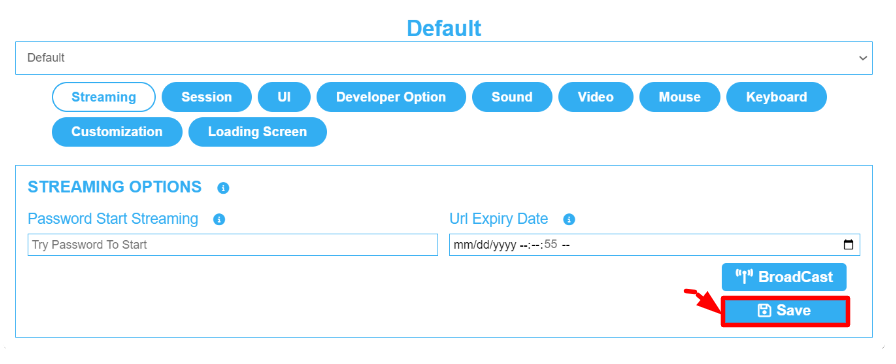
Image 5. Click Save
5. Click Broadcast (Optional)
Click ´Broadcast´ to share the Config settings on all running Applications (i.e. All open Tabs).
The Broadcast feature only works when the stream has already started (i.e. when the page is loading and the Application is running).
It does not work when the Application is on Queue!
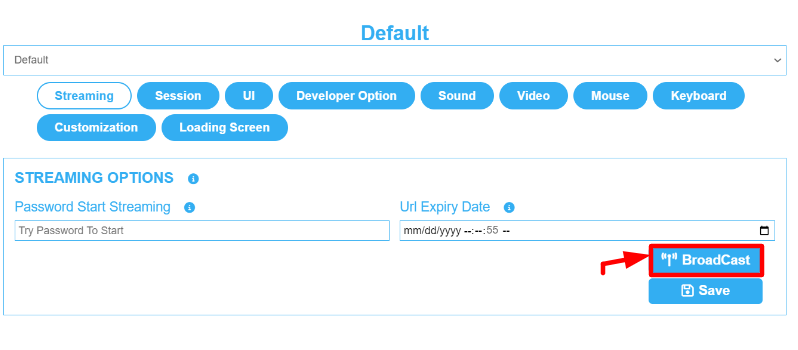
Image 6. Click Broadcast
6. Close the Config settings
Click on the ‘'Exit’' button or anywhere out of the page to close it.
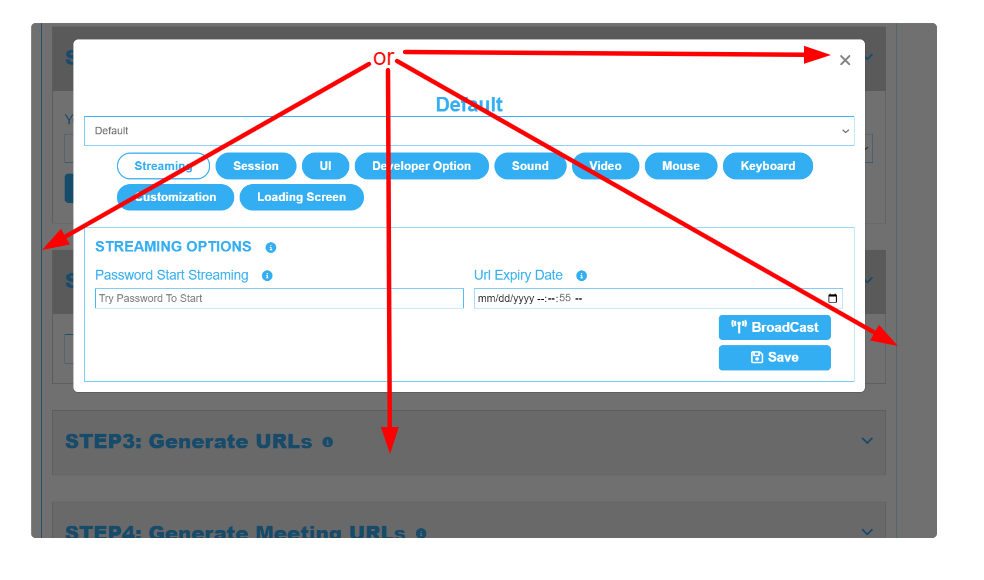
Image 7. Close the Config settings page
You are now ready for the next step ! Follow this tutorial .
Was this article helpful? Comment Below. Let us know your feedback.
Need help? Contact Support
Submit a new request at E3DS support portal.
Requests sent on weekends will not be addressed until the following business day.
Add label
