
In this document, we’ll guide you through the process of testing your dedicated multiplayer server locally.
This is useful for verifying server-client connectivity and debugging multiplayer behavior before deploying online.
Before we begin, it’s important to understand the difference between the server executable and the client executable.
Understanding the Difference: Server EXE vs. Client EXE
|
Type |
File Example |
Purpose |
How It Runs |
|---|---|---|---|
|
Server Executable |
|
Hosts multiplayer sessions and manages all connected clients. |
Runs as a background console process (no UI). |
|
Client Executable |
|
Allows players to join and interact within a multiplayer session. |
Opens a playable game window (UI visible). |
⚠️ Common Mistake:
If you double-click the server executable (.exe) directly, nothing will appear on screen — but it will still run silently in the background and consume system resources.
To confirm this, open Task Manager → Details tab, and you’ll find a process namedBootstrapPackagedGame.exerunning.
If you need to stop it, select it and click “End Task.”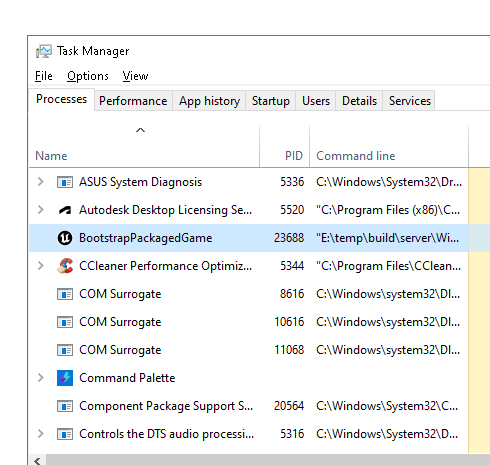
To properly view logs and confirm your server is active, always launch it using the shortcut method described below.
Now follow the steps to test dedicated server locally:
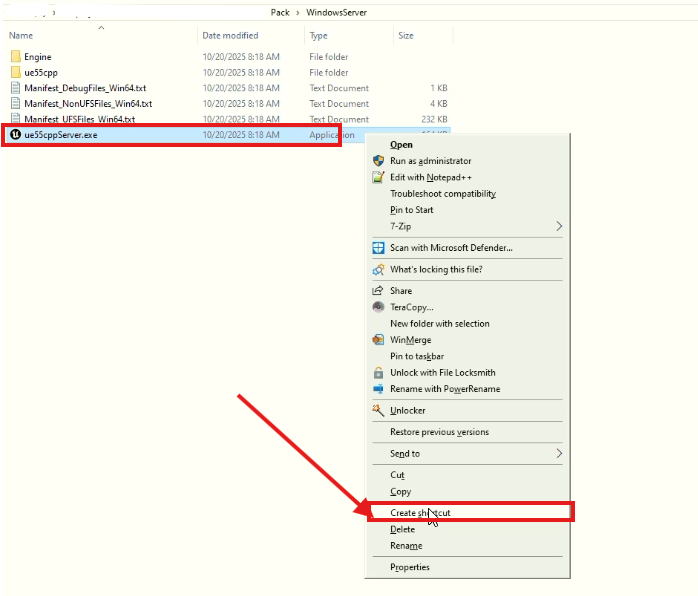
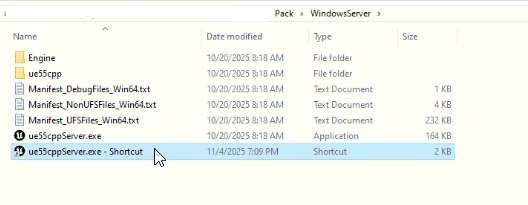
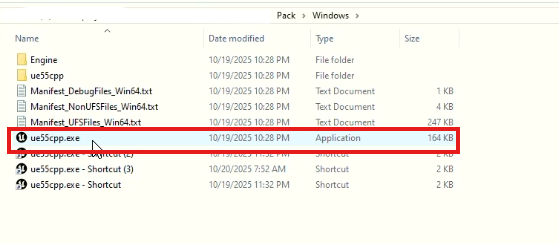
Step 1: Create a Shortcut for the Server Executable
-
Navigate to your server build directory.
-
Right-click on the server executable (
YourProjectServer.exe) and select Create shortcut.
(See Figure 1 and Figure 2 for reference.)

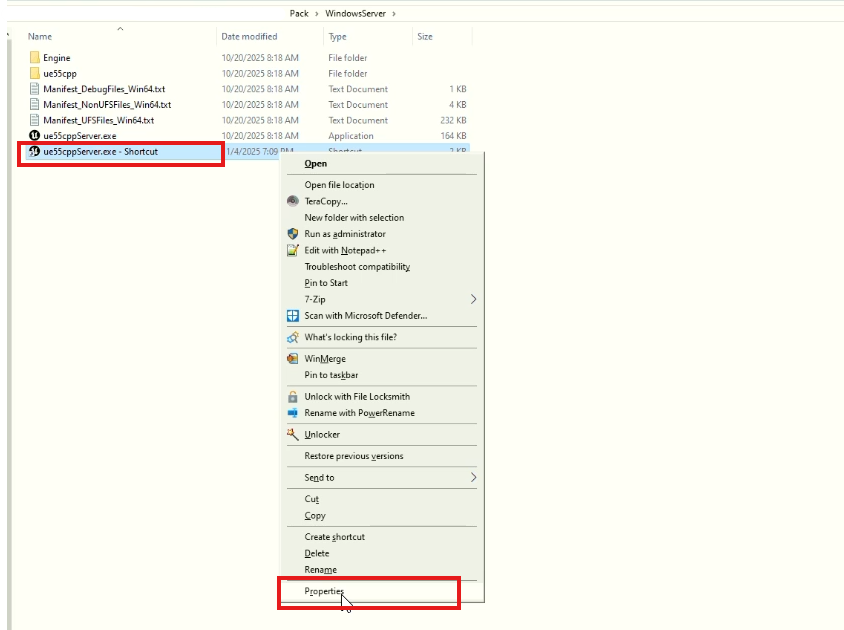
Step 2: Open Shortcut Properties
-
Right-click on the newly created shortcut.
-
Select Properties from the context menu.
(See Figure 3.)
Step 3: Add a Command Line Argument
-
In the Properties window, locate the Target field.
-
Go to the end of the existing line, press Space, and then add the following command:
-log
-
Click Apply, then OK.
(See Figure 4.)
This command enables logging so you can monitor server activity in a console window.
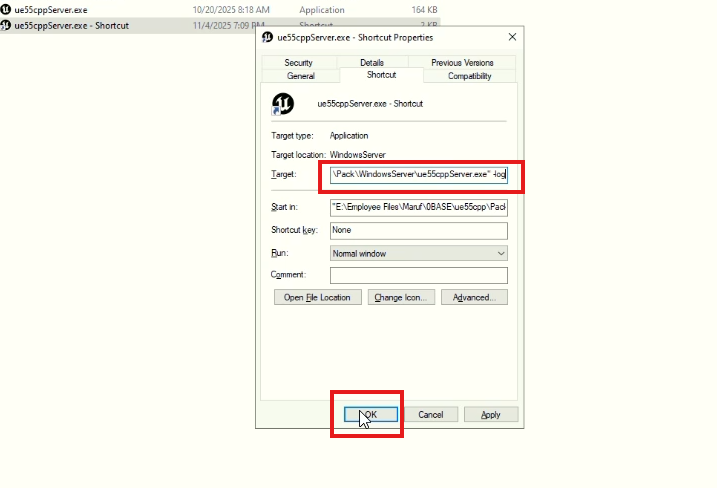
-log argument in the Target field
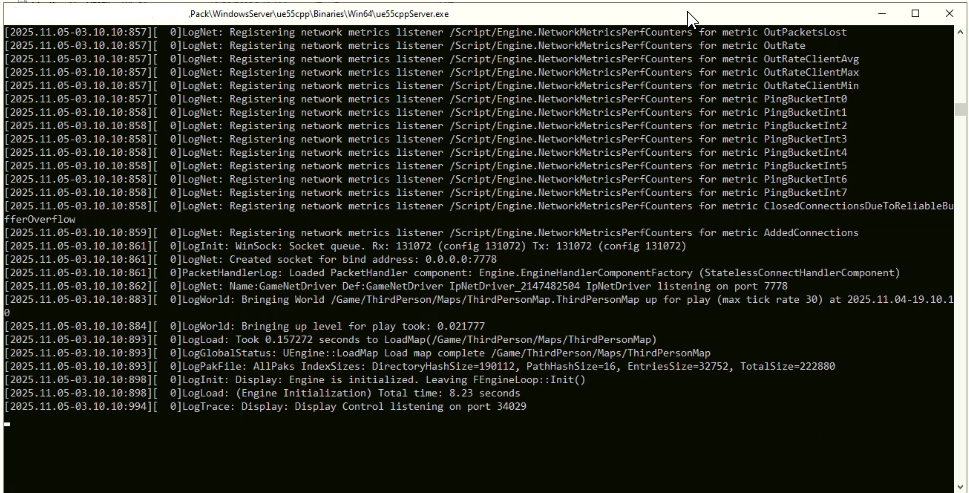
Step 4. Launch the Server
Double-click the shortcut file you created.
A console window should now appear showing server logs.
(See Figure 5.)
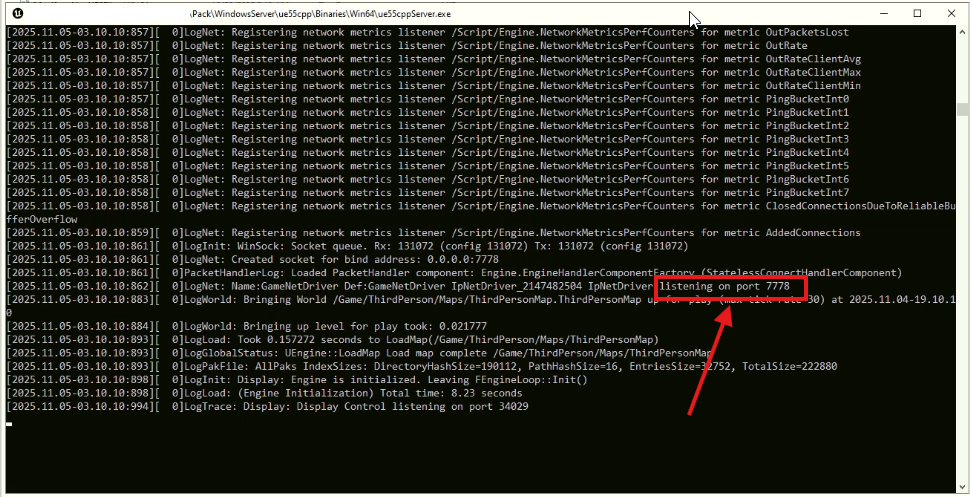
Step 5: Identify the Listening Port
Once the server starts, look in the console output to find the listening port number — typically 7777 or similar.
(See Figure 7.)
💡 Tip:
If multiple server instances are running, Unreal Engine automatically increments the port number.
Always confirm the correct port in the log window.
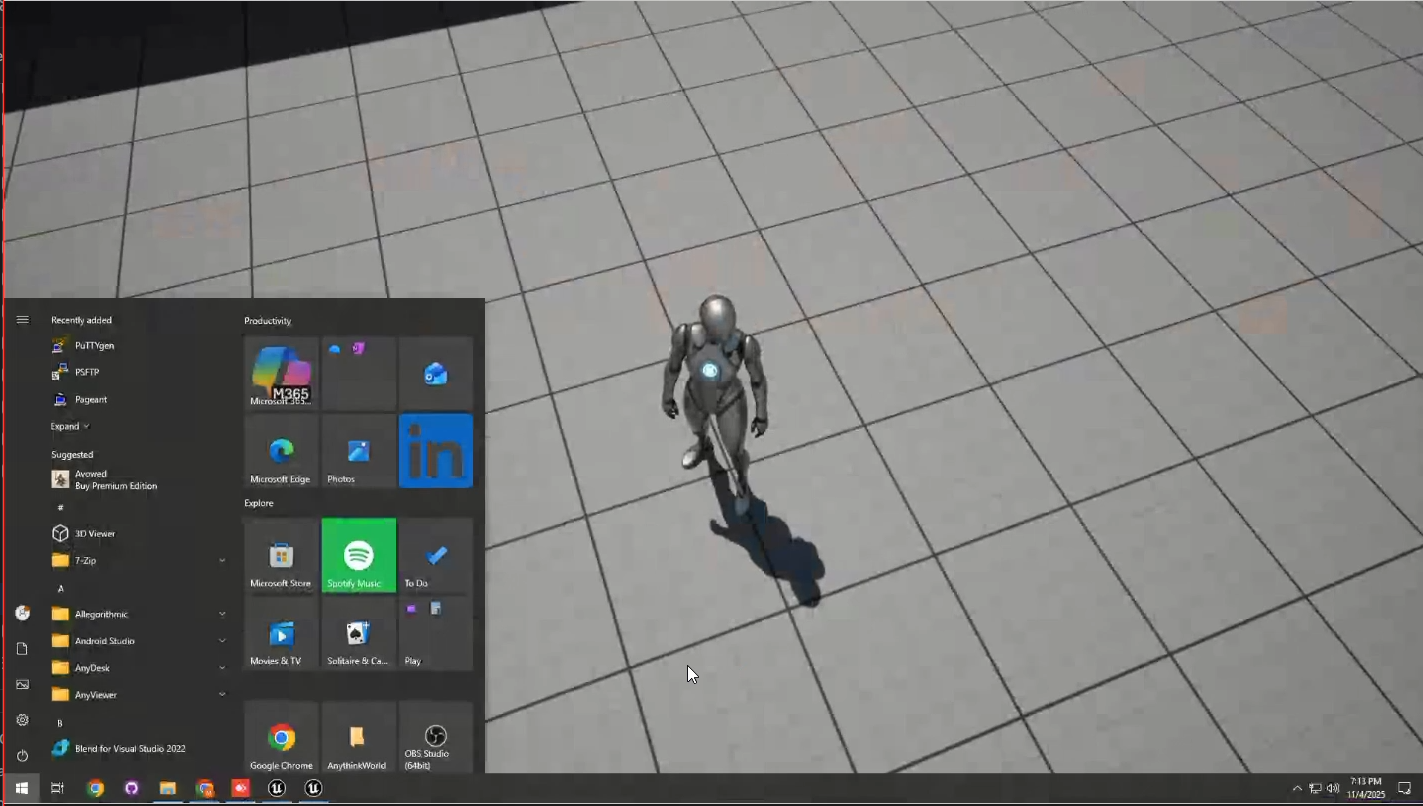
Step 6: Launch the Client Executable
-
Double-click on your client executable (
YourProject.exe) to open the game. -
Wait until the main menu or playable screen loads.
(See Figure 8.)
Step 7: Open the In-Game Console
Press the Tilde (~) key on your keyboard.
A black bar (console input) should appear at the bottom of your screen.
(See Figure 9.)

Step 8: Connect to the Local Server
In the console bar, type the following command and press Enter:
open 127.0.0.1:portNumber
For example:
open 127.0.0.1:7778
This connects your client to the dedicated server running on the same PC.
(See Figure 10.)

Step 9: Launch a Second Client
Repeat Steps 6–8 to launch another client instance.
Both clients should now connect to the same local server.
Tip: Handling Full-Screen Mode
If your game runs in full-screen and you can’t access other windows:
Press the Windows key or Alt + Tab to switch apps or minimize the game.
(See Figure 11.)
Step 10. Verify Successful Connection
After following all steps, both clients should successfully join the same dedicated server session.
(See Figure 12.)

Additional Notes
-
The default server port is 7777, unless manually changed.
-
Each new server instance automatically selects a new port if the previous one is occupied.
-
If running the server and client from different machines, use your server machine’s IP address instead of
127.0.0.1. -
Disable firewalls or antivirus restrictions temporarily if the client cannot connect.
-
Avoid running multiple server instances unnecessarily — they may consume significant CPU/RAM in background.
Troubleshooting
|
Issue |
Possible Cause |
Solution |
|---|---|---|
|
No console window appears |
Launched |
Use the shortcut with |
|
Client cannot connect |
Wrong IP/port or firewall block |
Verify IP/port, disable firewall, retry |
|
Multiple servers conflict |
Port already in use |
Close running servers or let Unreal auto-increment |
|
Game window unresponsive |
Full-screen blocking access |
Press Windows key or Alt + Tab |
|
High CPU usage, no visible window |
Server |
End |
|
Connection timeout |
Mismatch between client and server builds |
Rebuild both using same Unreal version |
|
Logs not visible |
Missing |
Add |
Need help?
If you need any assistance, feel free to reach out through any of the following channels:
🛠️ Support Portal: Contact Our Support Team
💬 Discord Community (Faster Support): Join Our Discord Community
📧 Email Support: support@eagle3dstreaming.com
Follow us on: