The E3DS Automation Kit is a Node.js library designed to automate specific Eagle 3D Streaming (E3DS) operations, including uploading, registering, and testing streaming applications.
It’s ideal for:
-
CI/CD pipelines
-
Automated deployment scripts
-
Faster build upload from local development environments
This guide walks you through the installation, setup, and execution process step-by-step, with visuals to make it easy for new developers to follow along.
Follow the steps below:
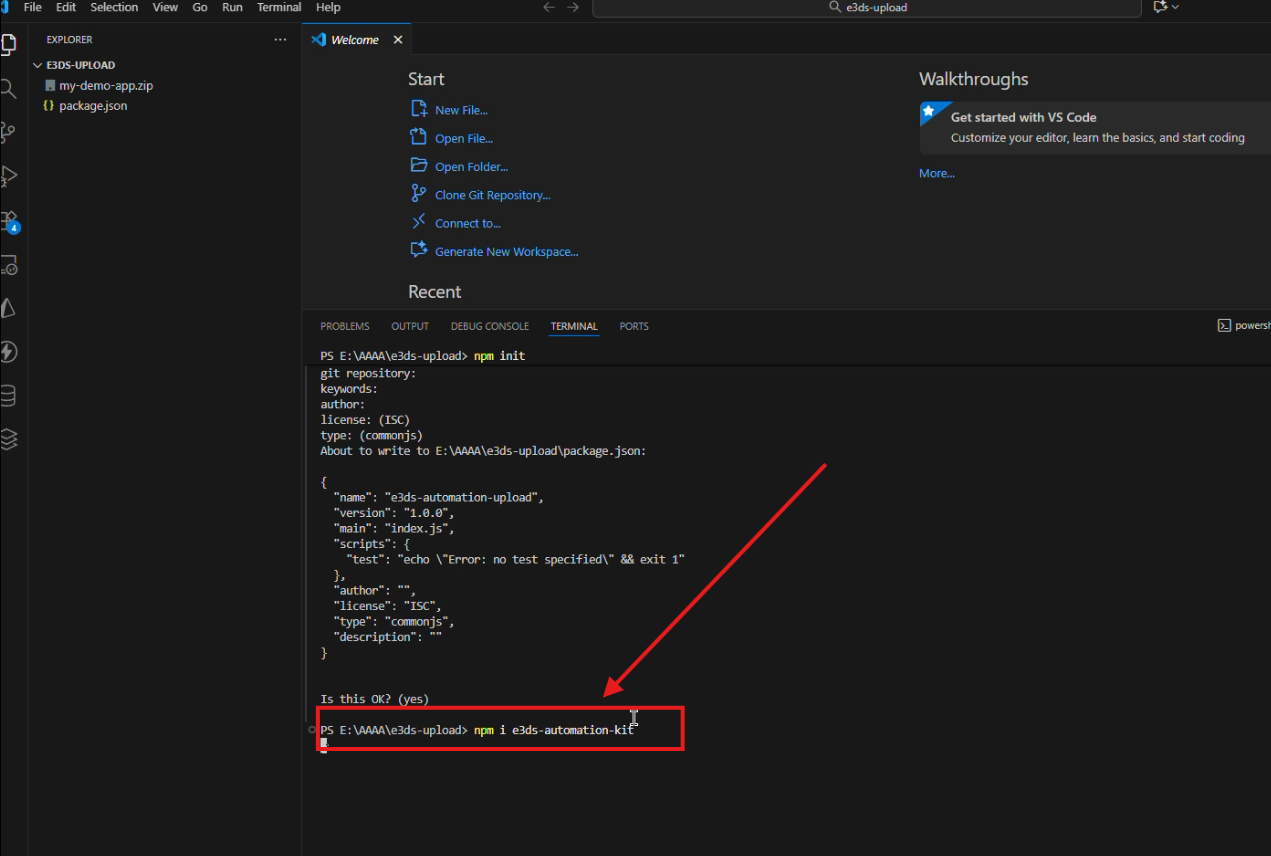
Step 1. Install the Package
You can find the package here:
🔗 https://www.npmjs.com/package/e3ds-automation-kit
Run the following command in your terminal:
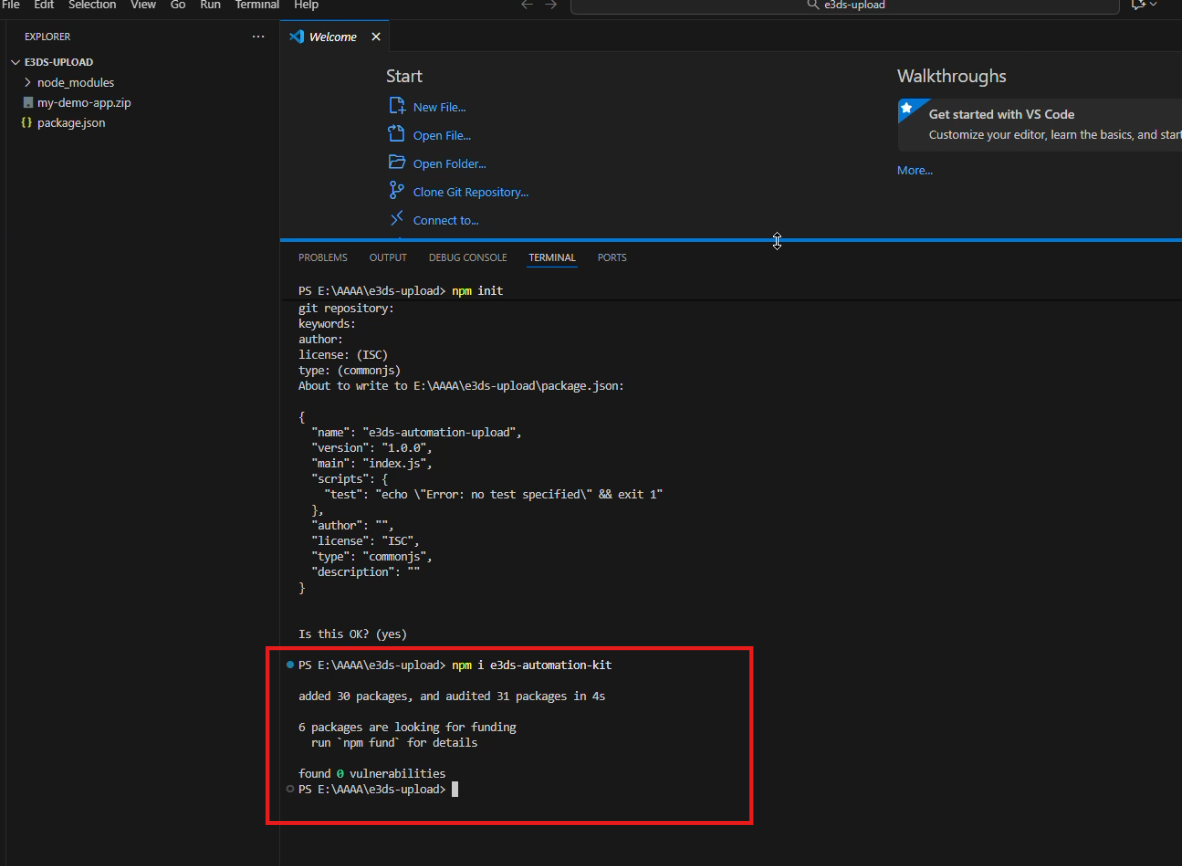
npm install e3ds-automation-kit
After successful installation, you’ll see confirmation messages in your terminal.
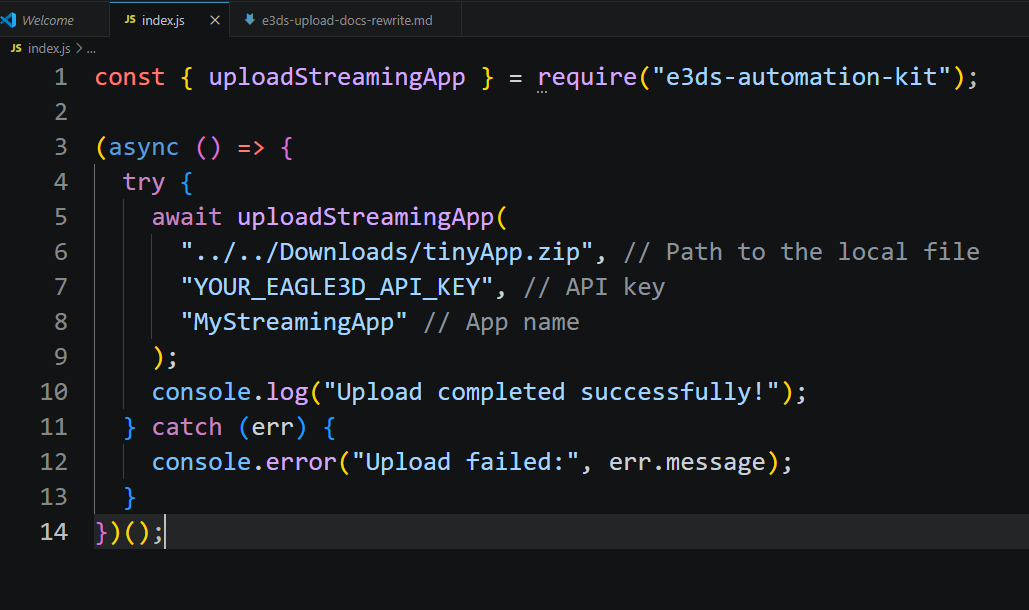
Step 2. Copy & Paste the Example Code
Create a new JavaScript file (for example, index.js) and paste the following code:
const { uploadStreamingApp } = require("e3ds-automation-kit");

(async () => {
  try {
    await uploadStreamingApp(
      "../../Downloads/tinyApp.zip", // Path to the local file
      "YOUR_EAGLE3D_API_KEY", // API key
      "MyStreamingApp" // App name
    );
    console.log("Upload completed successfully!");
  } catch (err) {
    console.error("Upload failed:", err.message);
  }
})();
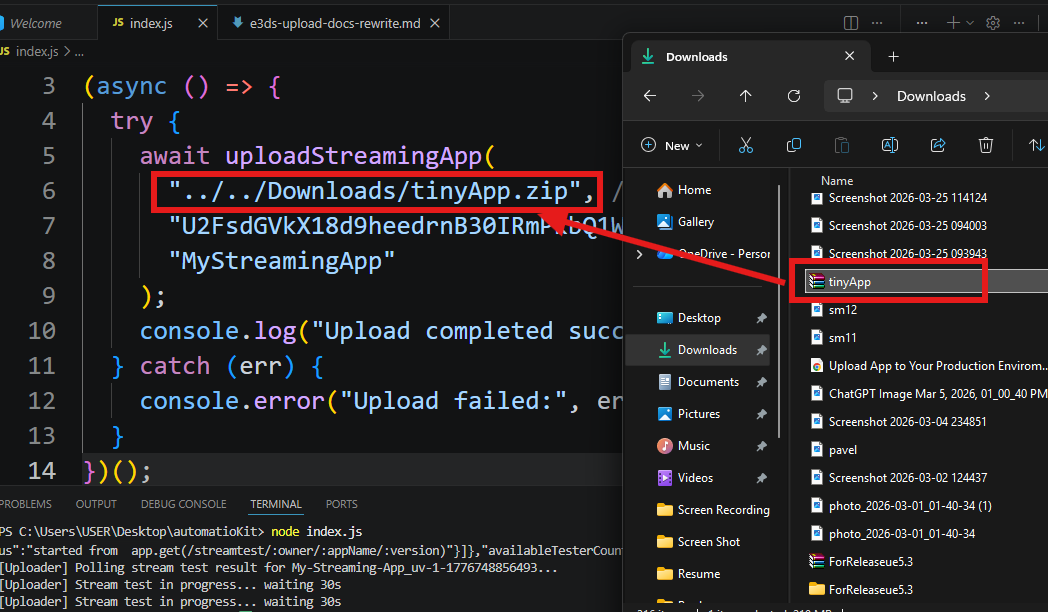
Step 3. Provide the Path to Your .zip File
Update the file path to point to your packaged .zip file, not the project folder, but the actual .zip file.
.zip File
Example Setup
Below is an example setup for reference:
-
.zip file:
C:/Users/USER/Downloads/tinyApp.zip -
Script location:
C:/Users/USER/Desktop/automatioKit/index.js
Valid Path Formats
Use the table below to determine the correct path format based on your setup:
|
Type |
Example |
Works? |
Notes |
|---|---|---|---|
|
Relative Path |
|
✅ |
Works on all systems if relative to where you run |
|
Windows (Forward Slash) |
|
✅ |
Recommended for Windows |
|
Windows (Escaped Backslash) |
|
✅ |
Works on Windows |
|
Mac/Linux Path |
|
✅ |
For macOS/Linux systems |
Invalid Path Examples
Avoid the following incorrect path formats:
|
Example |
Issue |
Why It Fails |
|---|---|---|
|
|
Backslashes not escaped |
JavaScript treats |
|
|
Folder instead of file |
Must point to |
|
|
File not found |
File not in same directory as script |
|
|
Wrong file name |
Case or name mismatch |
Step 4. Add Your API Key
You’ll need a valid E3DS API Key to authenticate your upload.
To find your API key, visit:
🔗 https://docs.eagle3dstreaming.com/wiki/api-key
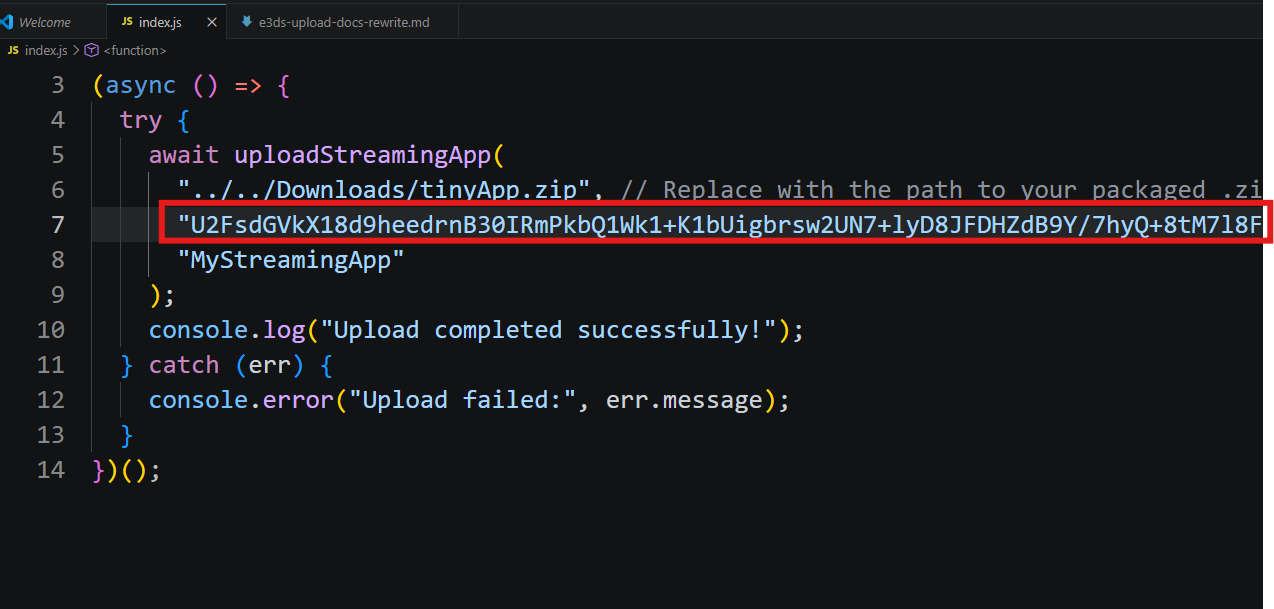
Tip: For security, store your API key in an environment variable (e.g., .env file) rather than hardcoding it in the script.
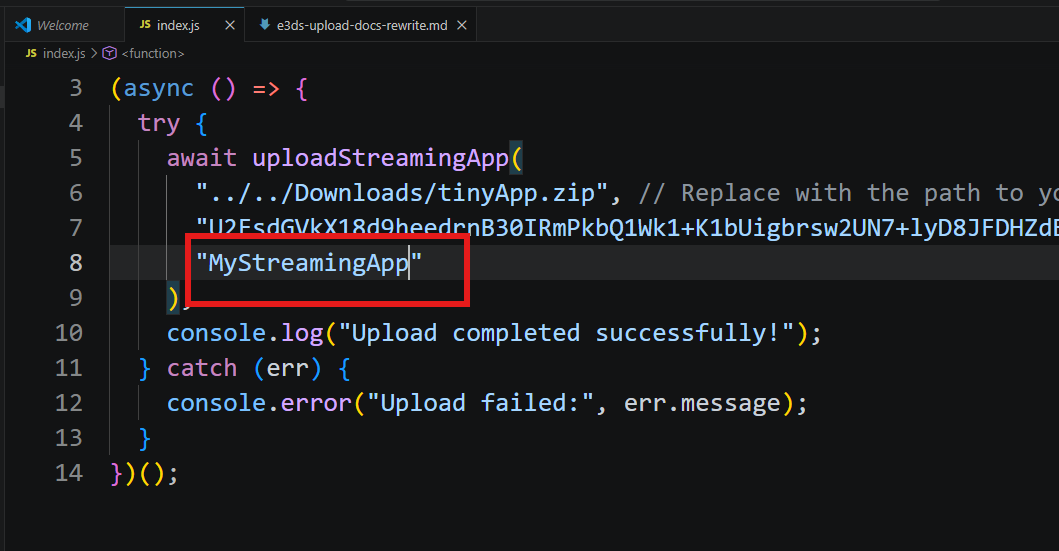
Step 5. Set the App Name
Choose a name for your app. This name will appear in your Eagle 3D Streaming Control Panel once uploaded.
⚠️ Important:
The app name should not contain any spaces or special characters. Use only letters (A–Z, a–z), numbers (0–9), or underscores (_).
Correct Example
"MyStreamingApp"
"My_App_01"
"app123"
Incorrect Examples
"My Streaming App"   // contains spaces
"My-App"             // contains special character (-)
"My@App"             // contains special character (@)
"My.App"             // contains special character (.)
Step 6. Run the Script
After saving the file, execute the script using Node.js.
If your file is named index.js, the command is:
node index.js
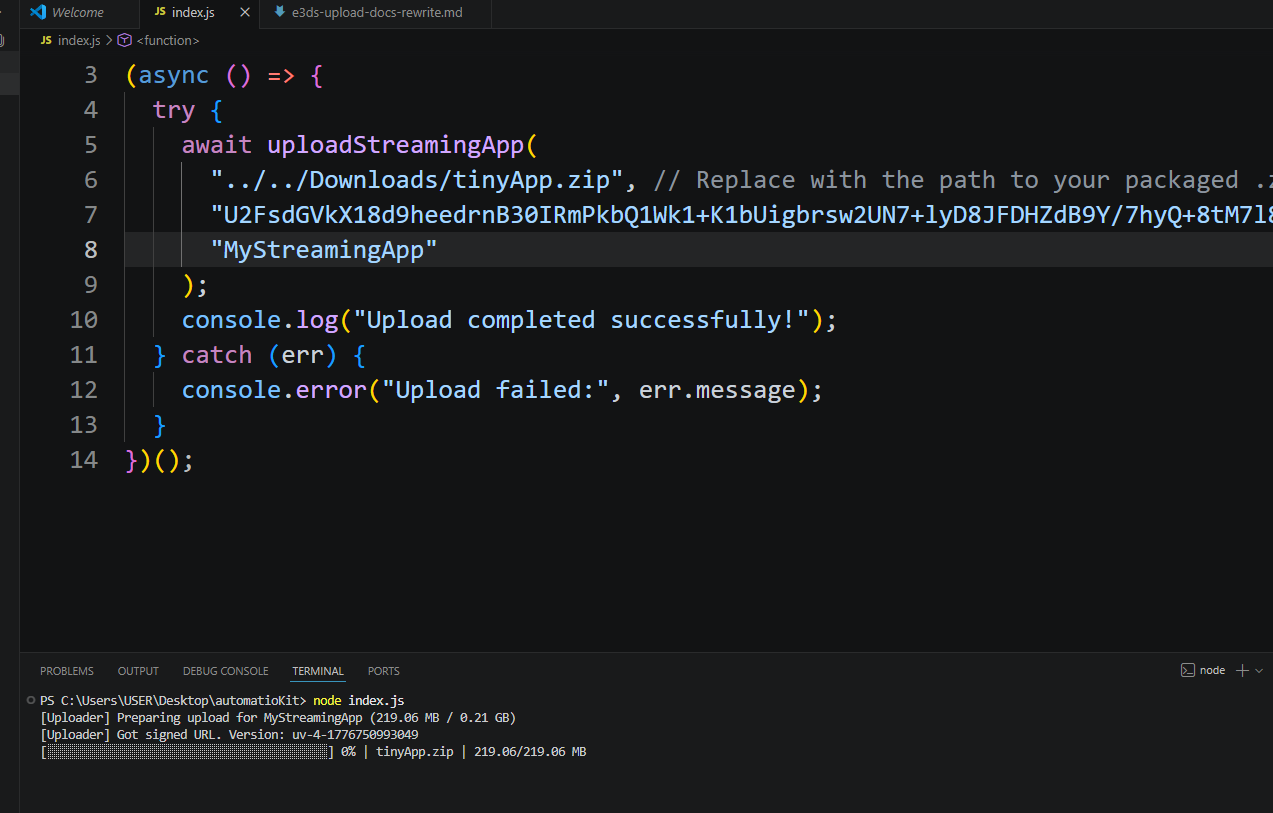
The automation kit will:
-
Validate the file path
-
Request a signed upload URL
-
Upload the build with progress tracking
-
Poll until the stream test completes
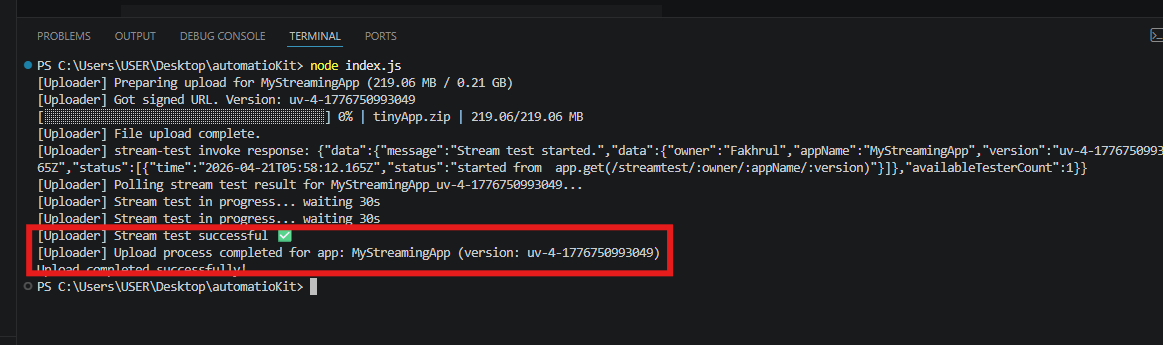
Step 7. Upload Successful
Once the upload is complete and validated, you’ll see a success message:
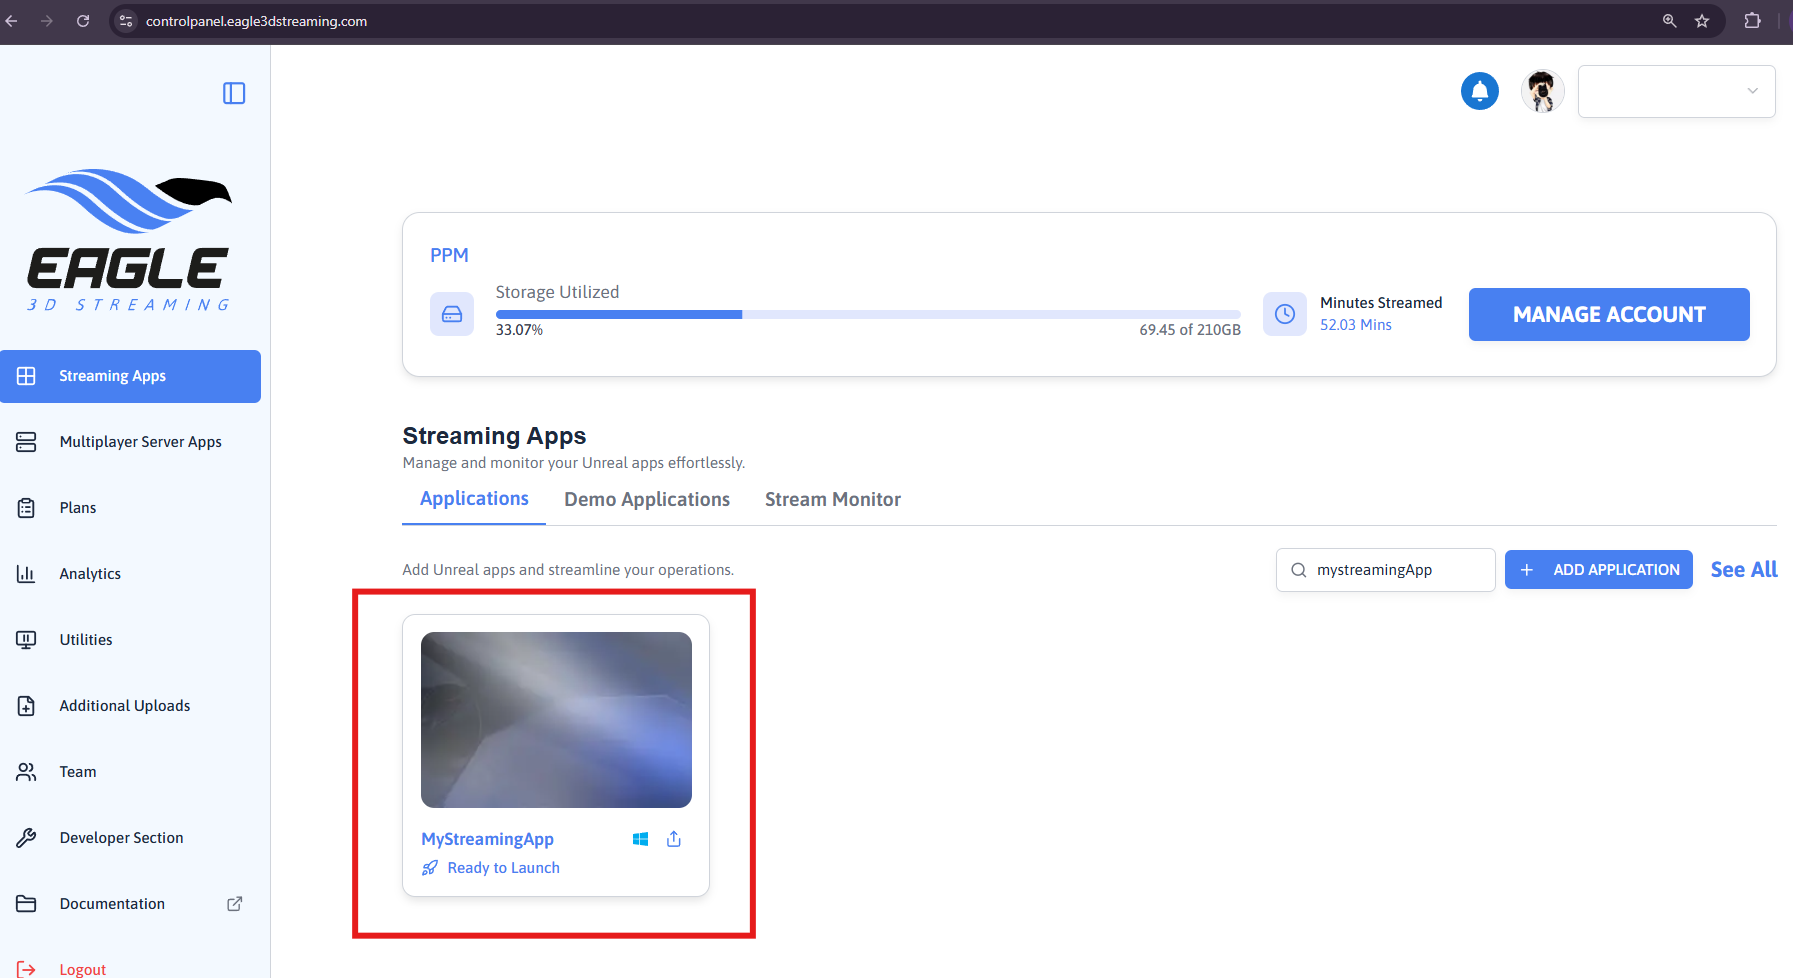
Step 8. Verify in Control Panel
Go to your E3DS Control Panel to confirm that your Unreal app has been uploaded and registered correctly.
Video Tutorial
Additional Notes
-
The tool automatically handles retries, progress bars, and upload verification.
-
The polling process for stream testing lasts up to 10 minutes.
-
Logging output is displayed in real time in your terminal.
Best Practices
|
Recommendation |
Description |
|---|---|
|
Use a valid API key |
Ensure your API key has proper upload permissions. |
|
Secure credentials |
Use environment variables instead of embedding secrets in code. |
|
Version control |
Keep consistent app names and use semantic versioning. |
|
Avoid interruptions |
Don’t terminate the process while upload or stream test is running. |
|
Monitor tests |
Wait until stream test validation is done before triggering new uploads. |
Troubleshooting
|
Issue |
Likely Cause |
Fix |
|---|---|---|
|
|
Invalid or incorrect API key |
Verify your API key from the E3DS Control Panel |
|
|
File does not exist at the specified path |
Confirm the |
|
Path points to a folder (e.g., |
Folder used instead of |
Provide the full path to the |
|
Relative path not working (e.g., |
File not in the expected directory |
Ensure the |
|
Wrong relative path (e.g., |
Incorrect directory level |
Adjust the path based on your script location (e.g., |
|
Windows path with single backslash (e.g., |
JavaScript treats |
Use forward slashes ( |
|
Upload fails or app name not accepted |
App name contains spaces or special characters |
Use only letters, numbers, or underscores (e.g., |
|
|
Package not installed |
Run |
|
|
Script file not found |
Ensure |
|
No output shown |
Script not executed properly |
Ensure Node.js is installed ( |
|
Upload retries continuously |
Network instability |
Check your internet connection (auto-retries up to 3 times) |
|
Stream test timed out |
Large build or slow network |
Wait a few minutes and check the control panel |
Need help?
If you need any assistance, feel free to reach out through any of the following channels:
🛠️ Support Portal: Contact Our Support Team
💬 Discord Community (Faster Support): Join Our Discord Community
📧 Email Support: support@eagle3dstreaming.com
Follow us on: