The E3DS Streaming Agent (EL) allows you to stream your Unreal Engine applications directly from your own hardware.
Prerequisites
-
You must have an account on Eagle 3D Streaming. Follow the official documentation to create an account.
-
Download the EL (i.e. the zip file) to your C: Drive. Click here to Download the EL.
Note: If the primary download link does not work then download from here
-
Make sure there is enough disk space on your C drive as the App will be stored in C:\e3ds_streaming_apps folder
To determine the needed space for the App, follow this rule:
The Required space = zipped App size + extracted App size + the biggest available extracted App size.
Machine requirements
-
A powerful machine/ VM with a GPU is required with Windows OS

-
A good Internet Connection.
All GPUs are supported but some Apps may Not Stream from a machine with an RTX 2080.
Installation Instructions
In your Computer :
Step 1. Go to “Control Panel\System and Security\System”
Step 2. Click on “Advanced system settings“
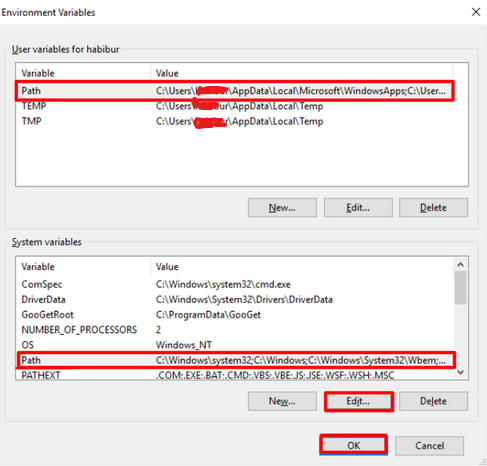
Step 3. Click on “Environment Variables“
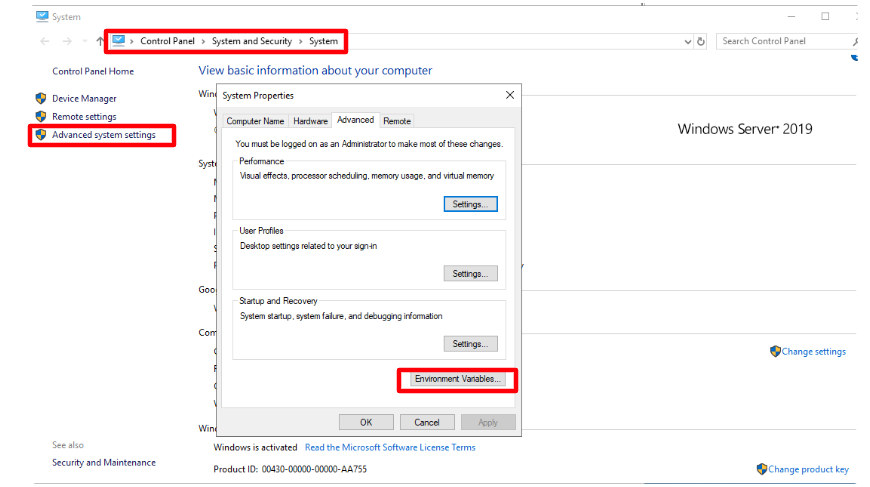
Step 4. Select each path and click “Edit”. (See image below).
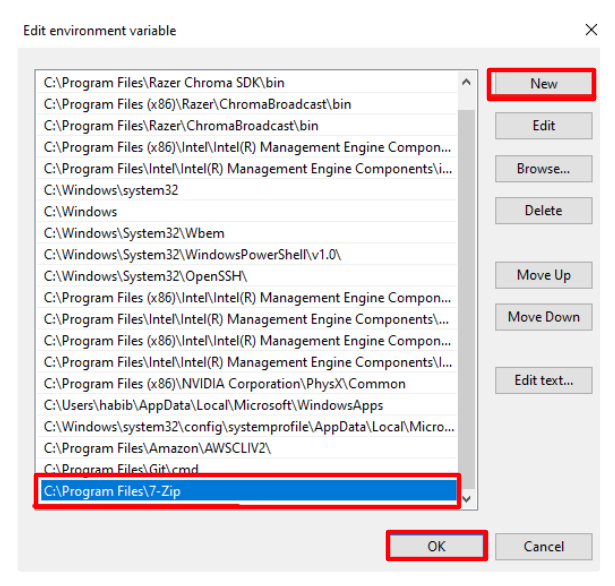
Step 5. Click ‘'New’' (Image 3)
Step 6. Add a new entry “C:\Program Files\7-Zip'' (i.e. installation folder where the 7-zip software is installed).
Step 7. Click OK in all open Control Panel windows to save the changes.
Step 8. Restart the instance.
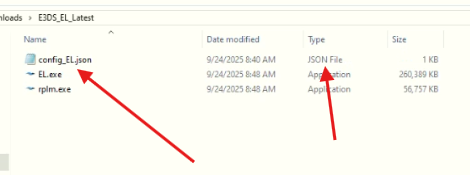
Step 9. Go to C: Drive on your Computer to the EL.zip. (previously downloaded from the Control Panel to the C: Drive).
Step 10. Extract the EL.zip folder.

Step 11. Double-click the EL.exe file. This will create a config_EL.json file. Once the file is created, close the EL.exe application.
Step 12. Collect your apiKey ( follow this document : Getting API Key)
Step 13. Open the config_EL.json with Notepad (Image 6)
Step 14. Paste the apiKey in the config_EL.json file
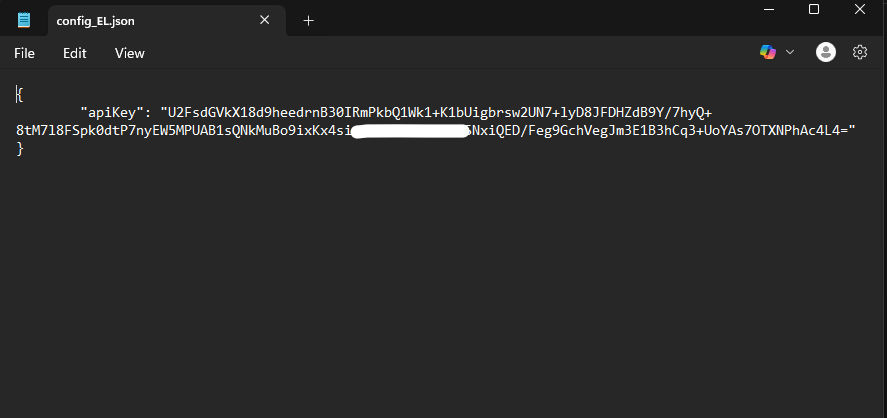
Step 15. Save the config_EL.json file.
Step 16. Double-click the EL.exe file.
Step 17. A terminal window will appear. Wait 1 to 2 minutes (i.e. the time to connect the machine to Eagle 3D’s system until the message “Ready to serve pixel streaming“ appears).
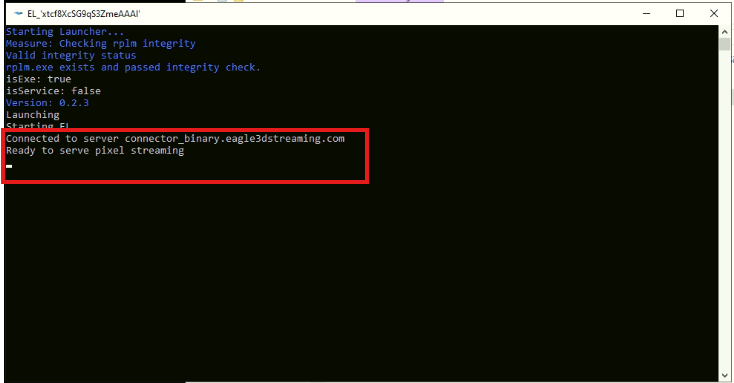
Now you have finished the E3DS Streaming Agent setup successfully!
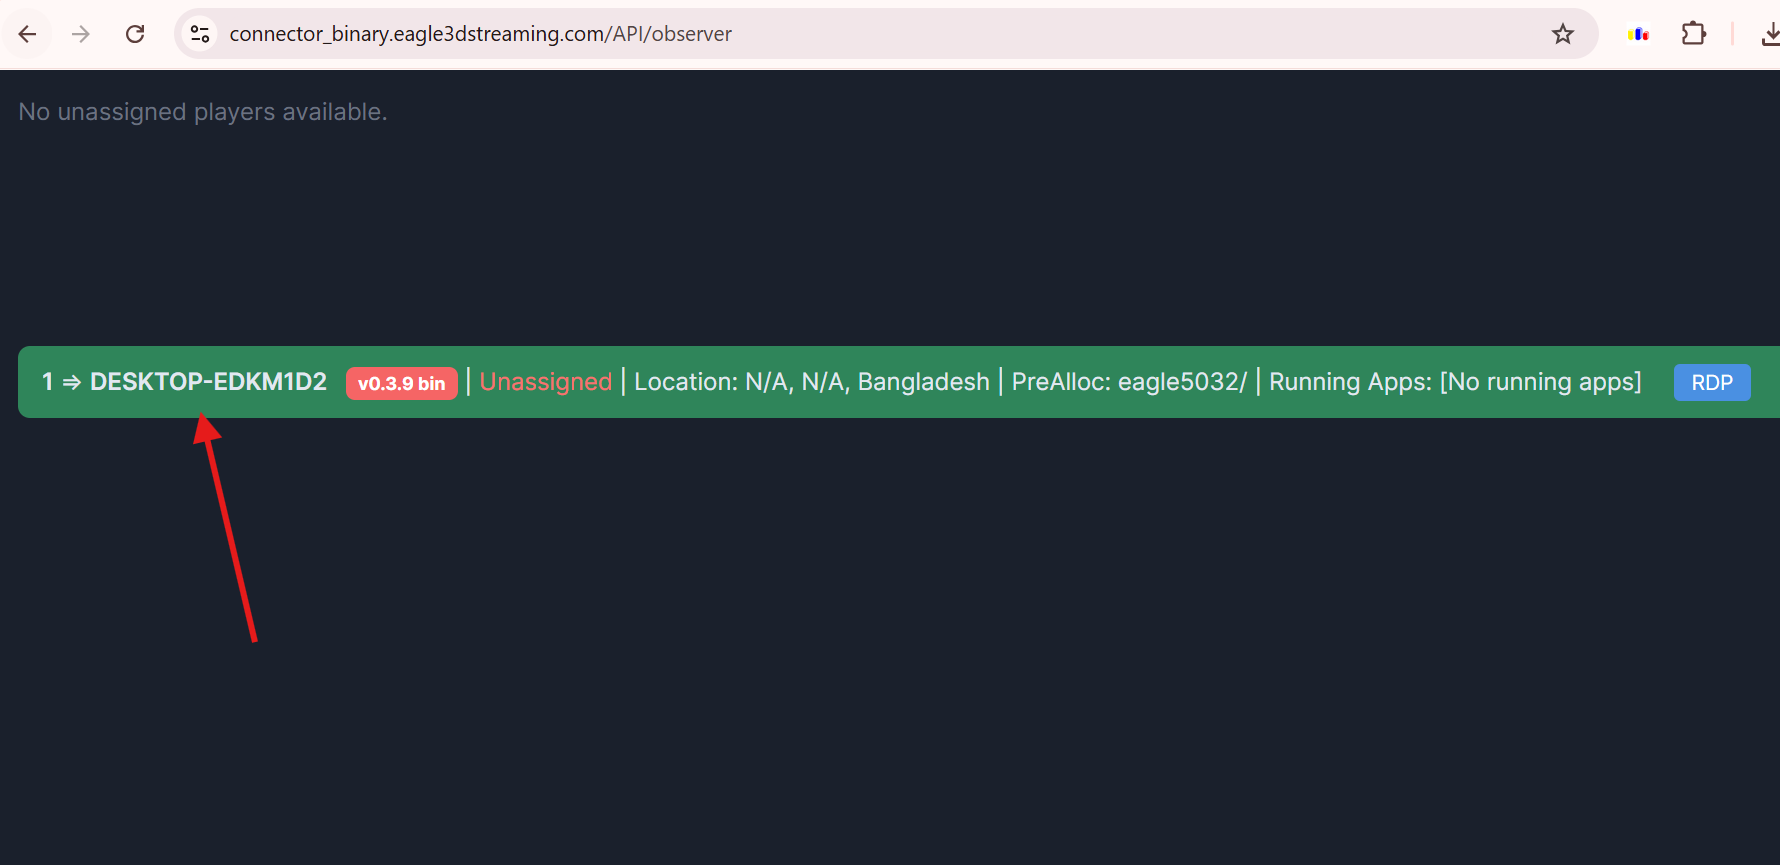
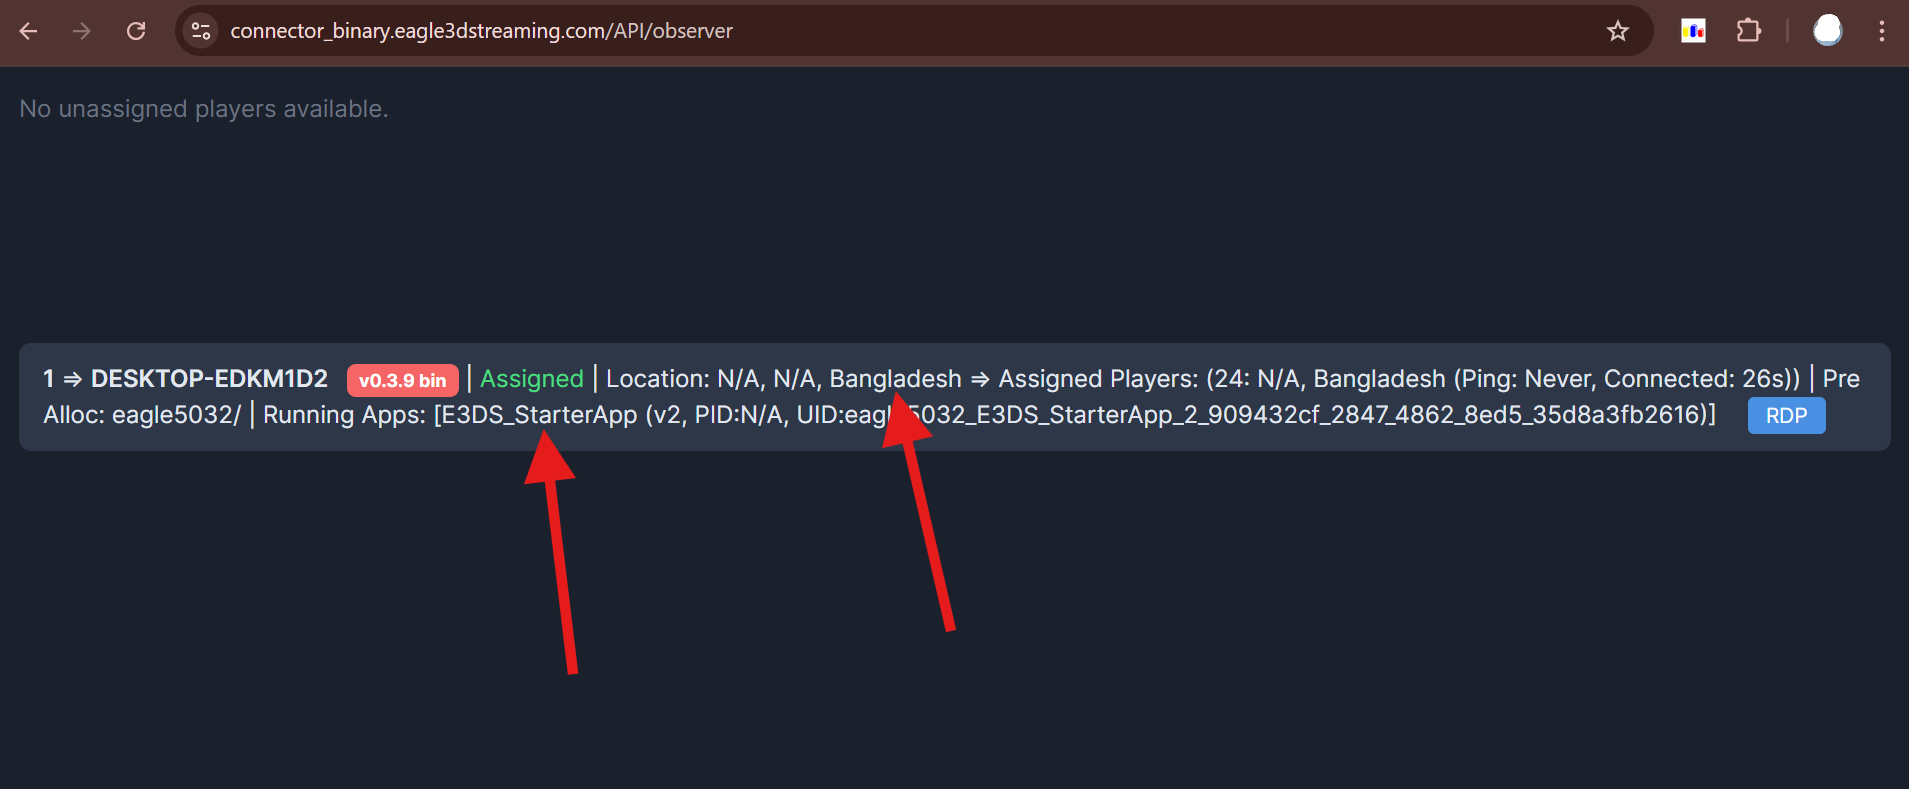
Step 18. Check the Observer to verify whether your streamer machine is connected to our system or not.
In the image below, you can see a machine named DESKTOP-EKDM1D2 connected to the Eagle system. This confirms that the machine is successfully connected and can now be used as a streamer machine.
Observer: https://connector_binary.eagle3dstreaming.com/API/observer
The machine where you set up EL.exe it will work as streamer machine. You can stream from any other device using your app streaming url. You just need to keep running the EL.exe in your streamer machine.
Step 19. Go to Control Panel
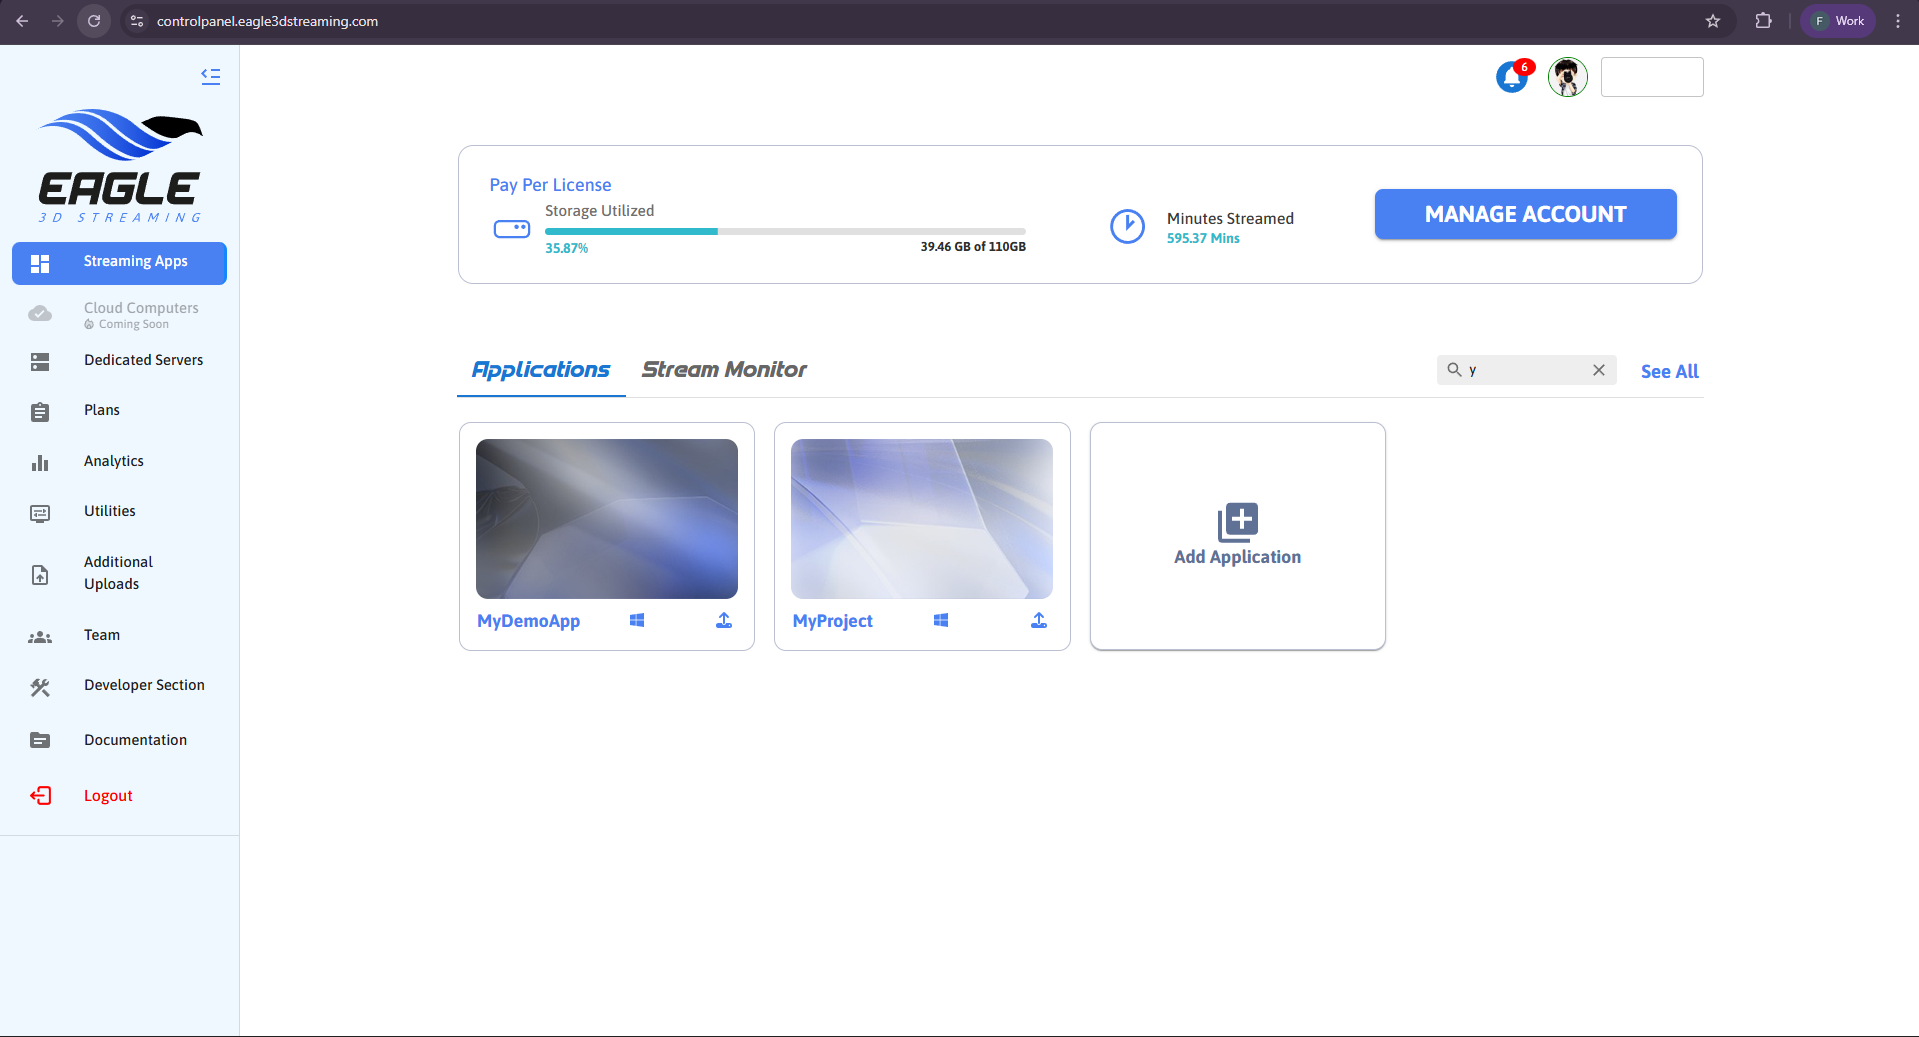
Step 20. Now upload and stream your app (Tutorial)
Step 21. Construct your Pixel Streaming URL using the following format:
https://connector_binary.eagle3dstreaming.com/v5/<username>/<appName>/<configName>
Example URL: https://connector_binary.eagle3dstreaming.com/v5/demo/myDemoApp/default
URL Parameters Explanation:
-
username: Your Eagle 3D Streaming account username.
-
appName: The name of the application you want to stream. This application must be uploaded to your Eagle 3D Streaming account.
-
configName: The configuration name created in the Eagle 3D Streaming control panel.
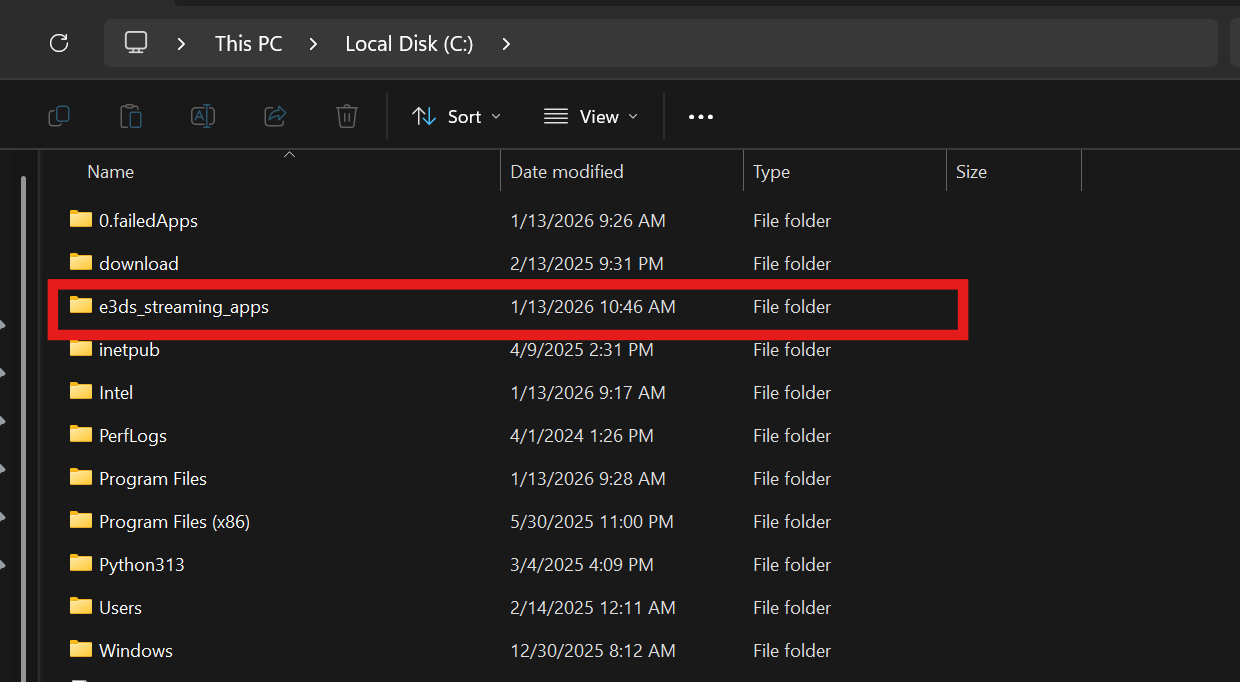
Step 22. When you access the streaming URL, the system automatically creates a folder named C:\e3ds_streaming_apps on your local drive. This folder stores the applications downloaded from Eagle’s system for streaming.
Step 23. After accessing the streaming URL, please check the Observer.
In the image below, you can see a client from Bangladesh running the E3DS_StarterApp on the connected streamer machine.
Observer: https://connector_binary.eagle3dstreaming.com/API/observer
Step 24. When you play the app for the first time, it will enter the Acquiring & Preparing Phase — downloading & extracting the app from Eagle’s system to your machine.
From the second run onward, the app will launch instantly.
If the App is running, then the setup was successful. If not, you will get errors. Please contact Support.
Notes
One running EL can serve only one user at a time. (1 CCU per License).
Please keep the terminal window open because closing it will stop the stream.
Don’t click inside the EL’s black window or any other window started by the stream. If clicked by mistake, just press the Esc button one time.
It is possible to start more than one “EL.exe“ in a single PC to run multiple stream from the same PC but this might cause poor streaming experience due to the lack of hardware resources like CPU, GPU or RAM.
Tip : On Sleep mode, the Stream stops. You need to make sure the EL is running non stop. You can change it from your computer’s settings.
Troubleshooting
|
Issue |
Possible Causes |
Solutions / Steps |
|---|---|---|
|
EL.exe does not start or closes immediately |
Missing Unreal Engine prerequisites, 7 Zip not installed or not added to PATH, EL.exe not running with administrator privileges |
|
|
"Ready to serve pixel streaming" does not appear |
Internet connectivity issue, incorrect API key, inactive license |
|
|
Application fails to download or remains in the Acquiring phase |
Insufficient disk space, folder permission issues, application not available in Control Panel, poor internet speed etc |
|
|
Application crashes after launch |
Unsupported GPU, outdated GPU driver, Unreal Engine compatibility issue, application exceeds hardware resources |
|
|
Black screen or no video in the stream |
EL.exe window closed, accidental input captured by the EL or Unreal window |
|
|
Poor streaming performance, high latency, or lag |
Unstable network connection, insufficient bandwidth, high latency, packet loss, limited hardware resources, outdated GPU drivers, multiple EL instances running, or application not optimized |
|
|
Streaming session stops unexpectedly |
Windows Sleep Mode enabled, EL.exe closed, session timeout configured |
|
Need help?
If you need any assistance, feel free to reach out through any of the following channels:
🛠️ Support Portal: Contact Our Support Team
💬 Discord Community (Faster Support): Join Our Discord Community
📧 Email Support: support@eagle3dstreaming.com
Follow us on: