Touch Components for Mobile Devices
Learn how to make your UE App able to receive inputs from mobile devices.
Overview
Achieving your mobile configuration will require making modifications to both your Control Panel Config and Unreal Engine (UE) Project.
Instructions
1. Modifications from the Control Panel Config
To receive Touch commands on Mobile devices, you should enable the Config Feature from the Control Panel.
If you are using:
Old Control Panel : Enable ‘Fake Mouse with Touches’ Config. Refer to this document.
New Control Panel : Enable ‘Fake Mouse With Touch’ Config. Refer to this document.
2. Modifications from the Unreal Engine (UE) Project
2.1. UE Project Setup
Follow the instructions below to setup your Project for both Mobile and Desktop.
Create a Cursor UMG
Create a Widget Blueprint.
Add to the Canvas with a small size as a cursor (example 20×20).
Set the image Alpha to Zero.
This will act as an invisible Cursor and it will be hidden behind the Browser Cursor during the Pixel Streaming.

Image 1. Create a Cursor UMG
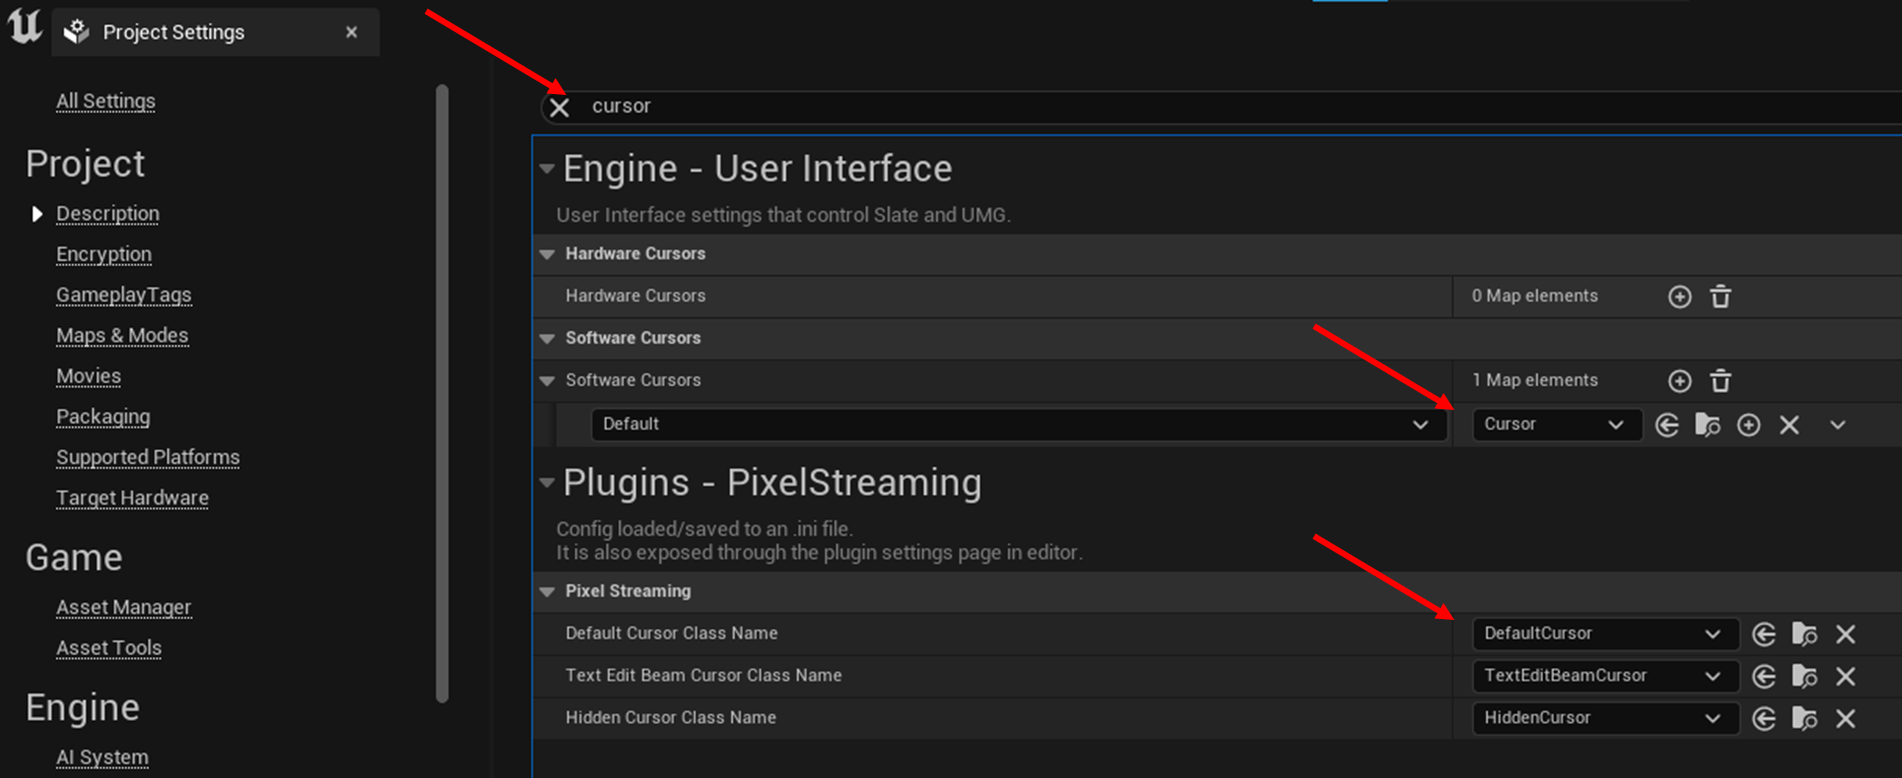
Set the created Cursor Widget under Software cursors
Navigate to: Project Settings >Engine>User Interface.
Set Pixel Streamer Default Cursor Class Name to ‘DefaultCursor’
Navigate to: Project Settings >Plugins>Pixel Streaming.

Image 2. Set a Pixel Streamer Default Cursor
Set the Show Mouse Cursor in Player Controller to TRUE
Open the Level Blueprint:
In the Unreal Editor, open the Level Blueprint where you want the cursor to be shown (or in a specific Blueprint as per your project requirements).
Add Get Player Controller Node:
In the Blueprint, right-click to add a node and search for Get Player Controller.
This node retrieves the Player Controller, allowing you to access its settings.
Add Set Show Mouse Cursor Node:
Drag from the output pin of the Get Player Controller node to create a new node.
Search for Set Show Mouse Cursor and add it.
This node enables you to toggle the visibility of the mouse cursor.
Set Show Mouse Cursor to True:
In the Set Show Mouse Cursor node, check the box next to Show Mouse Cursor to set it to True.
Connect the Nodes:
Connect the nodes as shown in the screenshot:
-Connect the Get Player Controller node to the Target input of the Set Show Mouse Cursor node.
Compile and Save:
Compile and save the Blueprint to apply the changes.
This setup will ensure that the mouse cursor is visible during gameplay.

Image 3. Create a Cursor UMG : Player Controller to TRUE
2.2. Touch Interface Setup (Optional)
This allows you to enable Joystick Controls in your App for Mobile devices.
Follow the steps below:
Create a new Touch Interface (or copy an existing one from the Engine’s default assets.)
To create a new one, go to the Content Browser, right-click, and select User Interface > Touch Interface.
Here’s a more detailed breakdown on creating a new Touch Interface in Unreal Engine:
Open the Content Browser:
In Unreal Engine, go to the Content Browser panel. This is usually located at the bottom of the screen. If you don’t see it, you can open it by going to Window > Content Browser.
Create a New Asset:
In the Content Browser, right-click in an empty area within a folder where you want to create the new asset.
Select User Interface > Touch Interface:
In the menu that appears after right-clicking, hover over User Interface to see more options.
From the submenu, select Touch Interface. This will create a new Touch Interface asset that you can configure for your mobile controls.
Name the Asset:
Give your new Touch Interface asset a descriptive name, like
MobileTouchInterface, to make it easy to recognize in your project.
Open and Configure the Asset:
Double-click the new Touch Interface asset to open it.
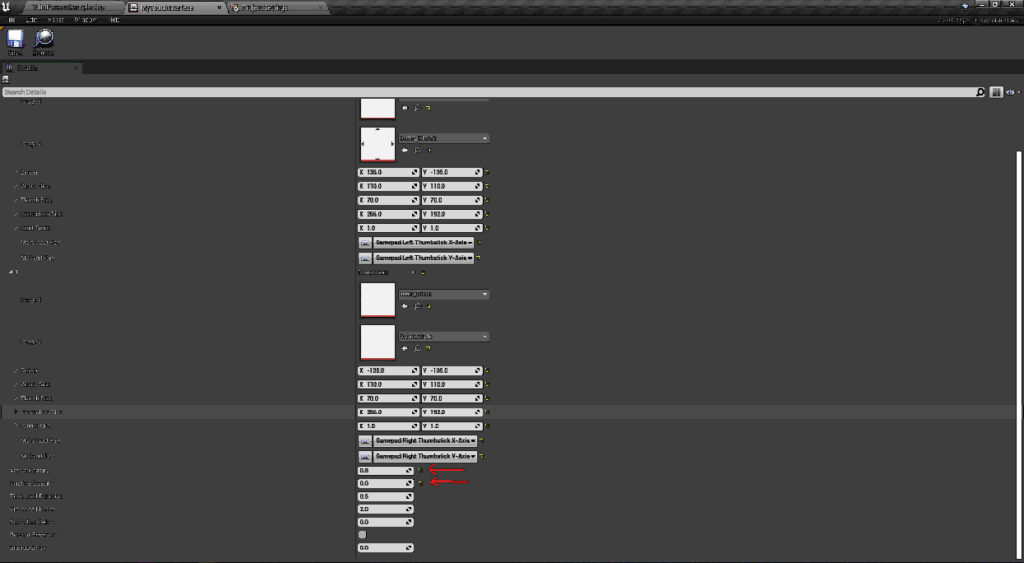
You can now set parameters like Active Opacity (to make controls visible on mobile) and Inactive Opacity (to hide controls when inactive or on non-touch devices).
In Touch Interface, configure the opacity values:
Set Active Opacity to
0.8to make it visible on mobile.Set Inactive Opacity to
0to hide it when inactive or on non-touch platforms.

Image 4. Touch Interface Setup
Assign the Touch Interface:
Go to Project Settings.
Navigate to Engine > Input.
Under Default Touch Interface, set this newly created Touch Interface asset.
Enable Always Show Touch Interface (Optional for testing):
In Project Settings > Input, enable Always Show Touch Interface under the Mobile section. This will ensure the touch interface appears when running on a mobile device.

Image 5. Enable Always Show Touch Interface
Set the Parameters as follow
Navigate to : Project Settings> Engine > Input > Enter the Parameters values below.

Image 6. Set these Parameters
The source code of the steps showed in this tutorial is here.
Need help? Contact Support
Submit a new request at E3DS support portal.
Requests sent on weekends will not be addressed until the following business day.
