
Host a Multiplayer Server App using E3DS infrastructure
Steps to host a Multiplayer Server App in the Old Control Panel.
Prerequisites
You must have a functional ‘Multiplayer Server App’ and an associated app configured with its Multiplayer Server: a 'Streaming App'.
We are expecting that you have successfully Built, Packaged, and tested your Multiplayer Server Locally and that your client App was able to connect with that Packaged Server.
We are expecting you are Uploading a Server App that is working 100% correctly on your Local environment.
For help Packaging the Multiplayer Server, see these URLs:
https://docs.unrealengine.com/5.1/en-US/setting-up-dedicated-servers-in-unreal-engine/
Instructions
Step 1. Archive creation
In the Root folder, select all the files and folders.
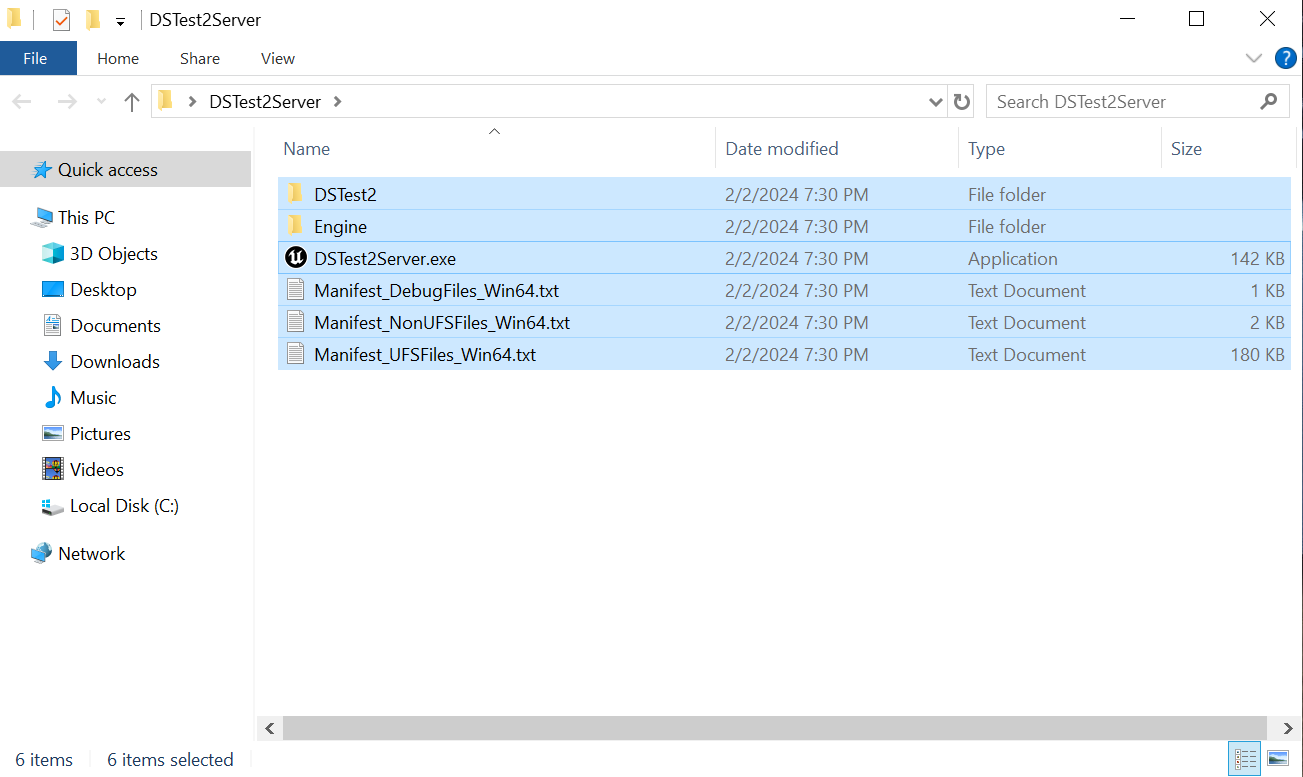
Image 1. Root Folder: Select all files and folders
Right-click the selected files and choose ‘Send to’ > ‘Compressed (zipped) folder’.
The Supported Archive Formats are: RAR, ZIP, 7z.
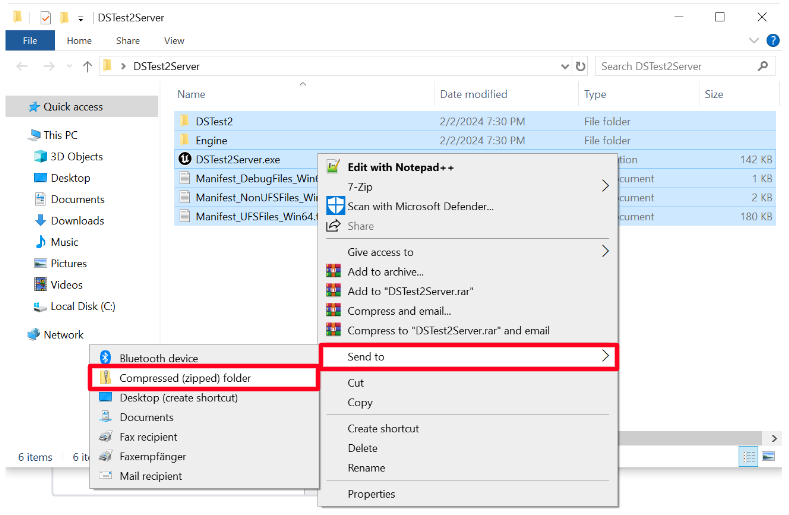
Image 2. Send to Compressed folder
Step 2. Multiplayer Server App upload
Login to the Control Panel.
Navigate to ‘Multiplayer Server Apps'.
Under ‘Details’, click ‘Add’


Image 3. Multiplayer Server Apps: Click Add
Enter the app name.
The Multiplayer Server App name in the Control Panel must match the executable file name (.exe). If the names do not match, the app may encounter issues and get stuck on the loading screen when attempting to stream.
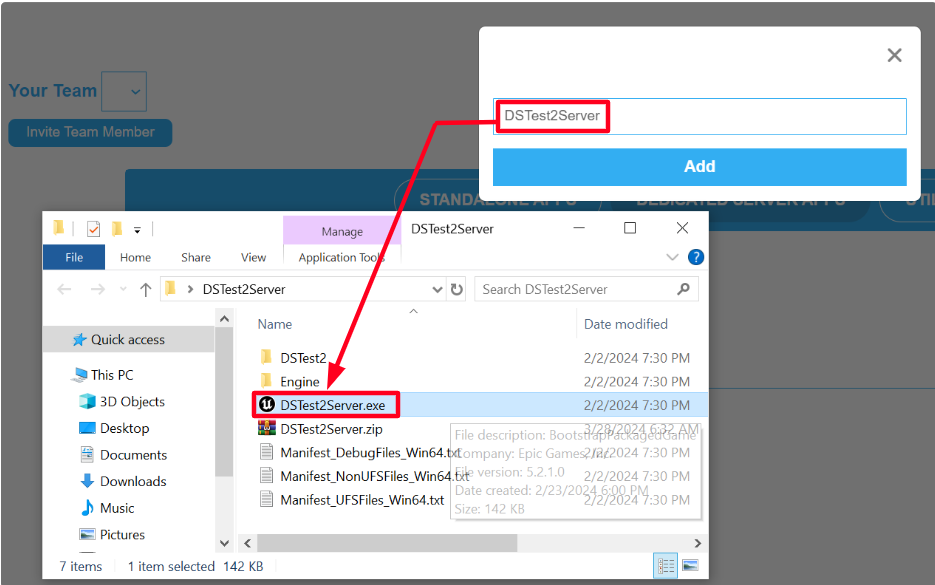
Image 4. App name matching the exe file name
Click ‘Add’.
After confirming the app name matches the executable file name, click Add to open the Uploader page in a new tab.
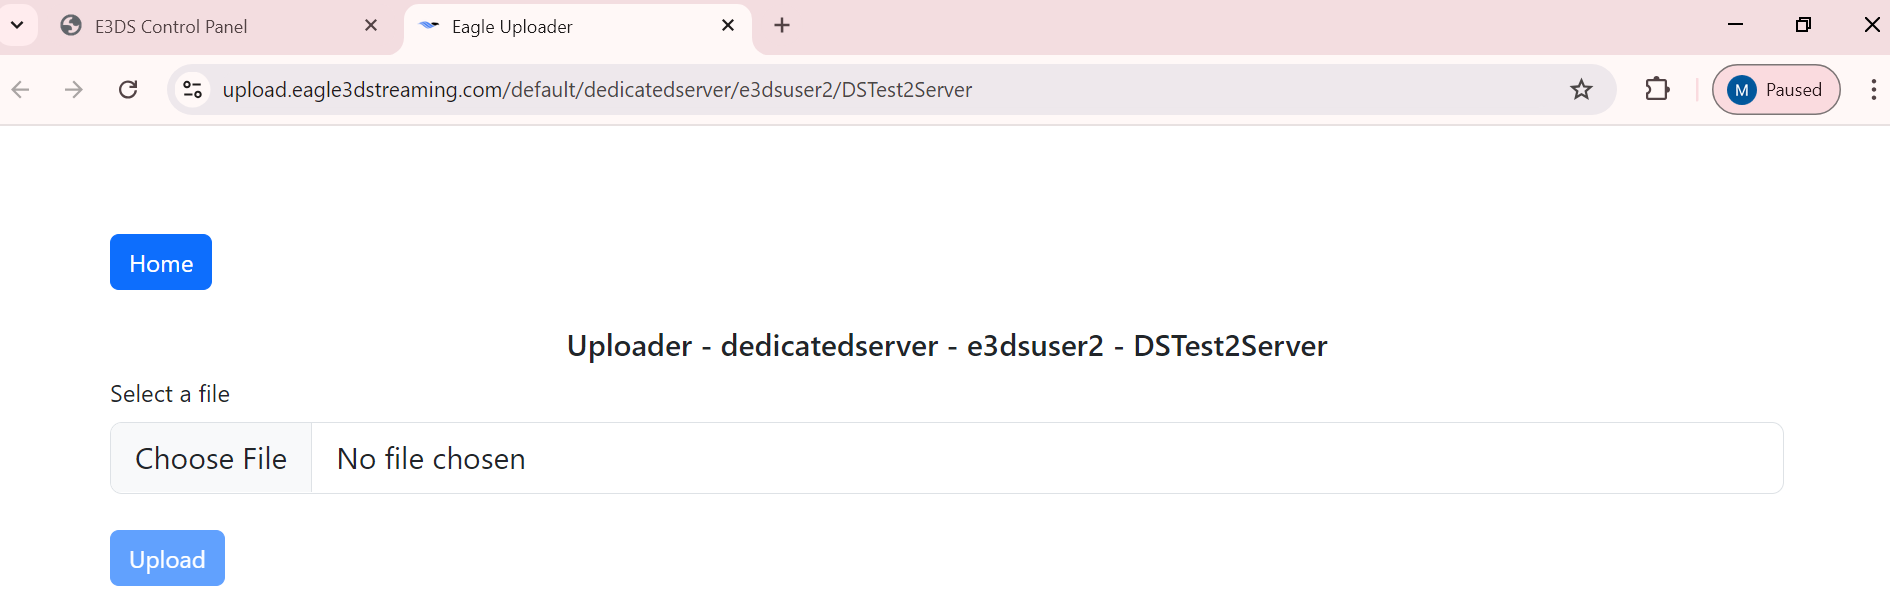
Image 5. Uploader page
Click 'Choose File'.
Browse your files to locate and open the archive created in Step1.
Click ‘Upload’.
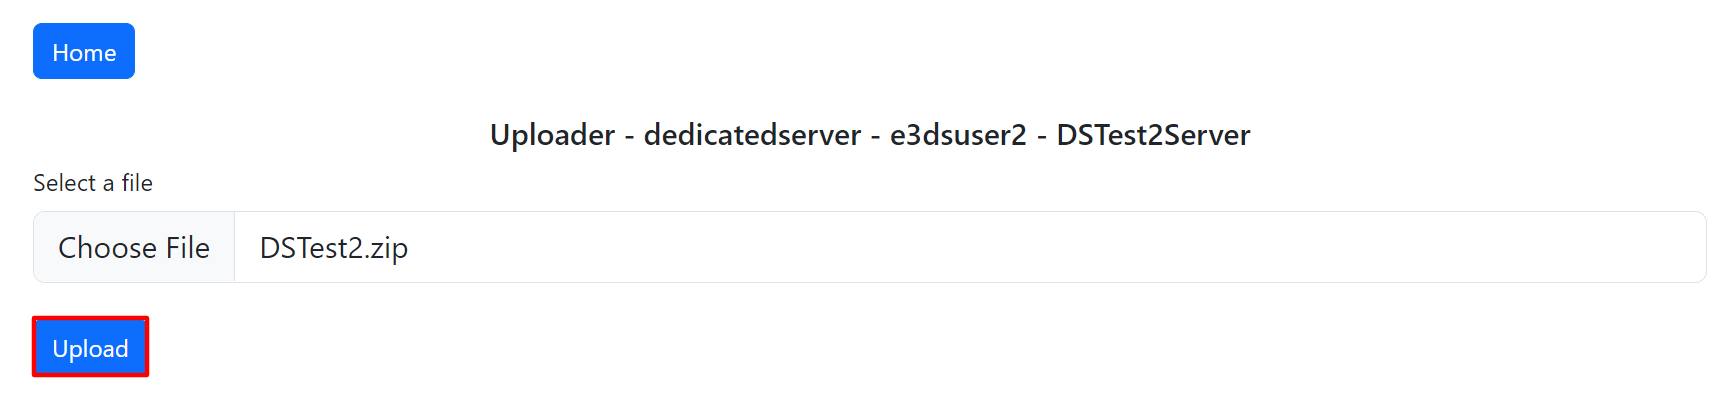
Image 6. Click Upload
Refresh the Control Panel to see the uploaded App in ‘Multiplayer Server Apps’ under 'Details'.
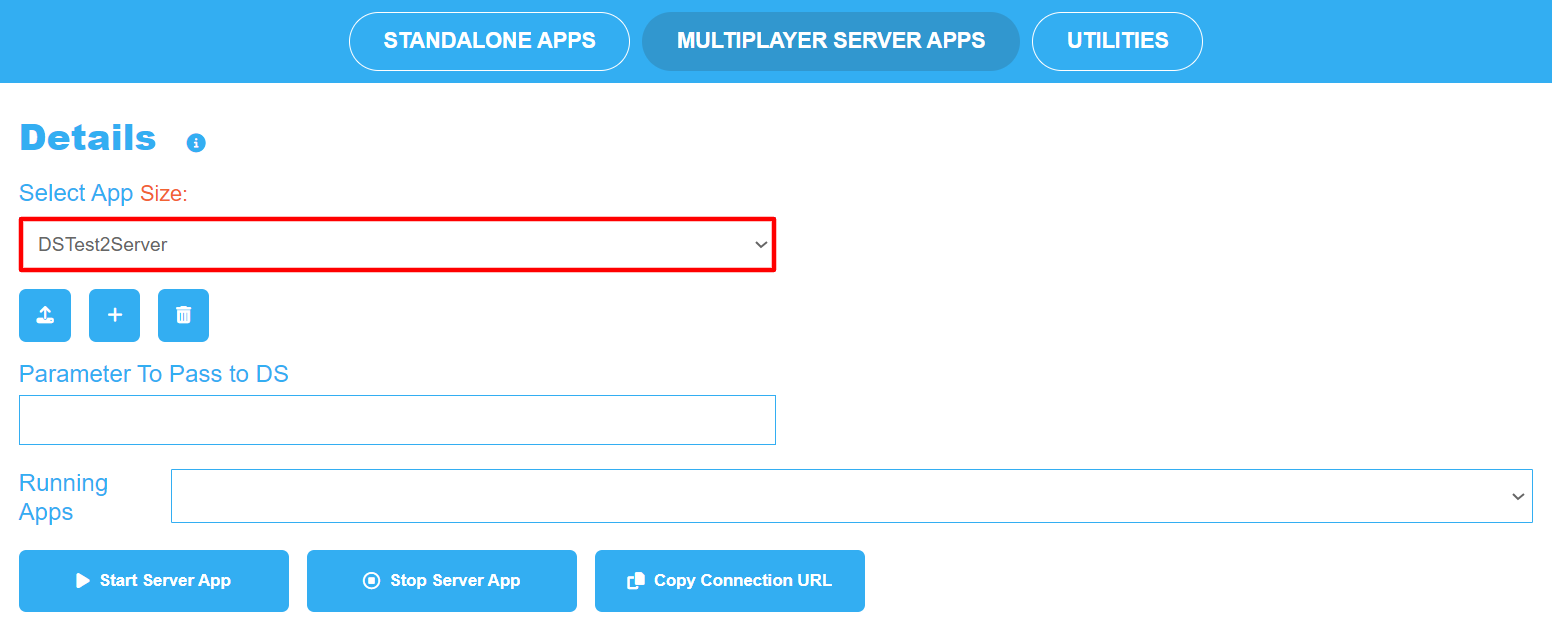
Image 7. Details: Multiplayer Server App
Step 3. Server App Initiation
Click ‘Start Server App’.
This action initiates the Multiplayer Server.
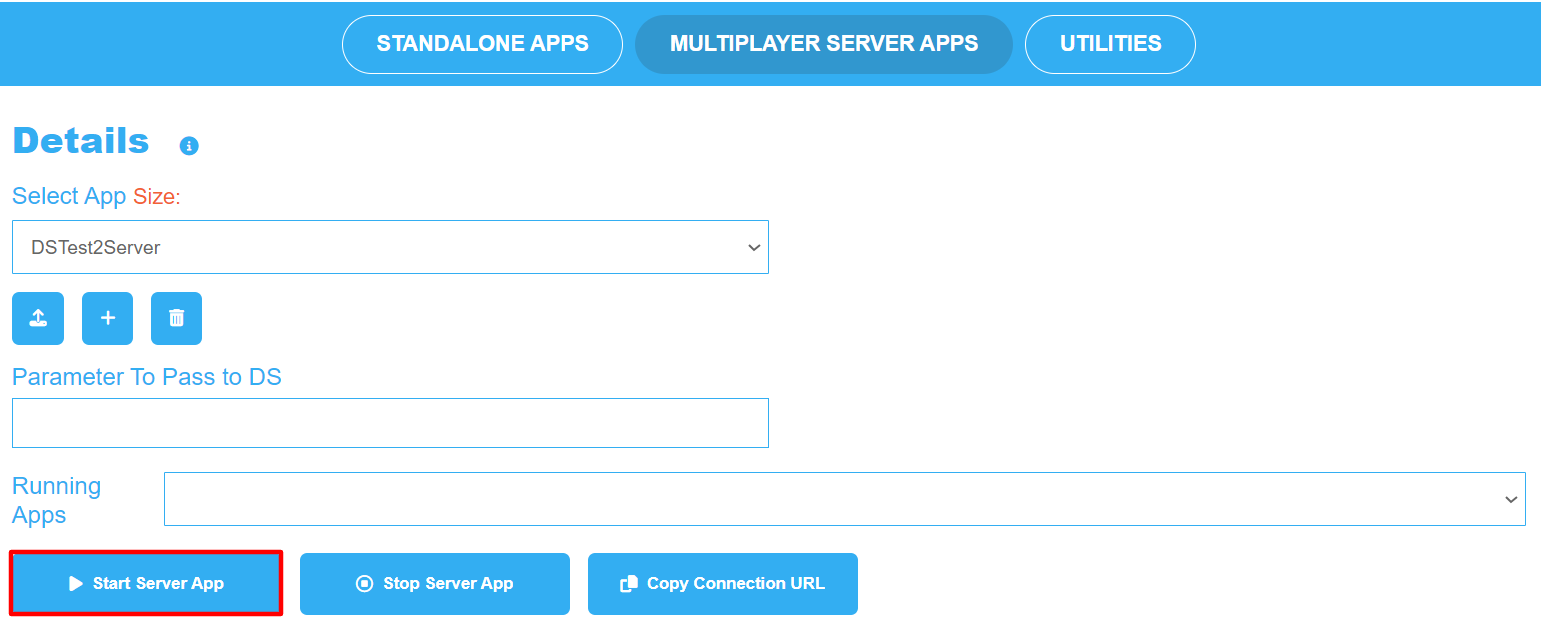
Image 8. Click Start Server App
Refresh the Control Panel.
The app will be listed under 'Running Apps'.
If the app does not appear in 'Running Apps', refresh the page or wait a few moments.
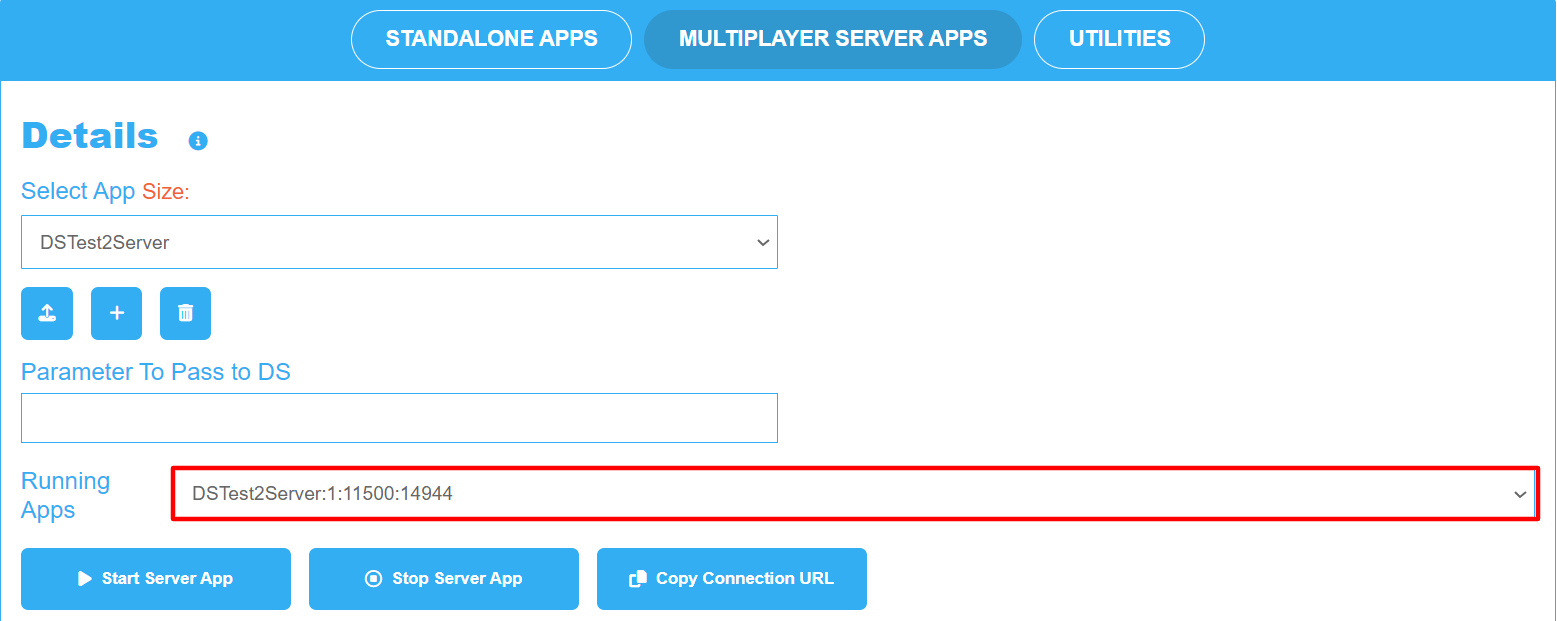
Image 9. Running Apps: Multiplayer Server app
Step 4. Launching the Streaming App
Follow the steps below:
Navigate to ‘Standalone Apps’.
Upload the Streaming App (associated to your Server app and configured with its Multiplayer Server).
Select the Streaming App in ‘Step 1: Select an App’.
Select a Config in ‘Step 2: Select a Config’.
Click ‘Play App’ in ‘Step 3: Generate URLs'.
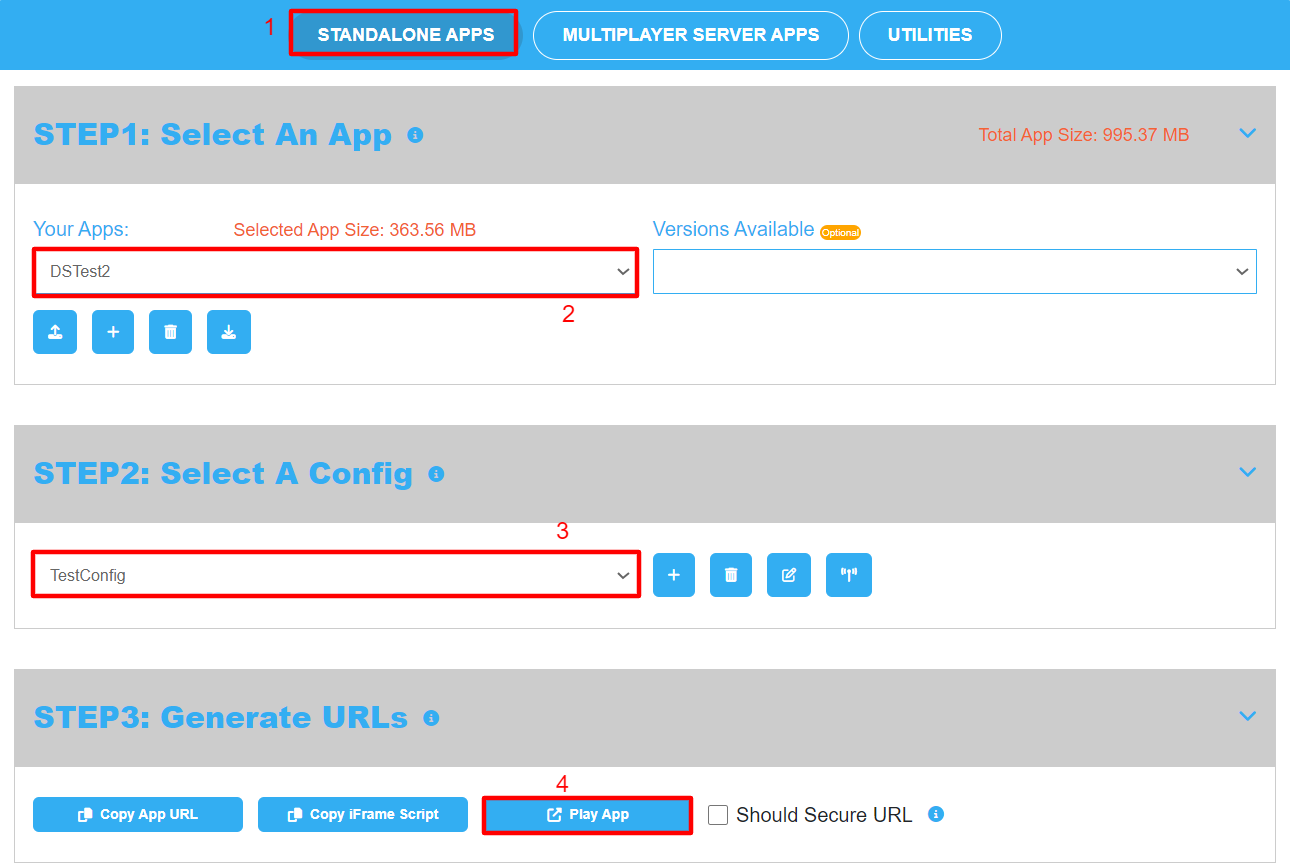
Image 10. Standalone Apps: Play App
Step 5. Stopping the Server
To stop the Multiplayer Server, click ‘Stop Server App’.
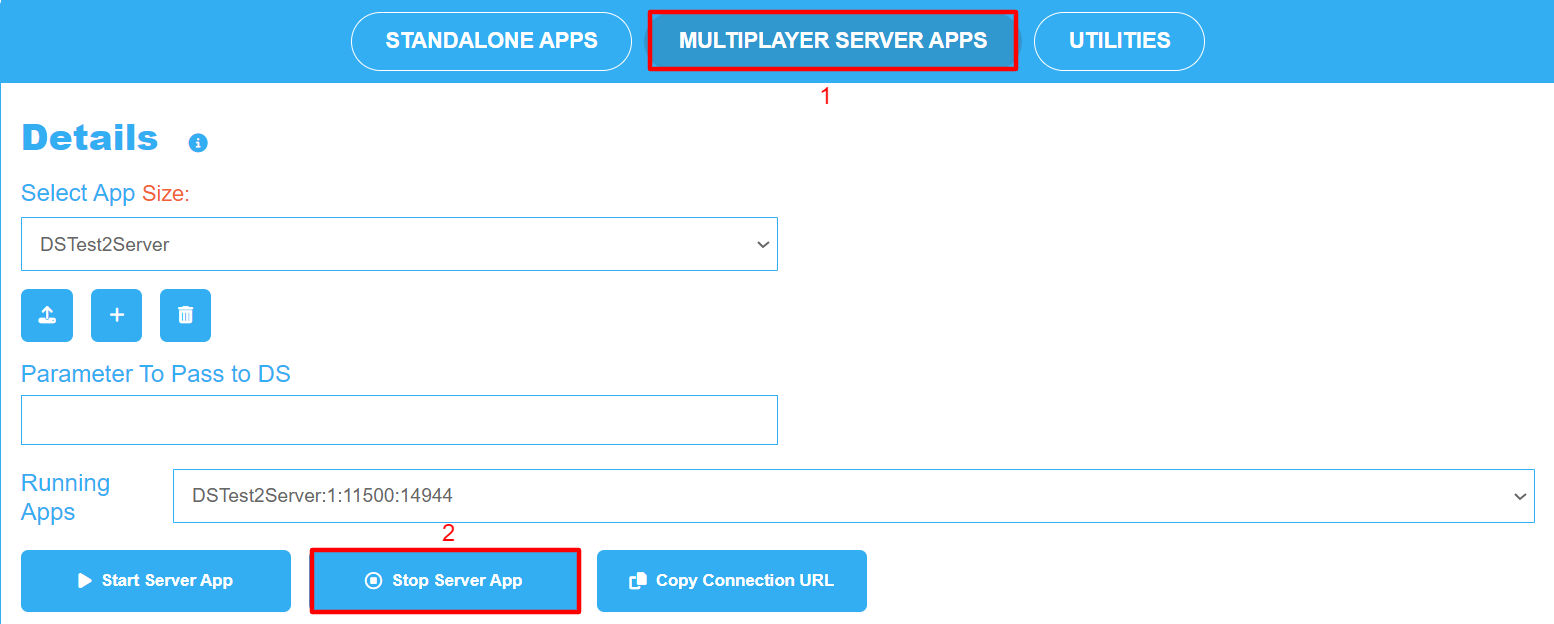
Image 11. Click Stop Server App
Step 6. Preparing the game for Multiplayer
With your server set up, it is now ready for Multiplayer use.
To use your server for multiplayer, complete the following:
Incorporate Eagle 3D’s UE multiplayer template into your project, the source code is: https://bitbucket.org/Eagle3DStreaming/e3dsfeaturestemplate/
Follow Eagle 3D’s instructions for setting up Multiplayer. Refer to this document.
We offer the Multiplayer Server system for free, the paid version is only for reliability.
Interested in the Multiplayer Server System and looking to purchase a paid account for an event?
To test your apps, upload them in 'Step 1: Select an App' on your Control Panel and evaluate their performance. You can use the free version of the 'Multiplayer Server' in your Control Panel to further test your applications.
If everything functions as expected, we will proceed with setting up a paid account on the Cloud platform of your choice.
Need help? Contact Support
Submit a new request at E3DS support portal.
Requests sent on weekends will not be addressed until the following business day.