In this document, we will guide you through preparing the Convai Unreal Engine project for Pixel Streaming, enabling microphone input for streaming sessions.
Demo Project
You can download the demo project here: Download Demo Project
Video Preview
Follow the guidelines below:
Part 1. Configure the Character Blueprint
1. Open the Project
-
Launch the Convai project in Unreal Engine.
-
Navigate to your character’s blueprint (e.g.,
BP_Character).
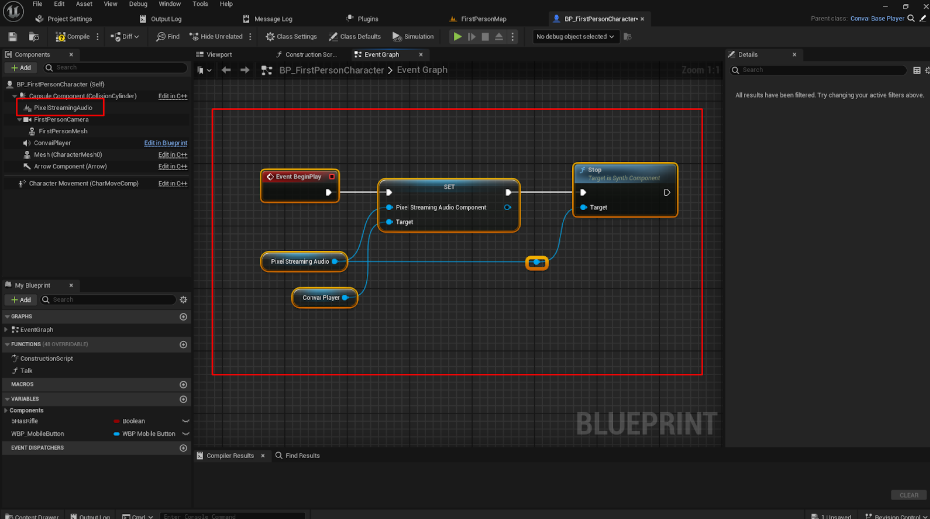
2. Add Pixel Streaming Audio Component
-
Add the PixelStreamingAudio component to your character blueprint.
3. Add Audio Streaming Nodes
-
In the Event Graph, add and connect the required nodes to handle audio streaming.
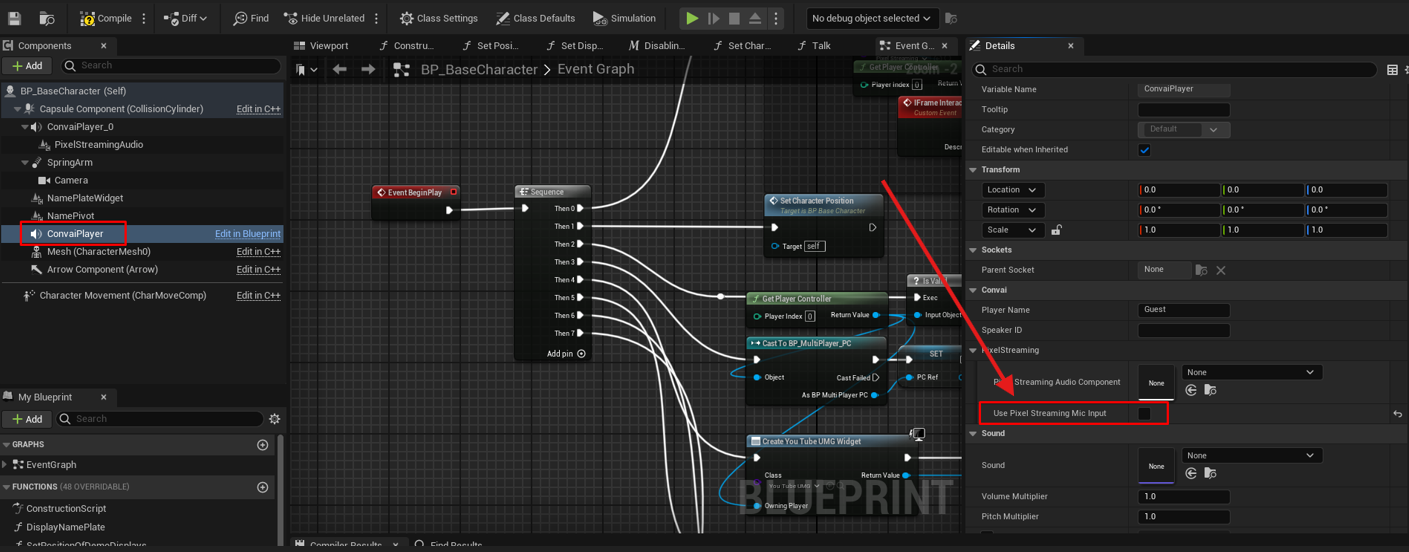
4. Configure Component Settings
-
In the PixelStreamingAudio component settings, disable the option:
Use Pixel Streaming Mic Input.
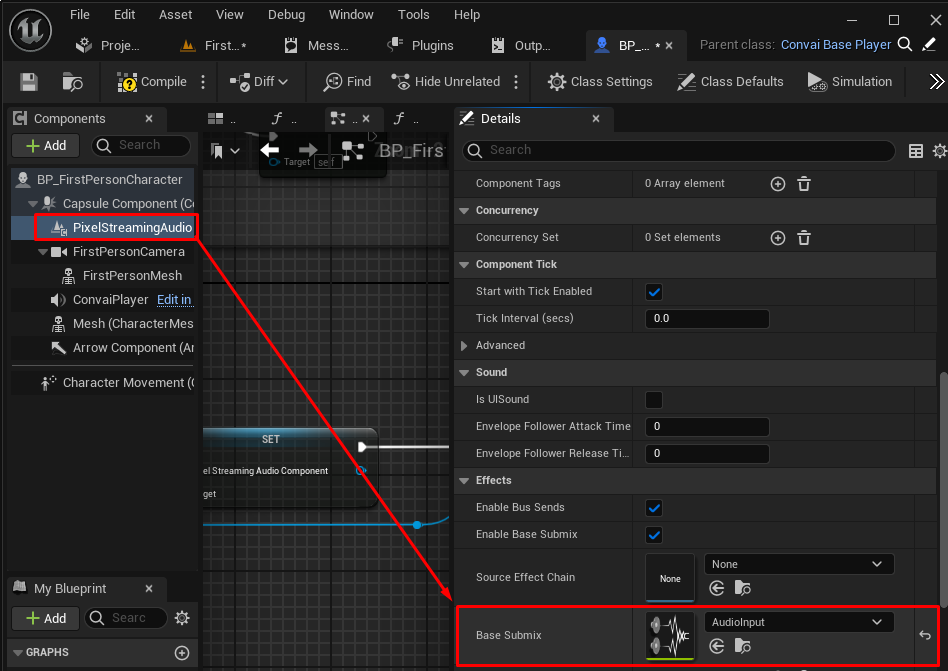
5. Add Audio Input
-
Under the PixelStreamingAudio component, add an AudioInput node.
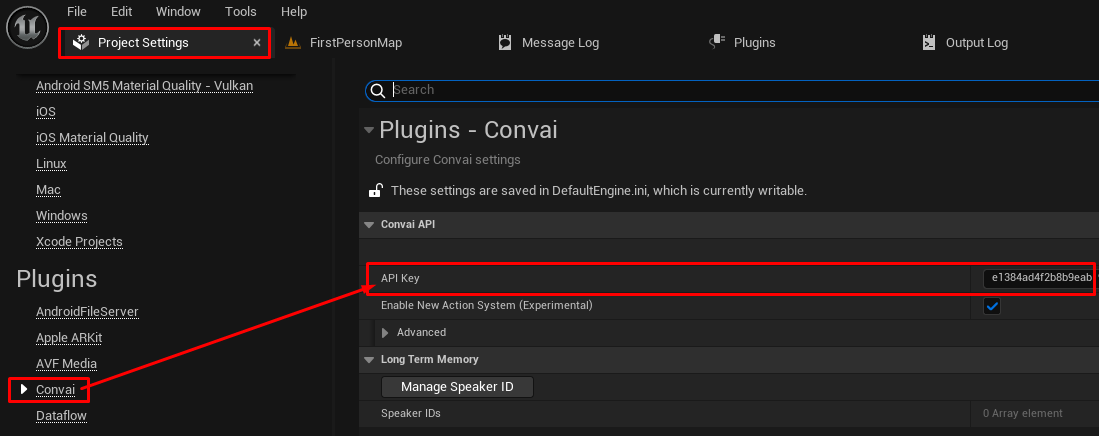
6. Open Project Settings
-
Go to Edit → Project Settings → Convai.
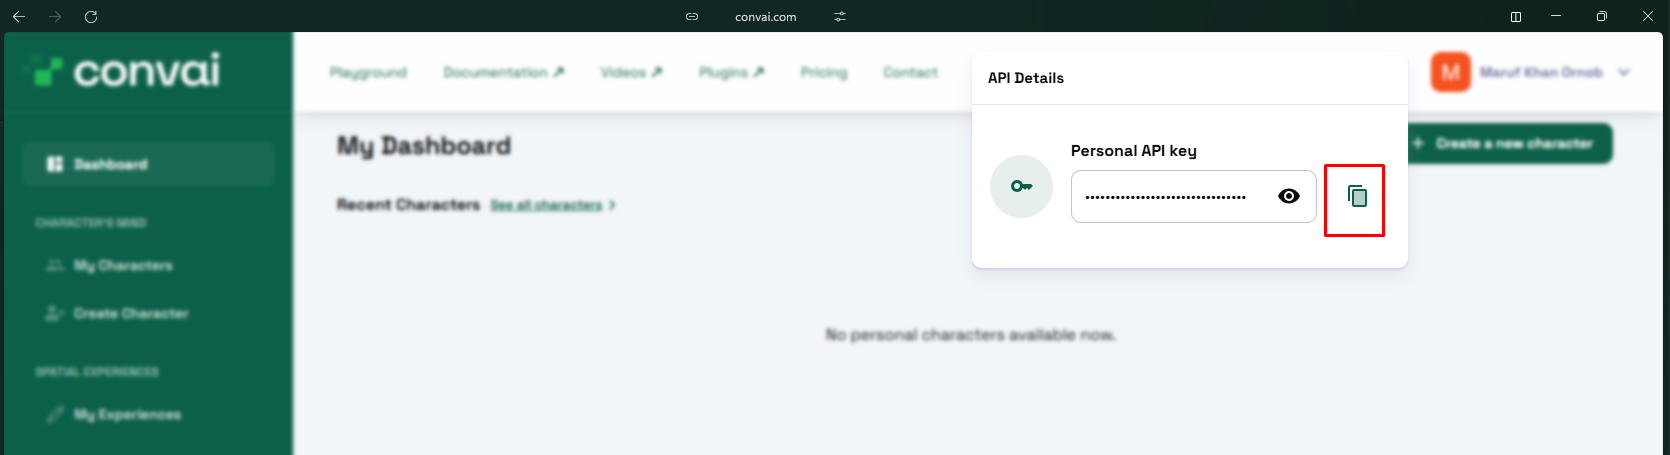
7. Add Your API Key
-
Enter your API key obtained from your Convai account under the Authentication section.
Part 2. Local Testing
1. Package and Run Locally
-
Package your project and run it locally for testing.
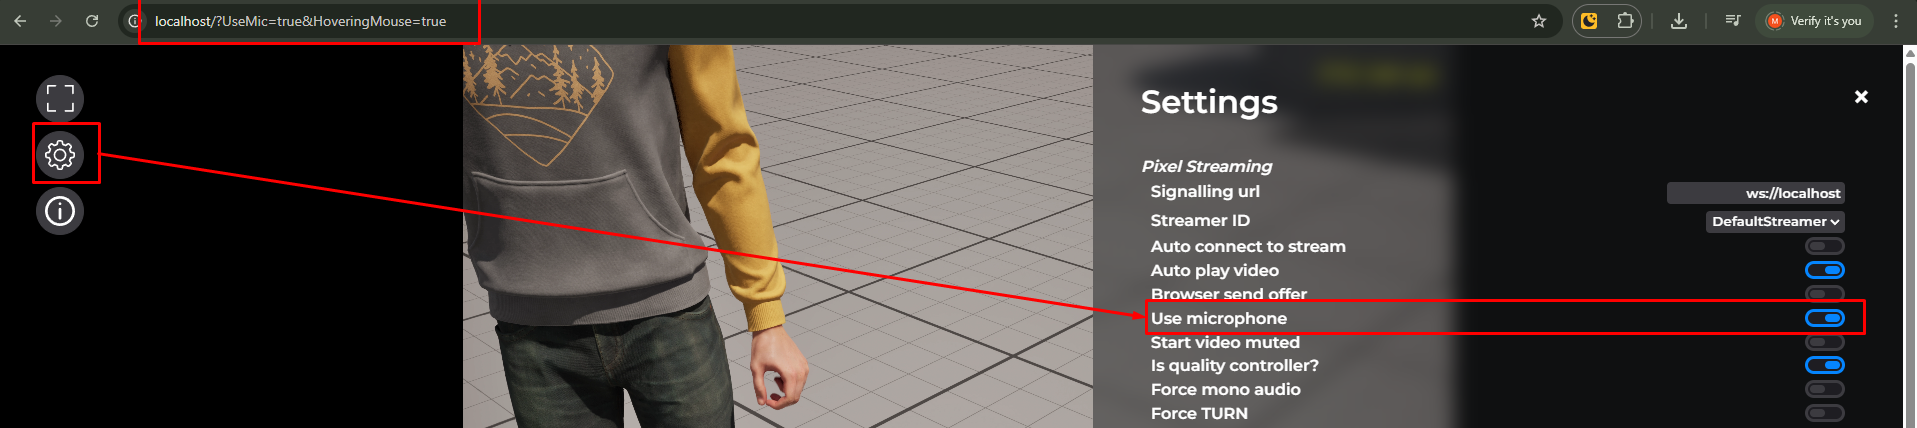
2. Enable Microphone
-
Ensure the Use Microphone option is enabled.
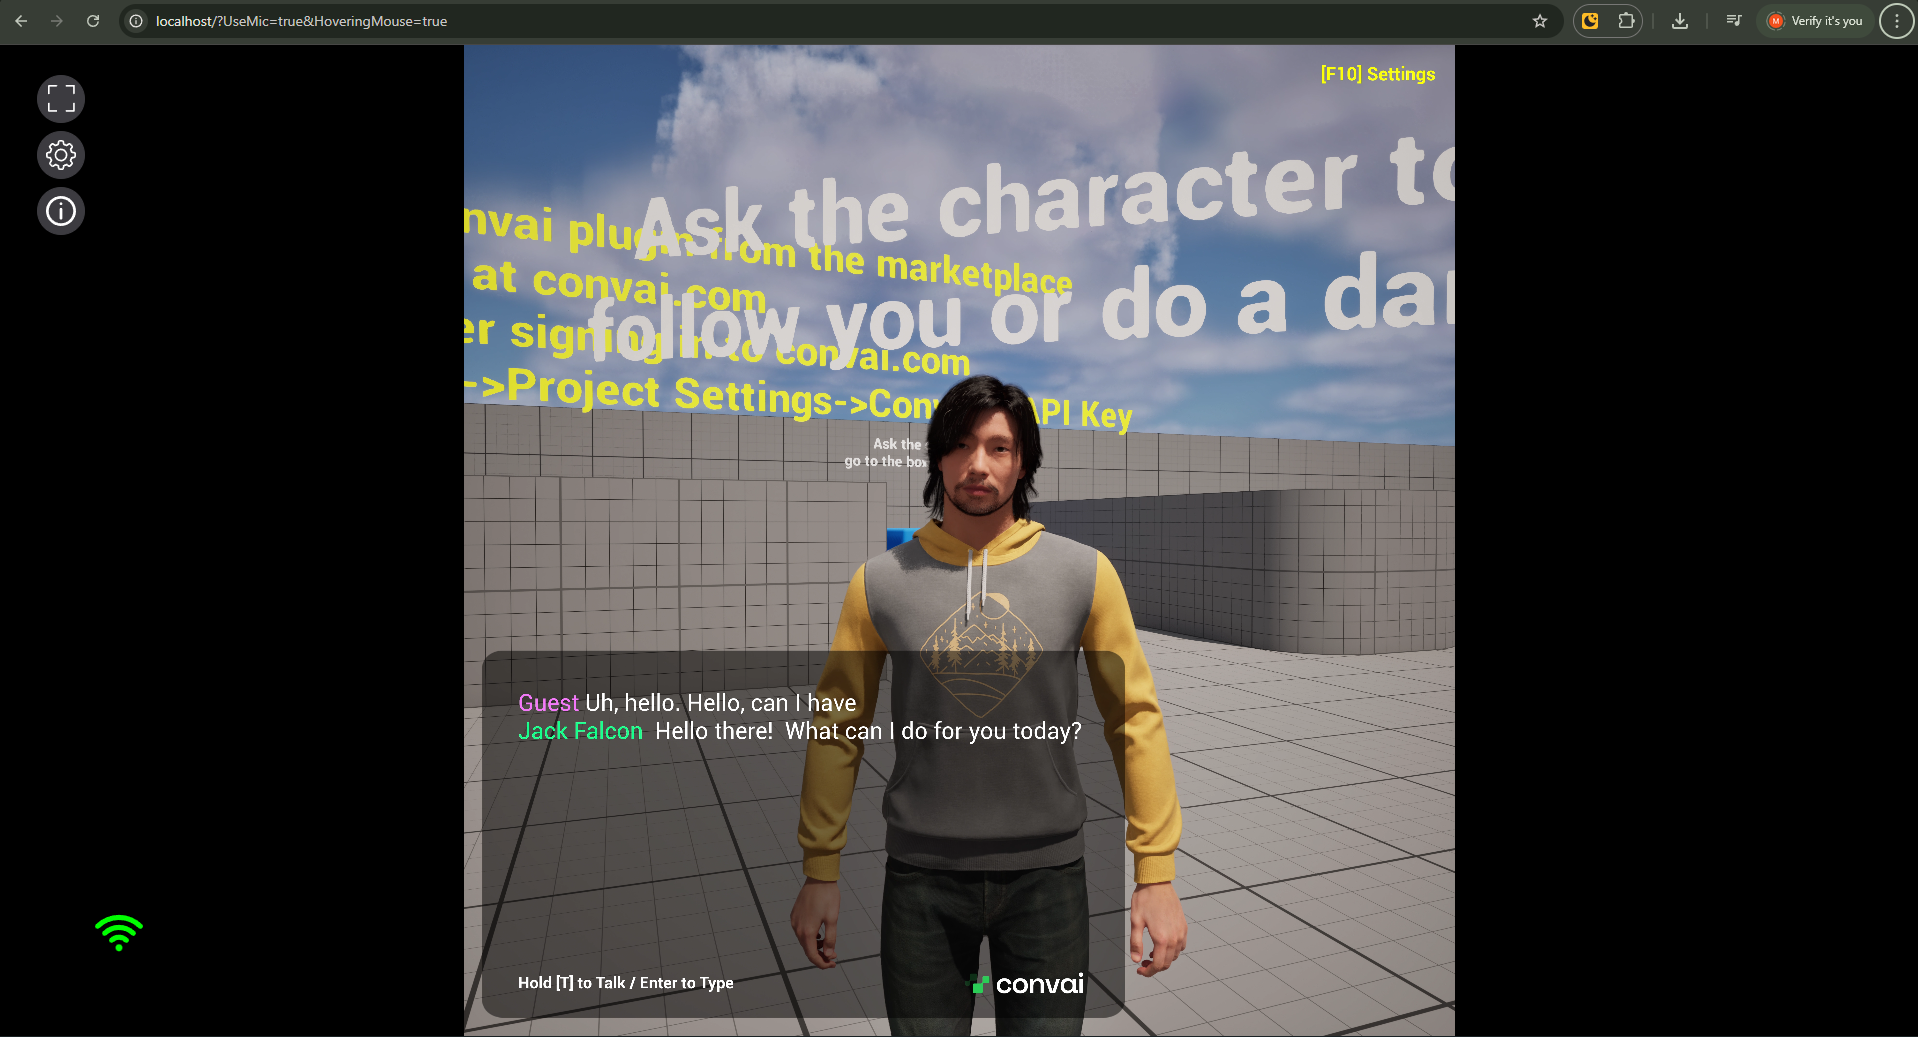
3. Verify Audio Input
-
Speak into your microphone during the session.
-
The audio should be captured and transmitted through the Pixel Streaming setup.
Expected Result:
You should be able to speak, and the system will successfully capture and stream your voice input.
Part 3: Upload to Eagle Control Panel
1. Upload Project
-
Open the Eagle Control Panel.
-
Upload your packaged project, refer to our documentation: Upload Packaged App
-
After uploading, create a new configuration for your application.
2. Enable Browser Microphone
-
In your configuration settings, enable the Browser Microphone option.
-
For detailed instructions, refer to our documentation:
Enable Browser Microphone
Troubleshooting
If your microphone or audio isn’t working as expected, follow these steps:
1. Enable Microphone Access in the Browser
-
When the browser asks for permission, click Allow.
-
If you denied access previously:
-
Click the lock icon 🔒 in your browser’s address bar.
-
Go to Site Settings → Permissions → Microphone → Allow.
-
Refresh the page.
-
2. Enable Sound Output
-
Check that your system sound and browser tab volume are not muted.
-
In browsers like Chrome or Edge:
-
Right-click the browser tab → Ensure “Mute site” is unchecked.
-
3. Enable Pop-Ups
-
Some browsers block pop-ups required for microphone initialization or dialogs.
-
Click the lock icon 🔒 next to the URL → Site Settings.
-
Under Pop-ups and redirects, select Allow.
-
Refresh the page.
-
4. Verify Browser Compatibility
-
Use a supported browser such as Google Chrome, Microsoft Edge, or Firefox.
-
Safari and mobile browsers may restrict mic access depending on version and OS.
5. Clear Browser Cache
-
Cached permissions or old configurations may block new mic access.
-
Clear the browser cache and re-launch the session.
6. Restart Stream
-
After changing permissions, restart the streaming session from the Eagle Control Panel for changes to take effect.
Need help?
If you need any assistance, feel free to reach out through any of the following channels:
🛠️ Support Portal: Contact Our Support Team
💬 Discord Community (Faster Support): Join Our Discord Community
📧 Email Support: support@eagle3dstreaming.com
Follow us on: