This document explains two methods to toggle between Hovering Mouse and Locked Mouse schemes when using Pixel Streaming.
There are three ways to switch the mouse control scheme:
-
Switch Mouse Mode in iFrame: Switch Mouse Mode in iFrame: Refer to the Switch Between Hover and Locked Mouse in iFrame guide.
-
Switch Mouse Mode Using SDK: Refer to the Switch Between Hover and Locked Mouse Using SDK guide.
-
Inside the Unreal App (Blueprint): Covered in this guide
You can switch between these schemes using either of the following methods:
Method 1. Using E3DS Features Plugin (Recommended)
Prerequisite:
Before proceeding, ensure you have downloaded and installed the E3DS Features Plugin in your Unreal Engine project. For detailed instructions, refer to:
Download and Install the E3DS Features Plugin
-
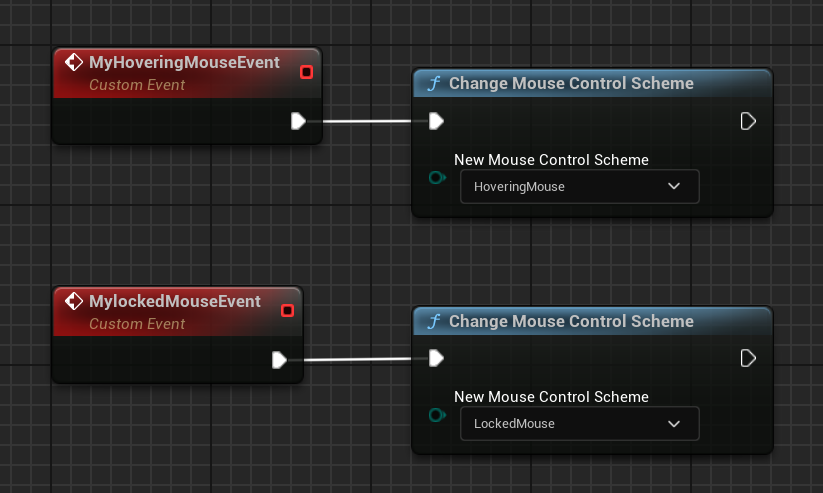
Place BP_E3DS_PS_Actor from the plugin content into your active level.
-
Reuse the same two events (
MyHoveringMouseEventandMyLockedMouseEvent). -
Instead of writing JSON manually, call the premade function Change Mouse Control Scheme.
-
From the dropdown, choose either:
-
HoveringMouse -
LockedMouse
-
Method 2. Manually Writing and Sending Messages (Not Recommended)
If you’re not experienced with Blueprint development, do not use Method 2. Please use Method 1 instead — Method 2 is more error-prone and increases the chance of implementation mistakes.
Using the E3DS Features Plugin (Method 1) is faster, easier, and less error-prone.
-
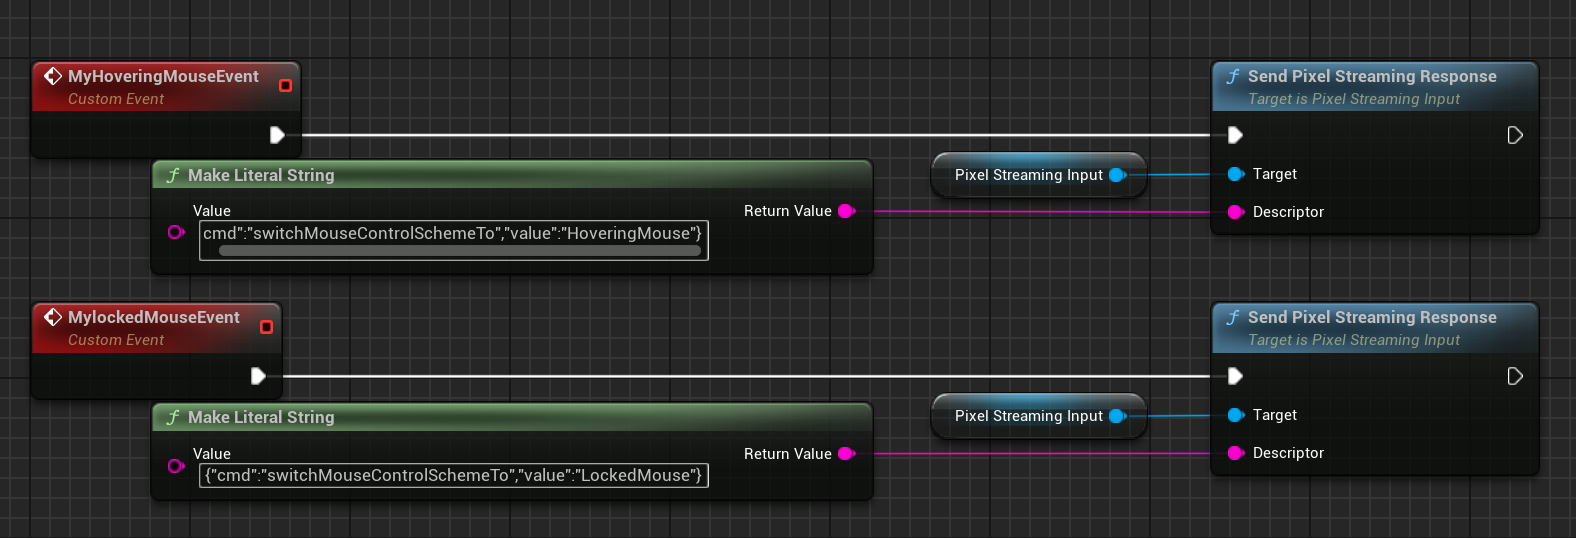
Create a new Blueprint.
-
Add the PixelStreamingInput component.
-
Create two custom events:
-
MyHoveringMouseEvent→ sends HoveringMouse message. -
MyLockedMouseEvent→ sends LockedMouse message.
-
-
Convert the messages into a string and call Send Pixel Streaming Response.
Related Guides
Need help?
If you need any assistance, feel free to reach out through any of the following channels:
🛠️ Support Portal: Contact Our Support Team
💬 Discord Community (Faster Support): Join Our Discord Community
📧 Email Support: support@eagle3dstreaming.com
Follow us on: