
Create an Account
Learn to create a User Account from the new Control Panel.
Follow these instructions :
Step 1. Open Eagle3D’s New Control Panel
Open this Link https://newcontrolpanel.eagle3dstreaming.com/
Step 2. Create an Account
1. Enter your Email and Password. Click ‘'Sign up’'
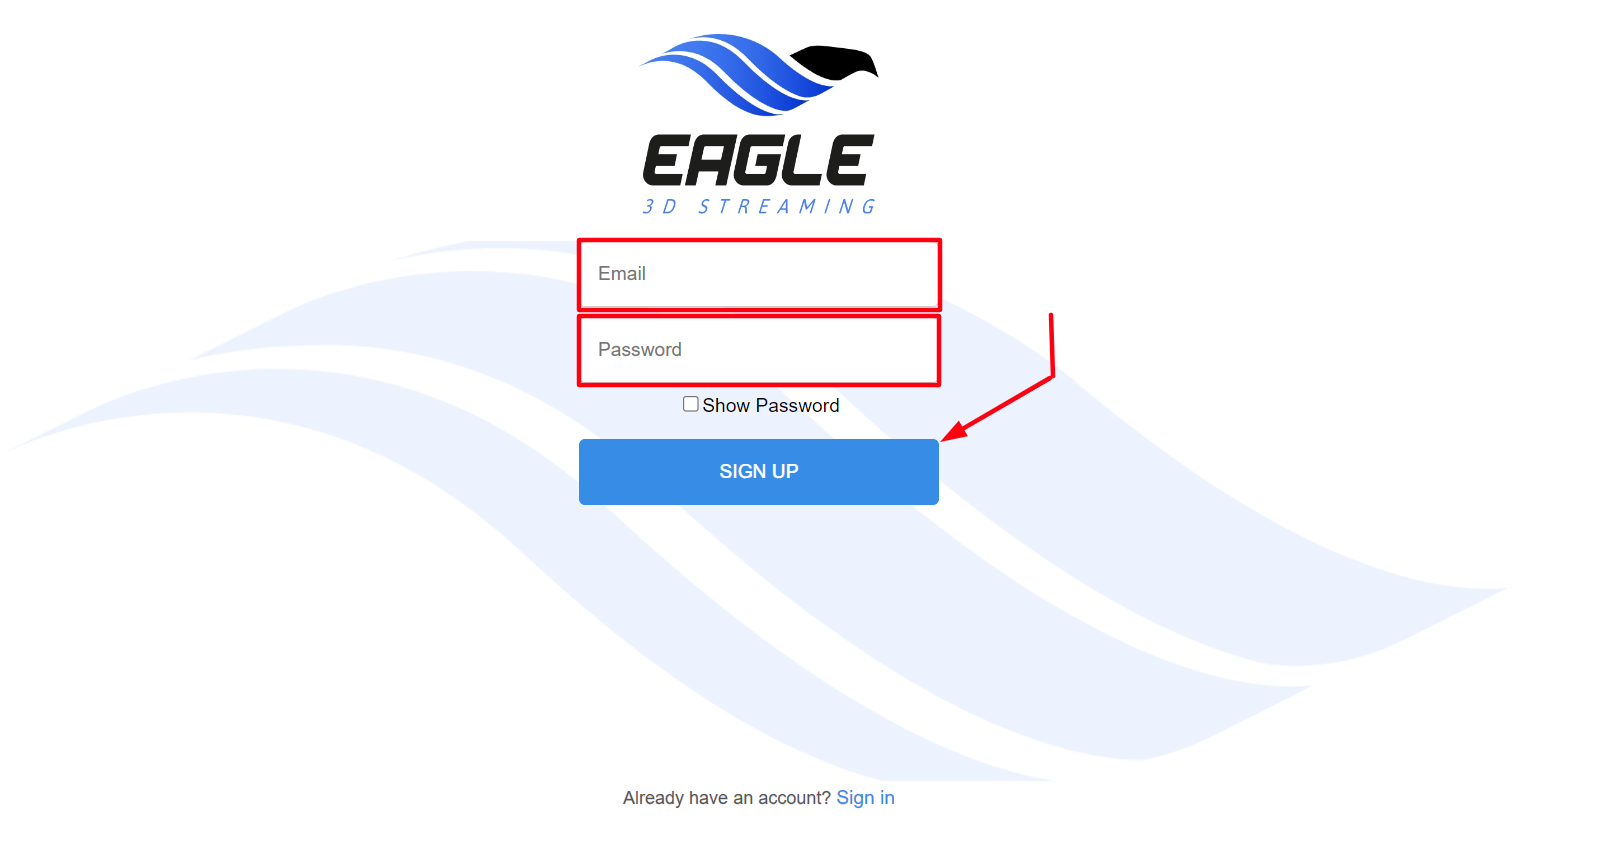
Image 1. Create an account : Sign up
2. Click OK in the Notification popup (screenshot below)
%20(1).png?inst-v=27e98e0b-a7f8-4fea-87e8-8659c502a385)
Image 2. OTP Notification popup. Click OK
Step 3. Collect your OTP code from your mail Inbox
You will receive an Email from Eagle 3D Streaming in your Inbox which has an OTP code.
Check your Spam if you do not see the mail in your Inbox!
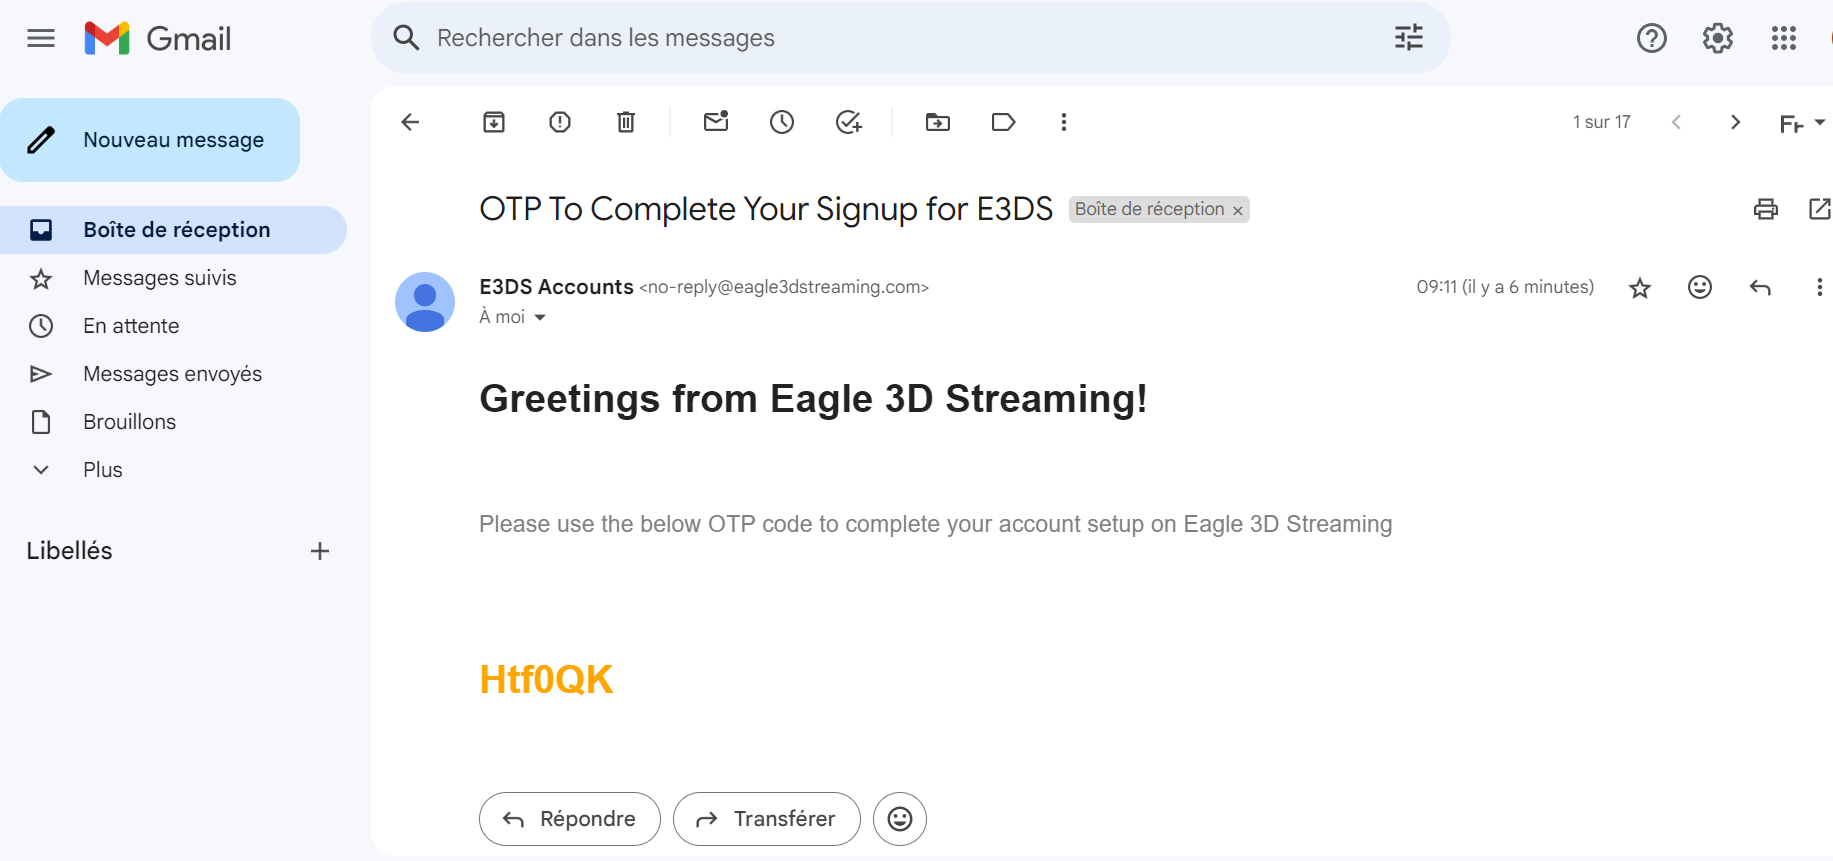
Image 3. Get the OTP code from your mail Inbox
Step 4. Type the OTP code in the box
1. On the Sign-Up page, type the OTP code
2. Click ''Verify OTP''
.png?inst-v=27e98e0b-a7f8-4fea-87e8-8659c502a385)
Image 4. Sign-Up page : Type the OTP code and click Verify OTP
3. Click OK on the Notification popup (screenshot below)
The OTP code is verified at this point and you have successfully created an account.
.png?inst-v=27e98e0b-a7f8-4fea-87e8-8659c502a385)
Image 5. OTP Verified and account successfully created
Step 5. Login with your Information
Enter your Email and Password in the text fields. Click ‘'Sign In’'.
.png?inst-v=27e98e0b-a7f8-4fea-87e8-8659c502a385)
Image 6. Login with your Email and Password. Click Sign In
Step 6. Enter your Phone number
Enter your phone number in the box and click ‘'Set Phone Number’'
.png?inst-v=27e98e0b-a7f8-4fea-87e8-8659c502a385)
Image 7. Type your Phone number. Click Set Phone Number
Make sure to ONLY use one Phone number per account!
The system will NOT accept a phone number that is already linked to another account.
If you use the same phone number for multiple Accounts, this notification will popup. (See screenshot below).
.png?inst-v=27e98e0b-a7f8-4fea-87e8-8659c502a385)
Image 8. Notification popup. Phone number already in use
Step 7. Enter the Code received on your phone
1. Collect the code received on your phone
2. Type it in the box
3. Click ''Verify Code'' (see screenshot below).
.png?inst-v=27e98e0b-a7f8-4fea-87e8-8659c502a385)
Image 9. Enter the code collected. Click Verify Code
4. Click OK
.png?inst-v=27e98e0b-a7f8-4fea-87e8-8659c502a385)
Image 10. Phone number successfully linked to your account
Step 8. Enter your Username
Usernames should be case sensitive and cannot contain special characters, dashes or spaces.
ONLY letters and numbers may be used in your Username.
.png?inst-v=27e98e0b-a7f8-4fea-87e8-8659c502a385)
Image 11. Enter your Username. Click Save
Step 9. Sign In to your account
1. Click Sign In
.png?inst-v=27e98e0b-a7f8-4fea-87e8-8659c502a385)
Image 12. Click Sign In
2. Your New Control Panel Interface opens up
.png?inst-v=27e98e0b-a7f8-4fea-87e8-8659c502a385)
Image 13. New Control Panel Interface
You are now on your 7 day Trial with 1CCU.
Click ''Upgrade Now'' to activate your Paid account.
Access the Control Panel from here.
Contact us if you have any questions or issues.
Step 10. Add an Application
Next, Enable the Pixel Streaming plugin, Package your project then Upload an Application on your Control Panel!
Was this article helpful? Comment Below. Let us know your feedback.
Need help? Contact Support
Submit a new request at E3DS support portal.
Requests sent on weekends will not be addressed until the following business day.