Step 1: Select an App
Use and functionality of all Features in Step1: Select an App in the Old Control Panel.
Prerequisites
-A user Account.
Refer to this document to create a new User Account.
Instructions
Login to the Old Control Panel.
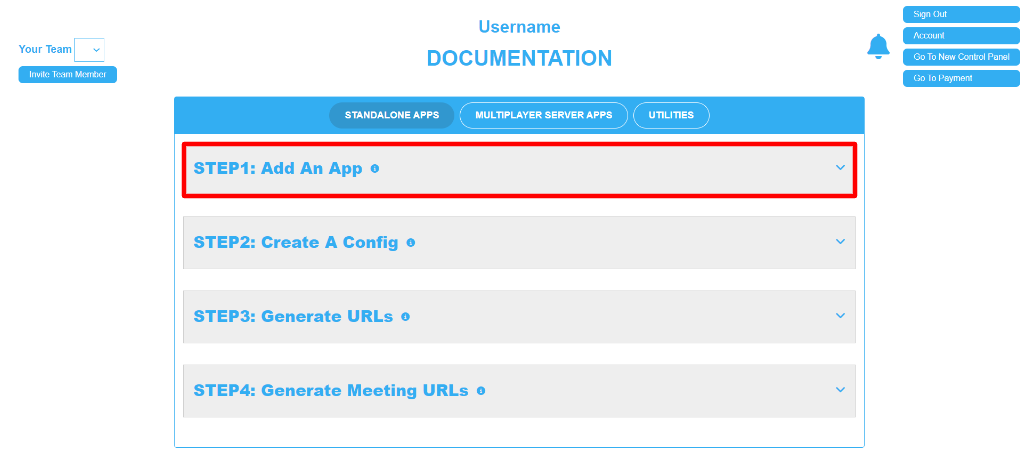
Navigate to: Standalone Apps > ‘Step 1: Add an App’.

Image 1. Standalone Apps : Step1: Add an App
Click on the ‘Step1: Add an App’ Menu to expand it.
With no apps uploaded in the Control Panel, only the 'Add New App' feature will appear in the 'Step 1: Add an App' menu.

Image 3. Add New App
Note: Refer to this document and follow the steps to upload a new App on your Control Panel.
Note: Upon uploading one or more apps in the Control Panel, Step 1 will be designated as 'Step 1: Select an App.'
Selecting an App from the list
-Uploaded Apps will appear in the drop-down list. Select your app from the list.

Additional features will appear in ‘Step 1: Select an App’.

Image 5. More Features
The following is a breakdown of all features in 'Step 1: Select an App':
Uploading a New App Version
The first Feature is ‘Upload New Version’. Follow the steps in this document to update your App and use the version system.

Image 6. Upload New Version
Adding an Application
The second feature is ‘Add New App’. Refer to this document to upload new Apps.

Image 7. Add New App
Deleting a Selected App
The third feature is ‘Delete Selected App’. Refer to this document to delete your App.

Image 8. Delete Selected App
Downloading a selected app’s archive
The fourth feature is ‘Download Selected App’s archive'. Refer to this document to download your app’s archive on your desktop.

Image 9. Download Selected App’s Archive
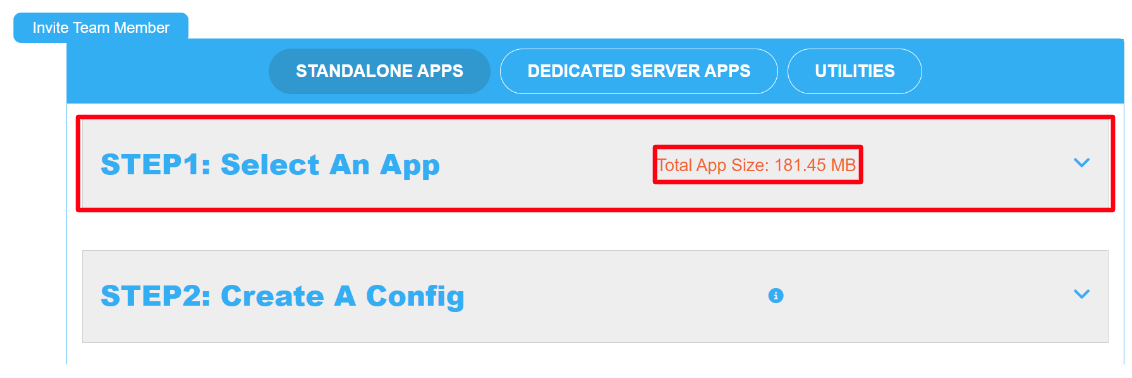
Checking the Size
Getting the Total App size
The size of all of your Apps will be displayed on the Drop Down Menu of ‘Step 1: Add an App’ in the Control Panel.

Image 10. Total App Size
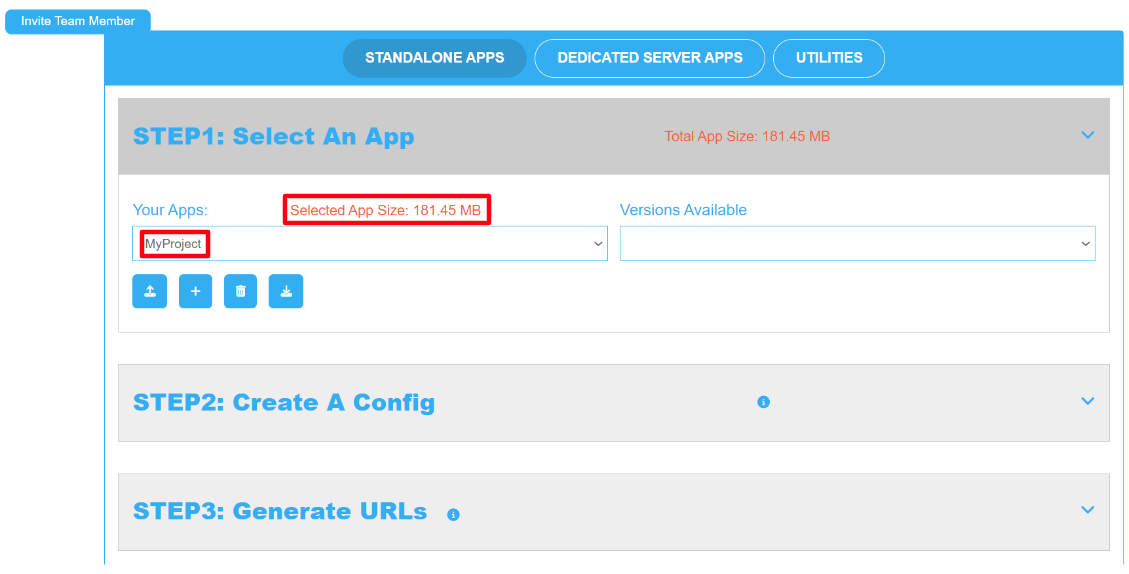
Getting the size of one selected App
Selecting an app from the drop-down menu will display its size.

Image 11. Size of one Selected App
Now you are ready to Select an Application from your Control Panel !
Next step is setting a Config (refer to this document) and playing the App (check this document).
Need help? Contact Support
Submit a new request at E3DS support portal.
Requests sent on weekends will not be addressed until the following business day.
