
Upload 2D Assets
Learn to upload 2D Assets.
Prerequisites
Access to the Control Panel ;
At least one uploaded application.
Instructions
Go to: Control Panel >Step 2: Create a Config > Customization > Upload 2 D Assets
Step 1. Click Upload 2D Assets
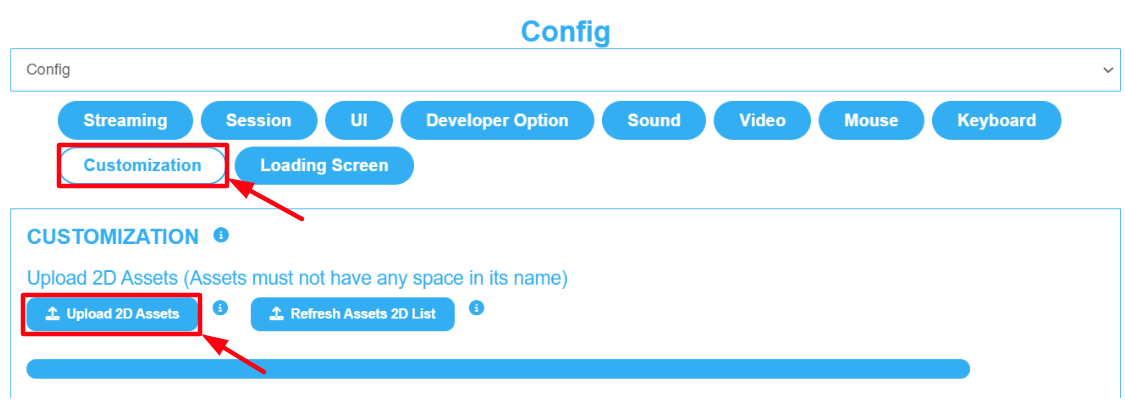
Image 1. Control Panel : Step 2: Create a Config : Edit : Customization : Upload 2D Assets
Step 2. Click Choose File
The Uploader page opens up. Click ‘'Choose File’' to select an Asset from your device.
.png?inst-v=a829147f-1ebb-4c97-90de-8c5ed9835995)
Image 2. Uploader: Choose a file
Step 3. Browse your files and open a 2D Asset
Tips :
Only .jpg .png .gif .bmp are accepted.
Make sure there are no spaces in the name of the uploaded Assets.
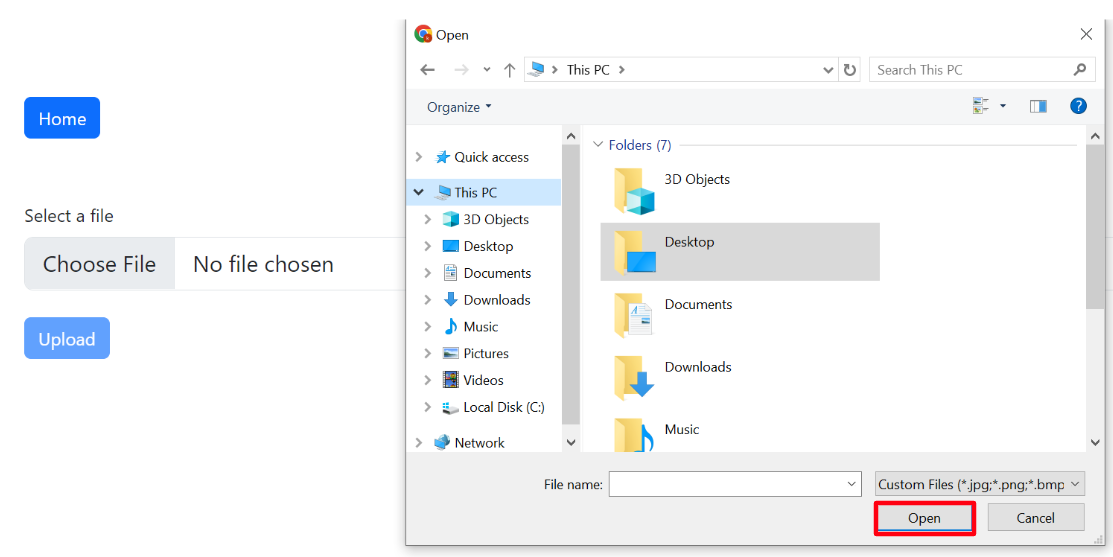
Image 3. Browse your files on your desktop and open a 2D Asset file
Step 4. Click Upload
.png?inst-v=a829147f-1ebb-4c97-90de-8c5ed9835995)
Image 4. Uploader page: Click Upload
Step 5. 2D Asset uploaded successfully
Larger files (>1Mb) can take a few minutes to load.
You will get a Notification Popup ‘'Successfully uploaded’' when the upload is completed.
.png?inst-v=a829147f-1ebb-4c97-90de-8c5ed9835995)
Image 4. Uploader page: 2D Asset successfully uploaded
Step 6. Click Refresh 2D Asset List
Go back to the Control Panel.
Click the ‘'Refresh 2D Asset List’' Button to see your Asset in the List.

Image 5. Click Refresh Assets 2D List
Step 7. Upload More Assets
1. Click ‘'Upload More’' to upload more Assets
.png?inst-v=a829147f-1ebb-4c97-90de-8c5ed9835995)
Image 6. Uploader page : Click Upload More
2. Re-do the steps in this tutorial (from Step 4)
Now you are ready to upload 2D Assets in your Control Panel !
Check how to Customize the Loading screen and how to Customize the Queue screen.
Need help? Contact Support
Submit a new request at E3DS support portal.
Requests sent on weekends will not be addressed until the following business day.