Follow the steps below to upload your build using E3DS Automation Tools and stream it :
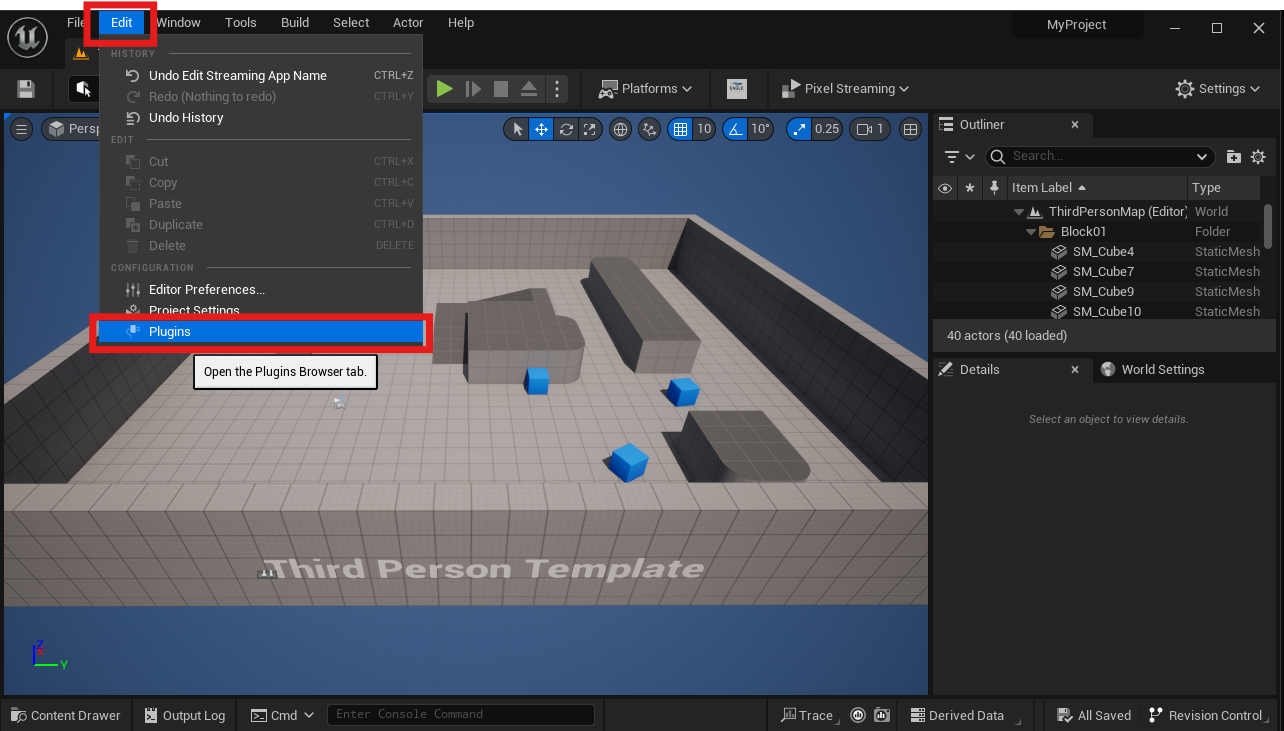
Step 1. Open your project in Unreal Editor and navigate to Edit > Plugins.
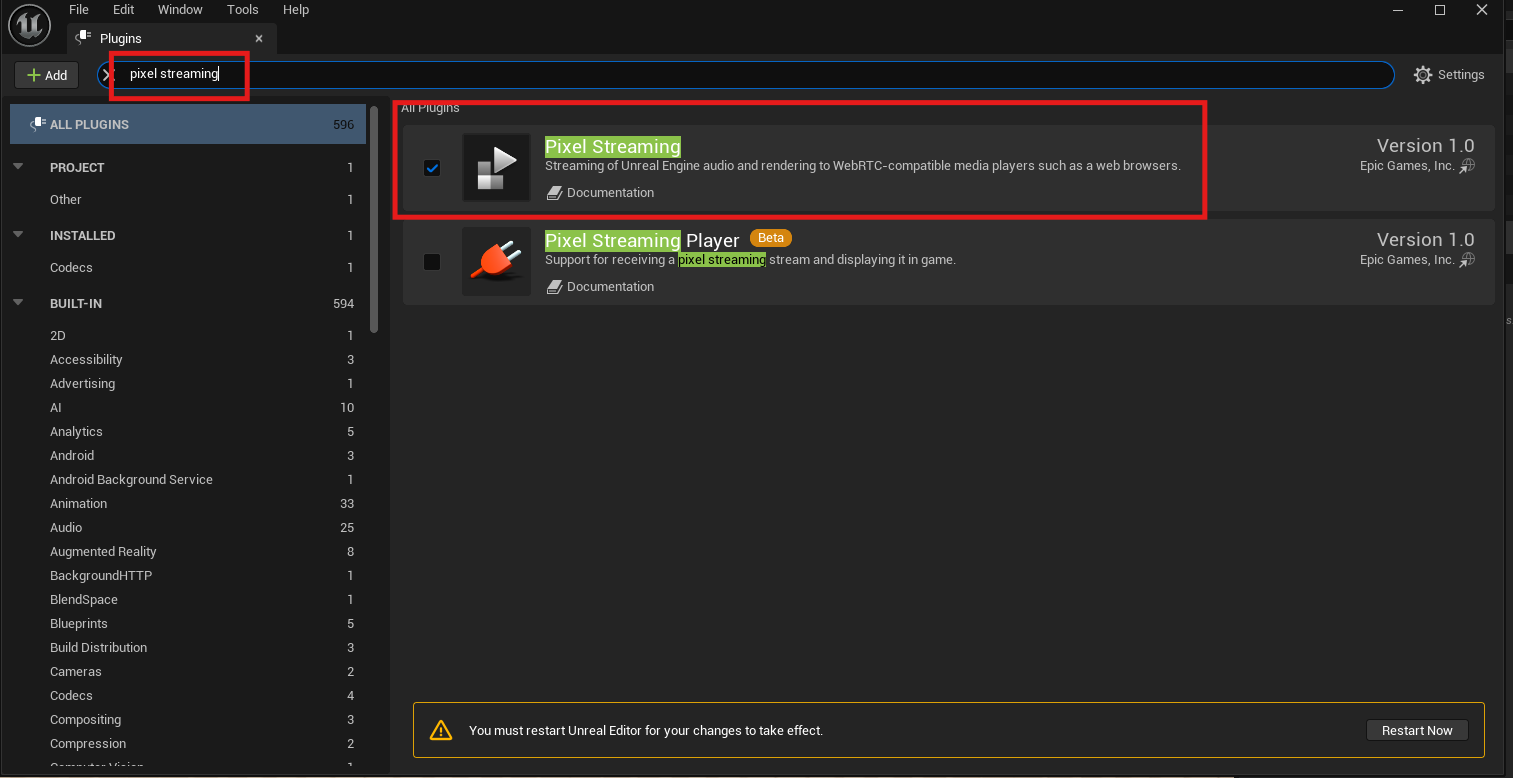
Step 2. Enable Pixel Streaming Plugin.
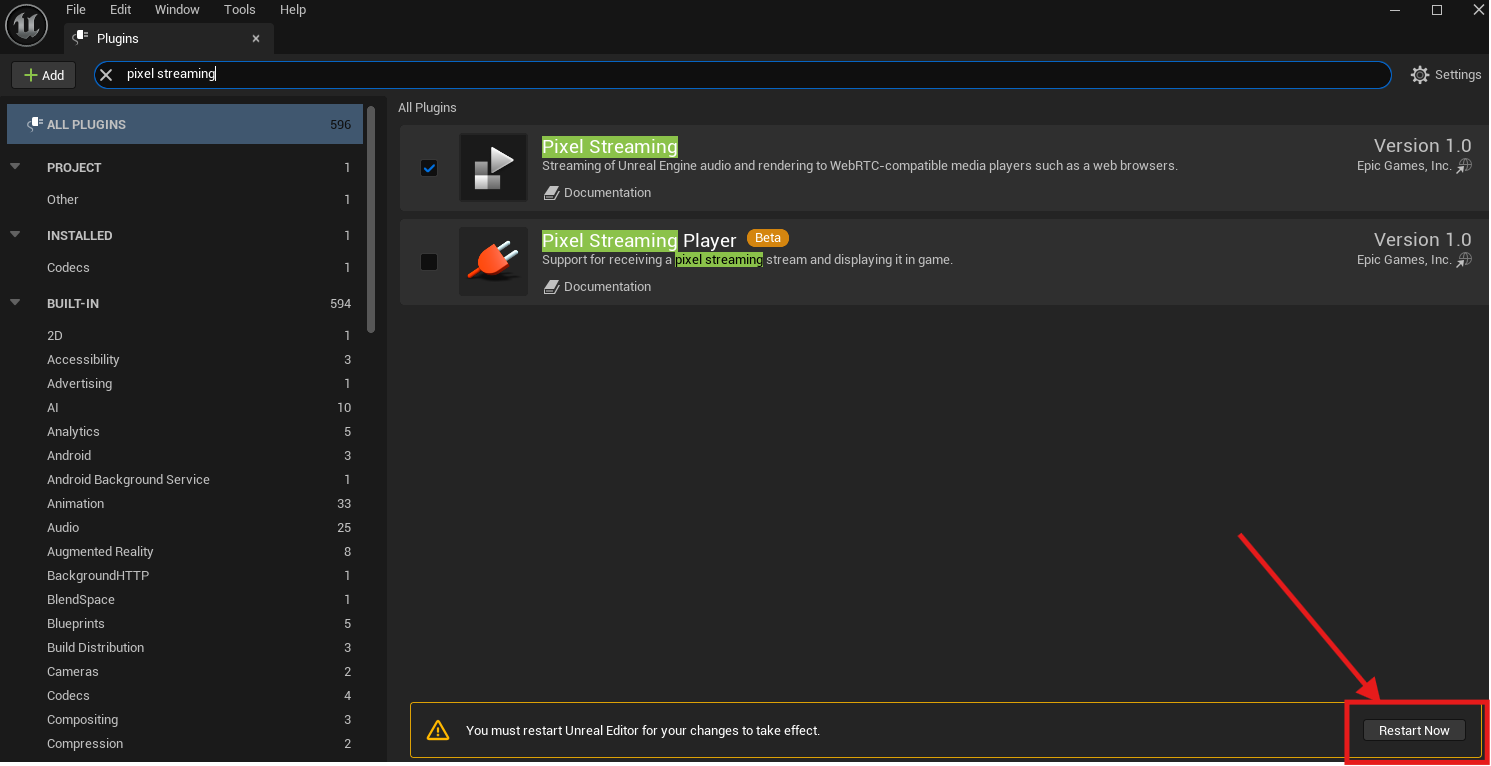
Step 3. Restart your Unreal Editor.
Step 4. Go to Edit > Project Settings.
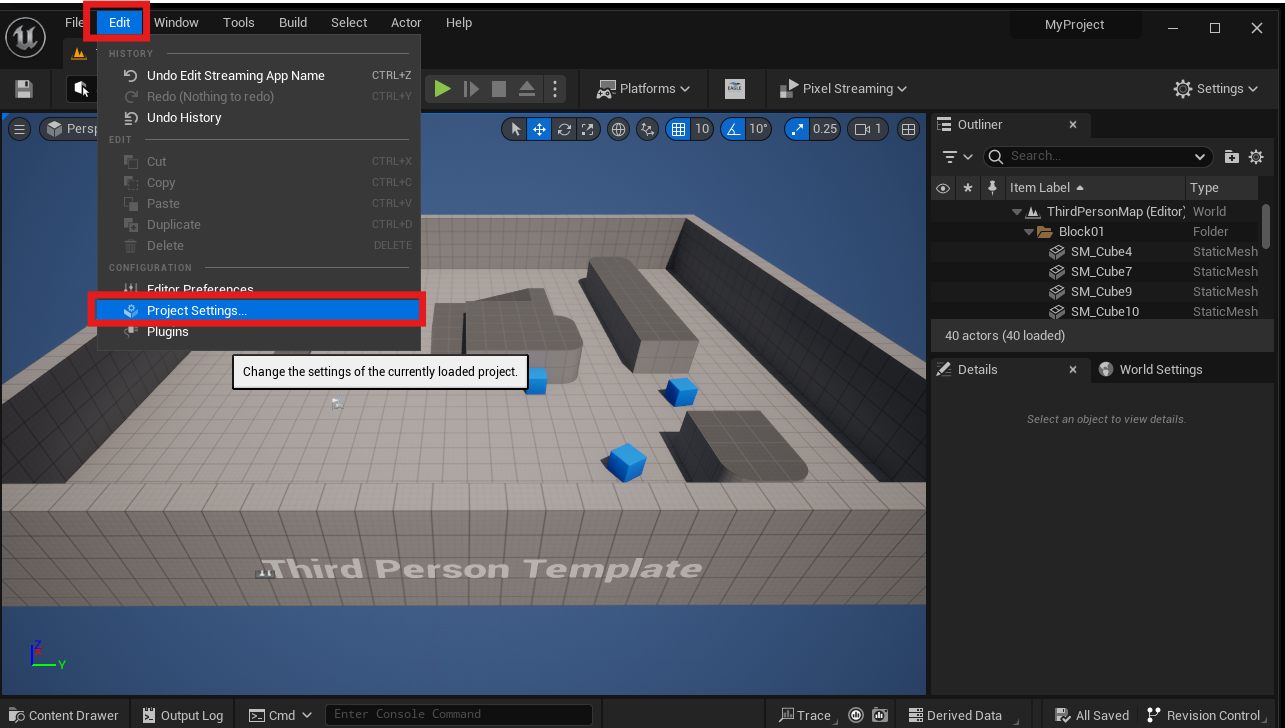
Step 5. From Plugins select “E3DS Automation Tools Settings”.
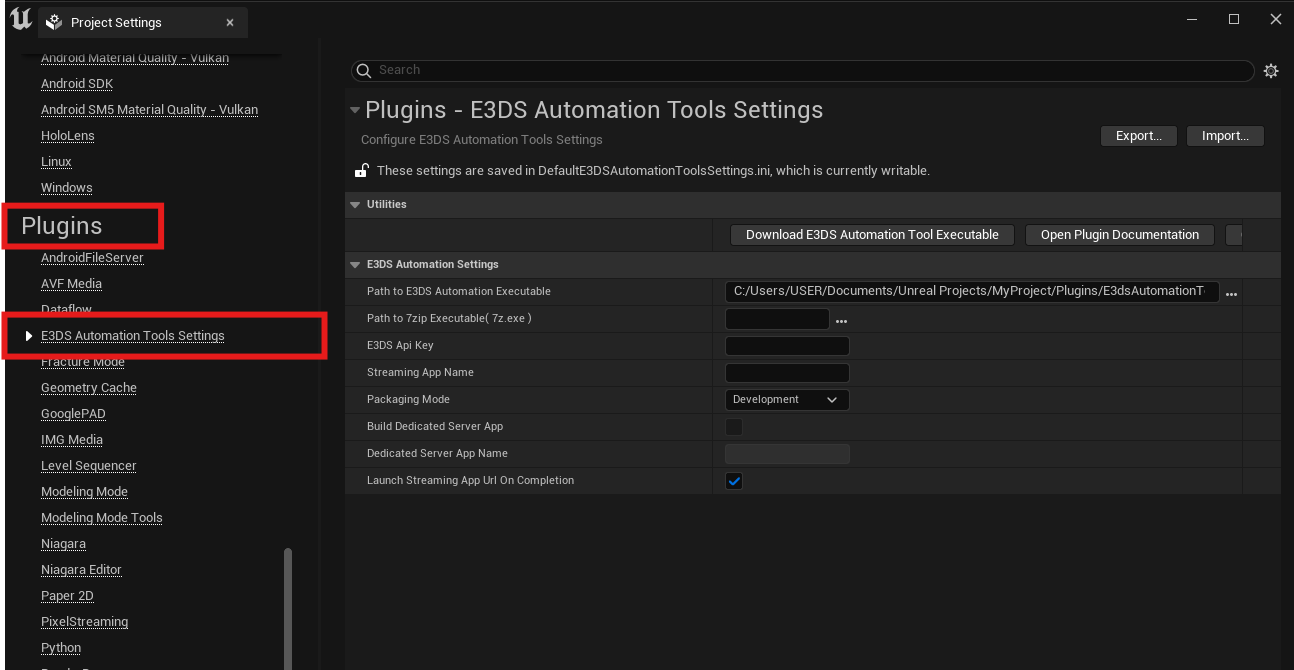
Step 6. Configure E3DS Automation Tools Settings.
Download 7-Zip application and install that match your computer specification (If you have not done it before)

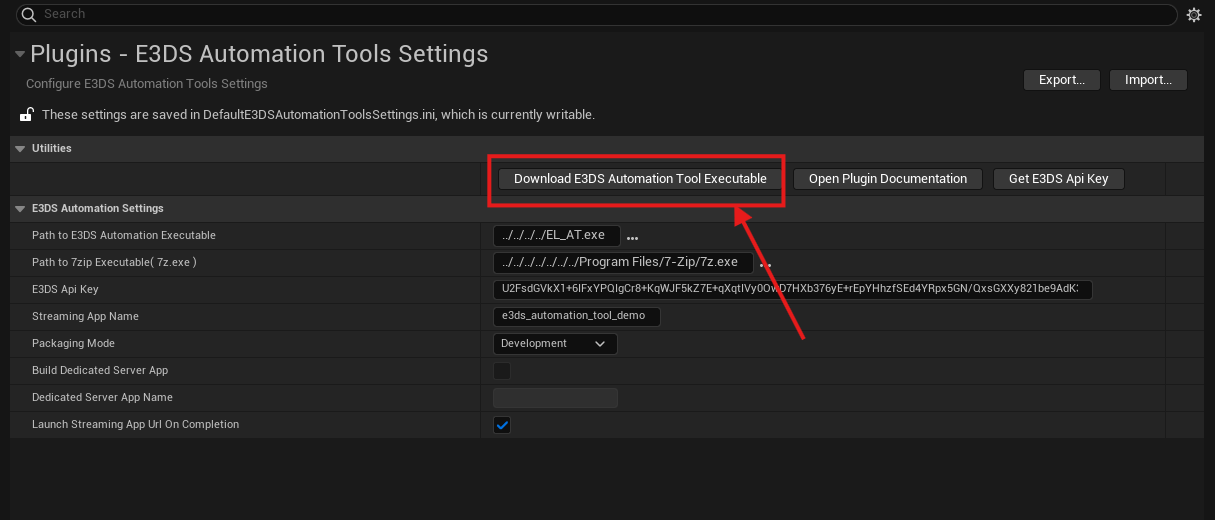
Click Download E3DS Automation Tool Executable button (Figure 7 ) to download the E3DS Automation Executable
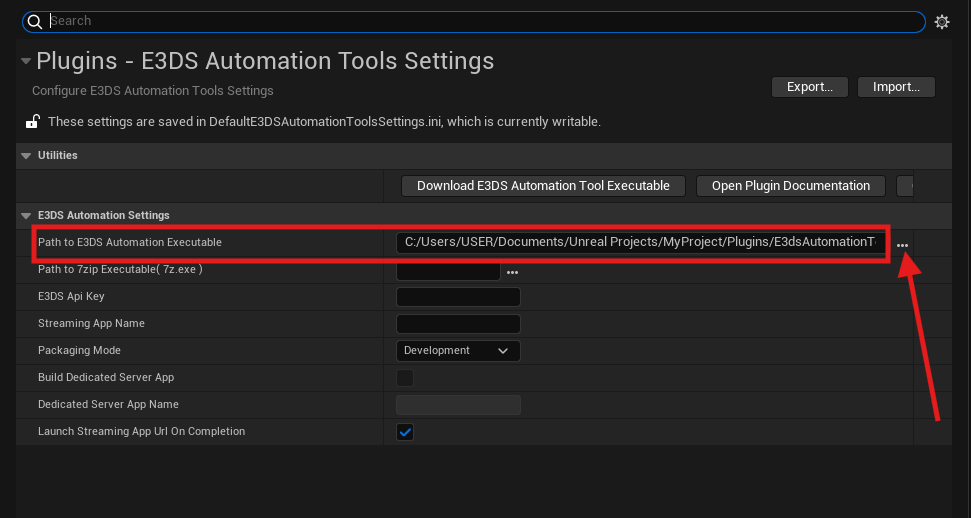
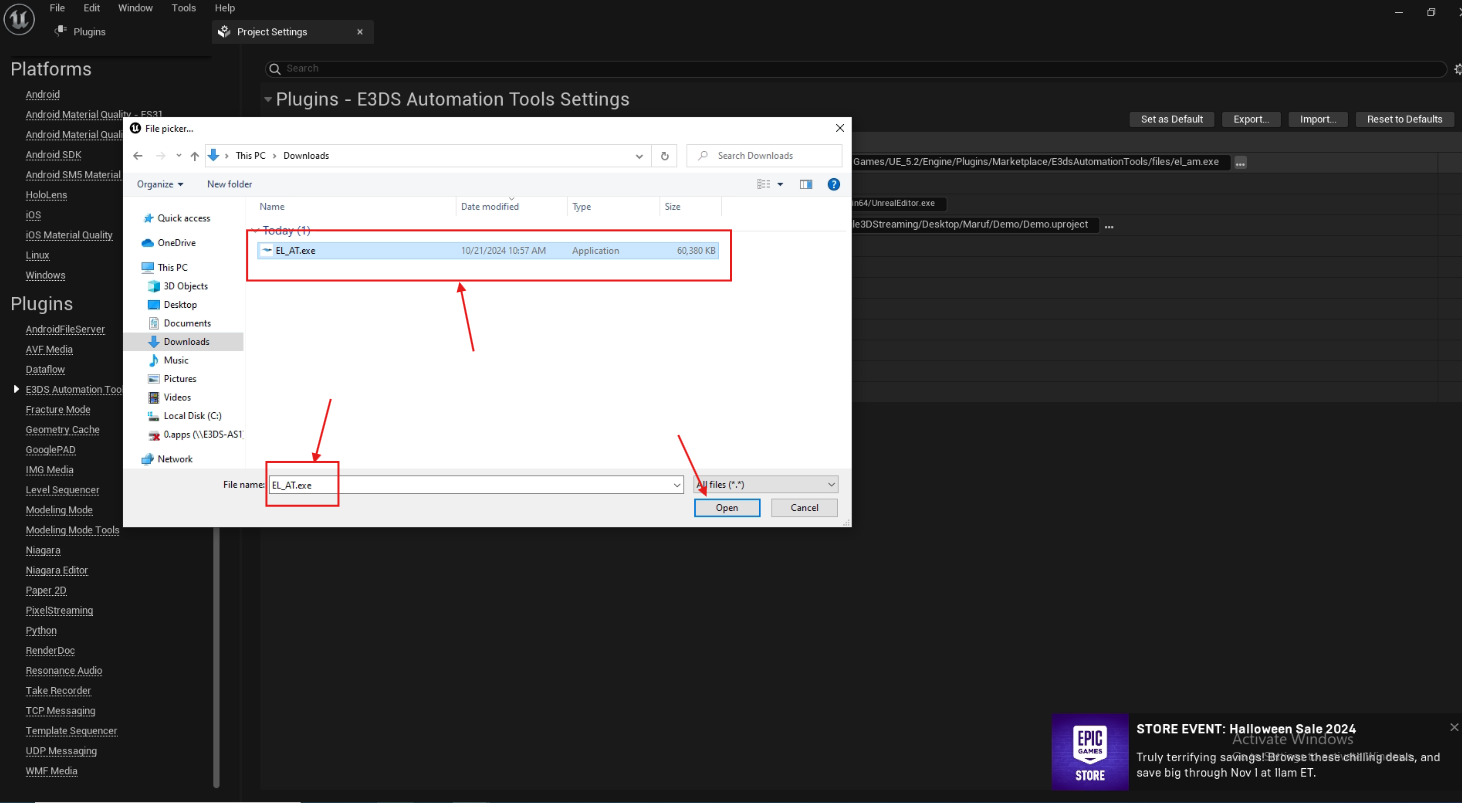
(i) Select Path to E3DS AutomationExecutable (Figure 8) and configure the path (Figure 9)
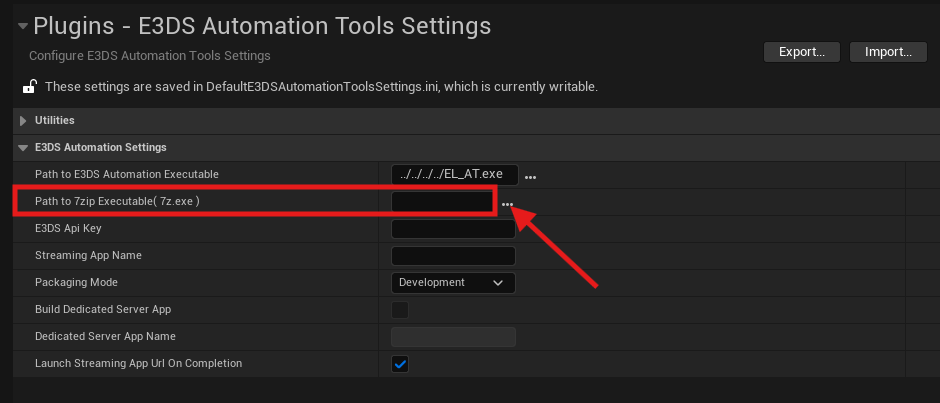
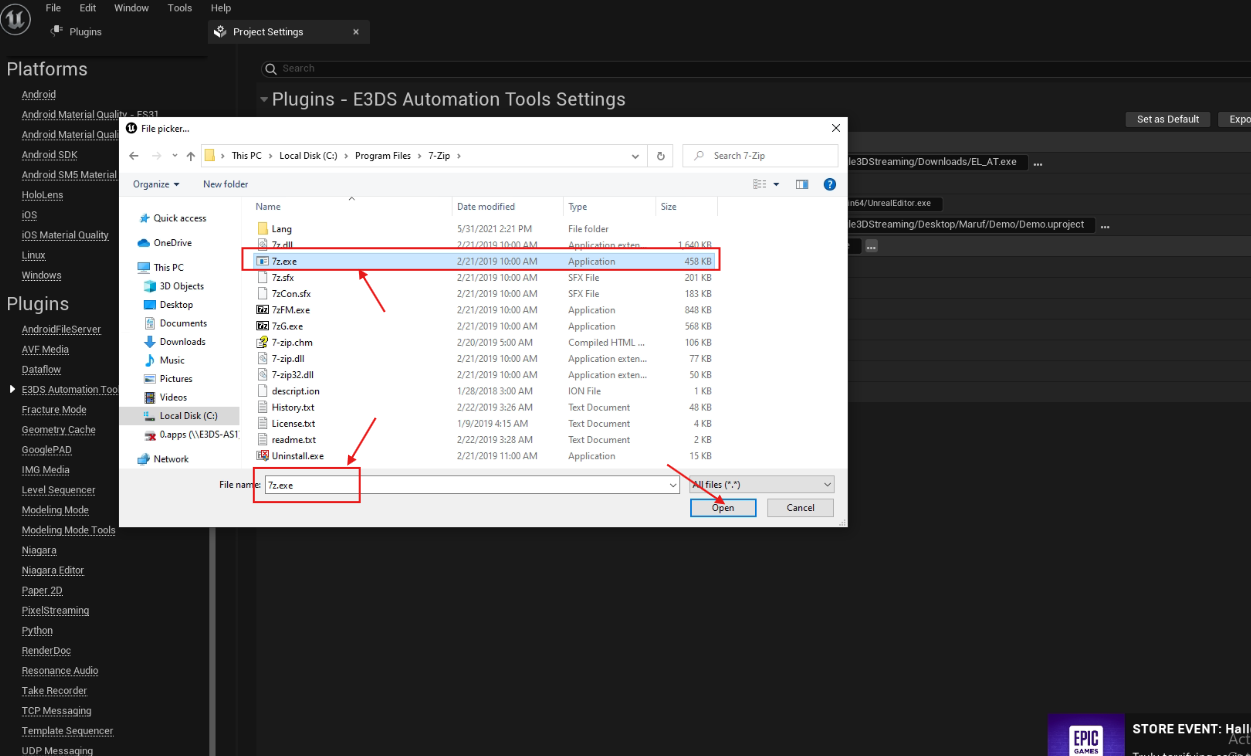
(ii) Select “Path to 7Z.exe” field (Figure 10) and give the path of 7Z.exe file (Figure 11)
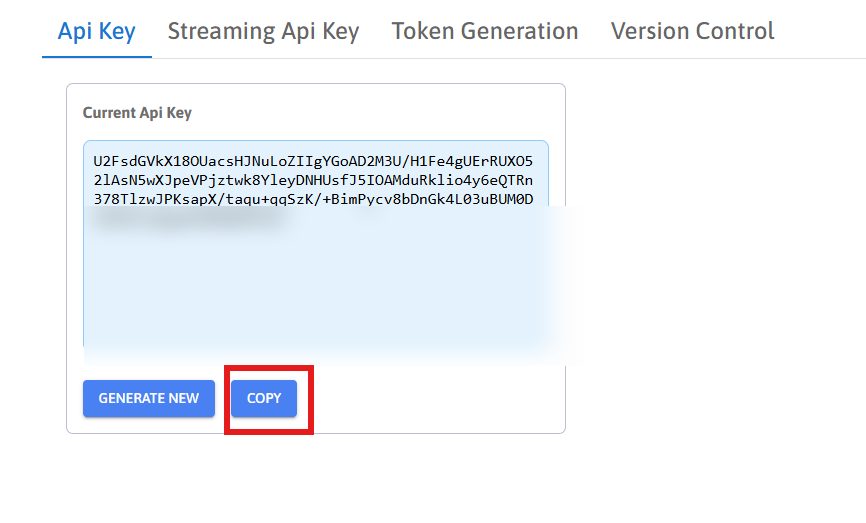
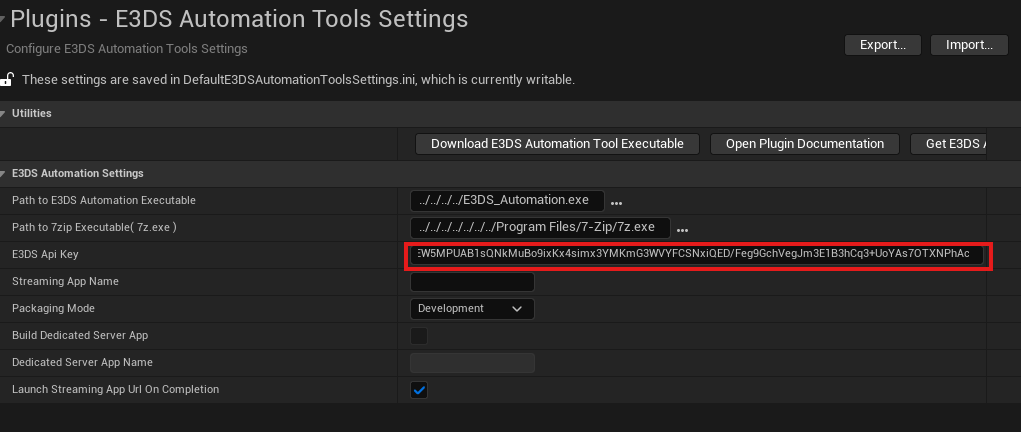
(iii) Click on “Get E3DS API Key” (Figure 12), copy the generated API key (Figure 13), and paste it into the API Key field (Figure 14).
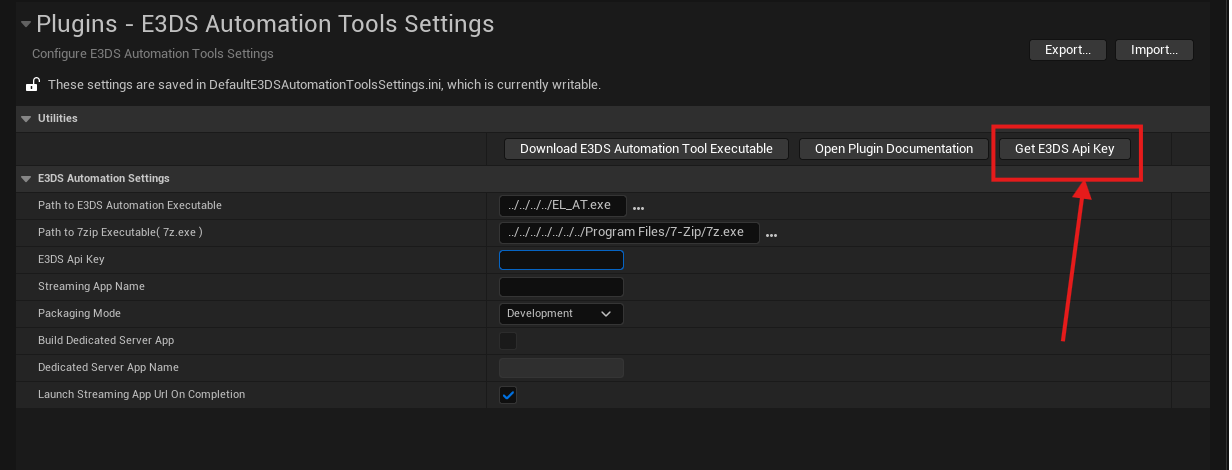
If you are not logged in, please log in first.
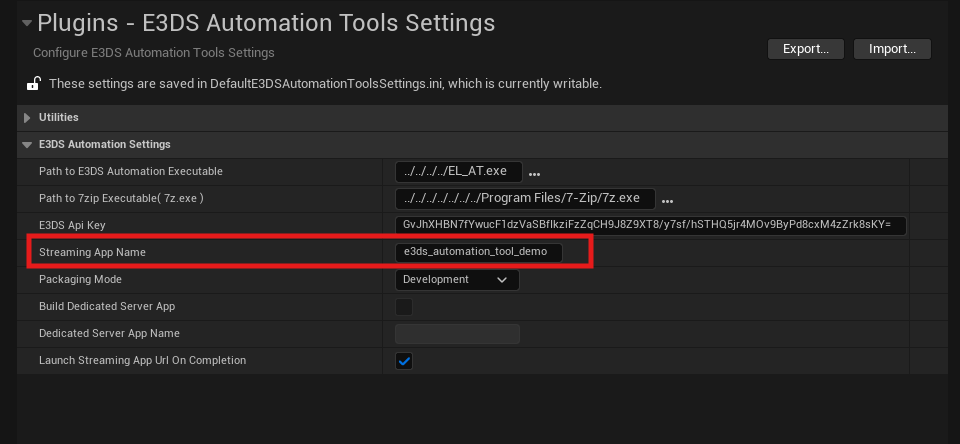
(iv) Give Your E3DS Streaming App Name
Use only letters and numbers (Don’t use dots or spaces )
If you upload using a name that has been previously used, it will create a new version of that application.
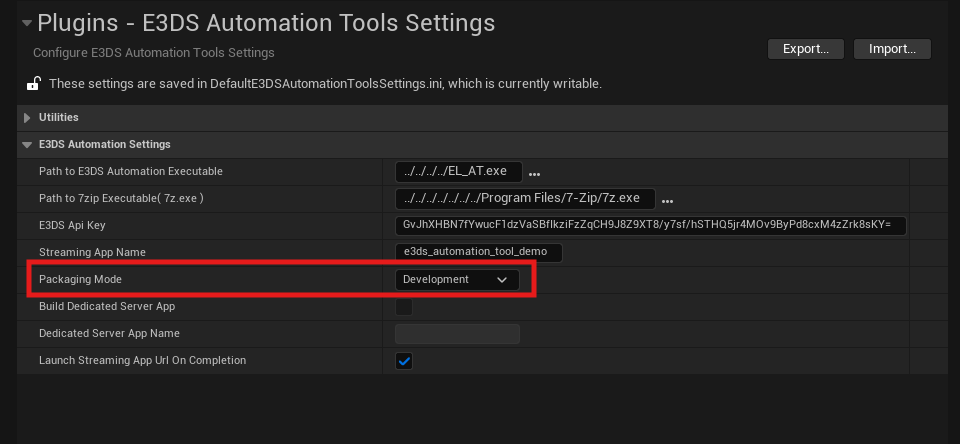
(v) Choose Packaging Mode
There are two types of packaging mode : Development mode and Shipping mode. In development mode the packaging is slower and you can see the “Output logs” while packaging it. On the other hand in shipping mode the packaging is faster but you can’t see the “Output logs” while packaging it.
Do not check the “Build Dedicated Server App” option, it is used for multiplayer apps. For more information about dedicated server builds, please refer to this documentation:
Upload the Multiplayer Project from Unreal Editor Using E3DS Automation Tools Plugin
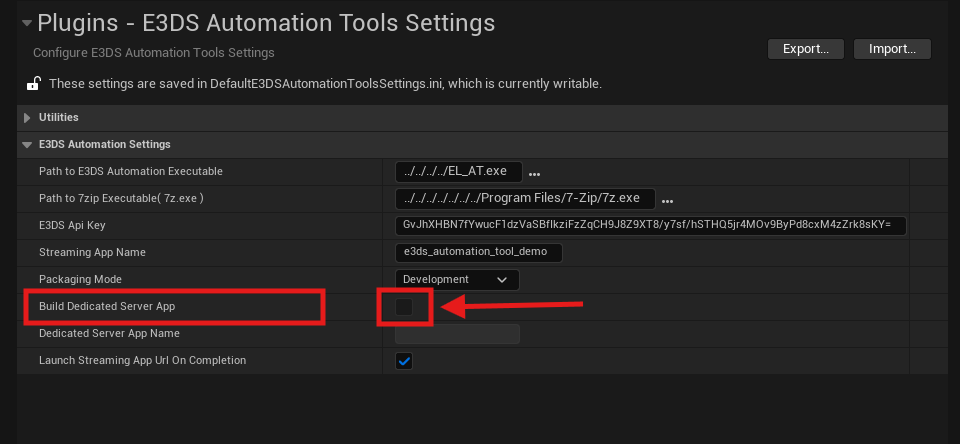
By default, the "Build Dedicated Server App" option is disabled if you downloaded Unreal Engine from the Epic Games Launcher. However, it is enabled by default in the Epic Games GitHub version or the E3DS custom version.
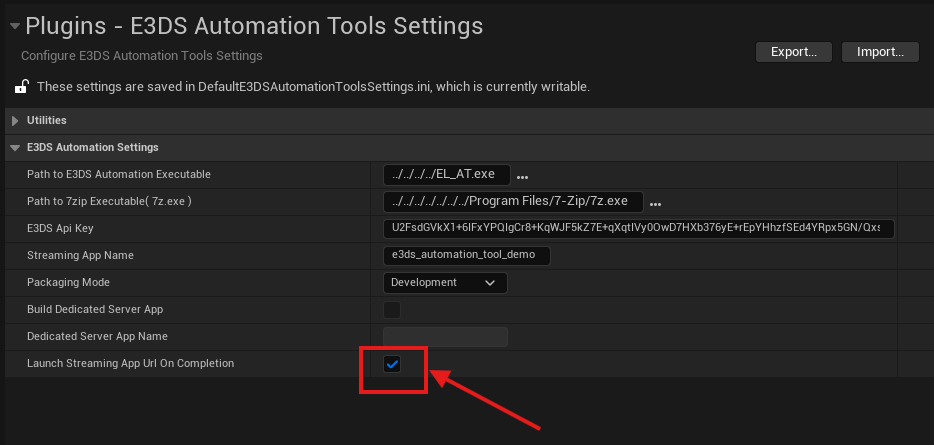
(vi) Enable the 'Launch Streaming App URL on Completion' option to automatically launch streaming in your browser as soon as the upload completes.
Step 7. Launch your project.
Before deploying to the cloud using the E3DS Automation Tools Plugin, it is recommended to manually package the project at least once. This allows you to identify and resolve any potential errors by reviewing the logs. Refer to the following guide for manual packaging: Packaging the Project
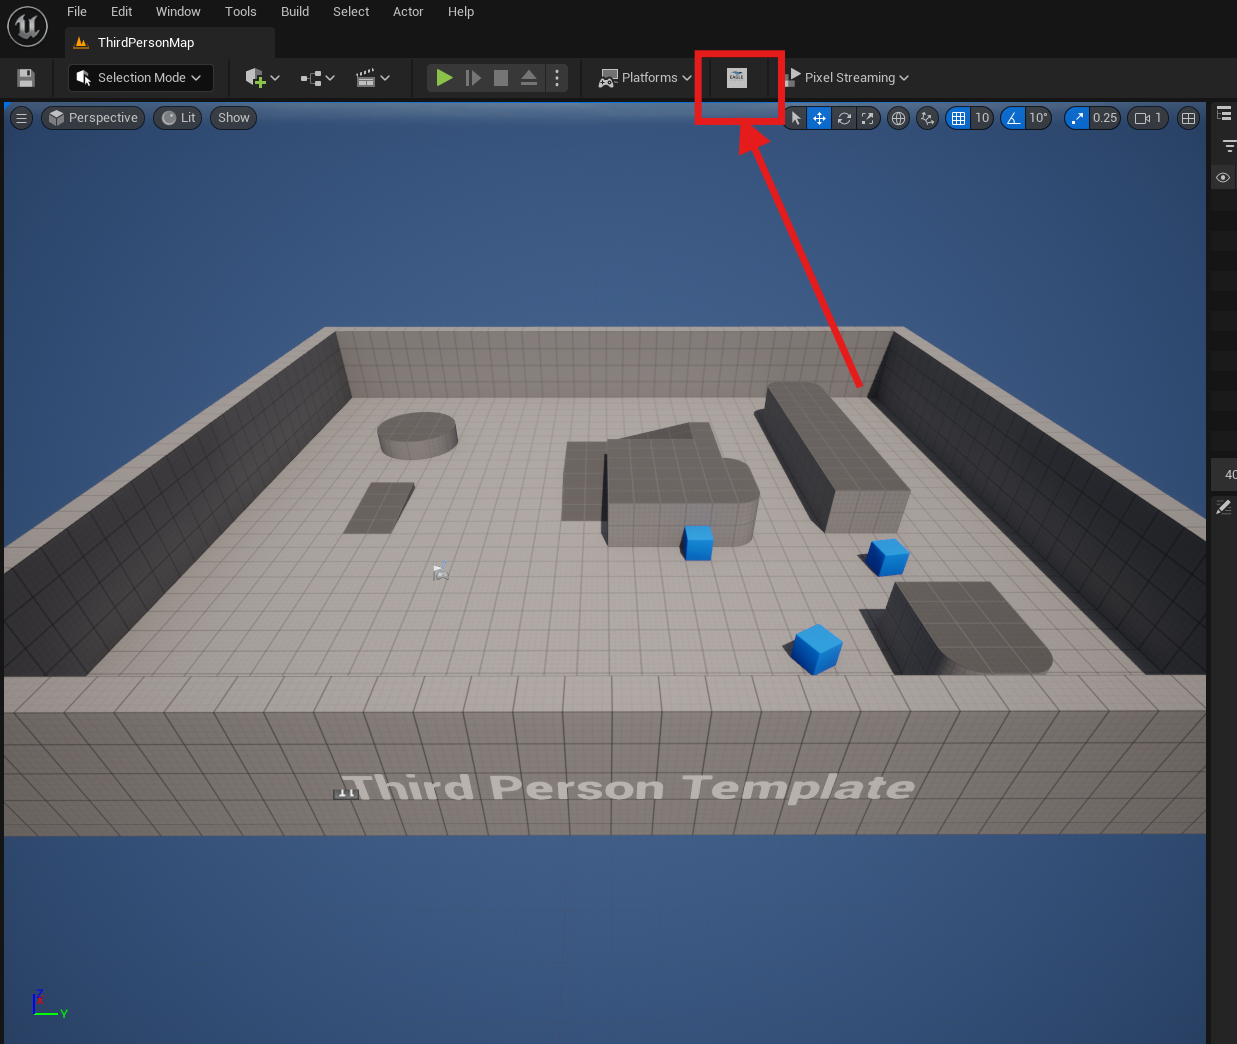
Select Launch E3DS Automation Tool to push the project to cloud (Figure 19)
If you have installed the E3DS Automation Tools Plugin from the Fab Marketplace, please note the following:
If there are any unsaved changes in your project, such as:
-
Unsaved map changes
-
Unsaved blueprint changes
-
Newly imported assets that have not been saved
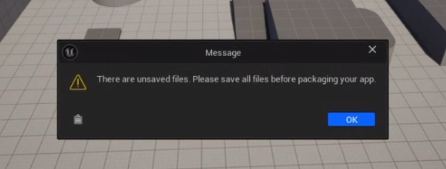
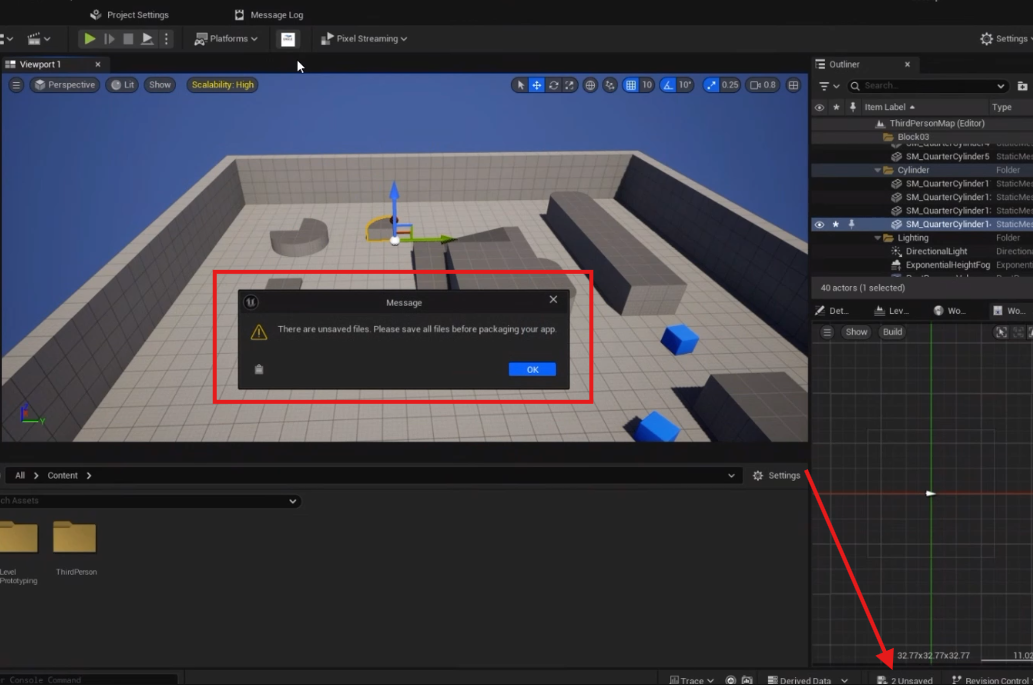
a popup message will appear (see Figure 20 and Figure 21).
When this popup appears, click OK or close the popup, then save all unsaved items before launching the E3DS Automation Tool to push your project to the cloud.
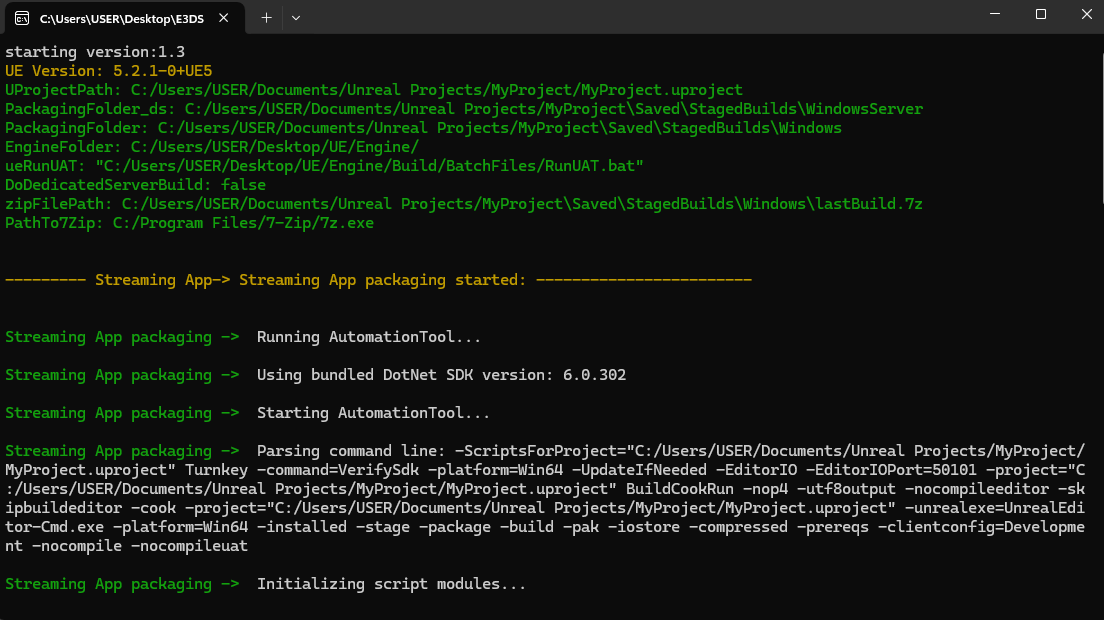
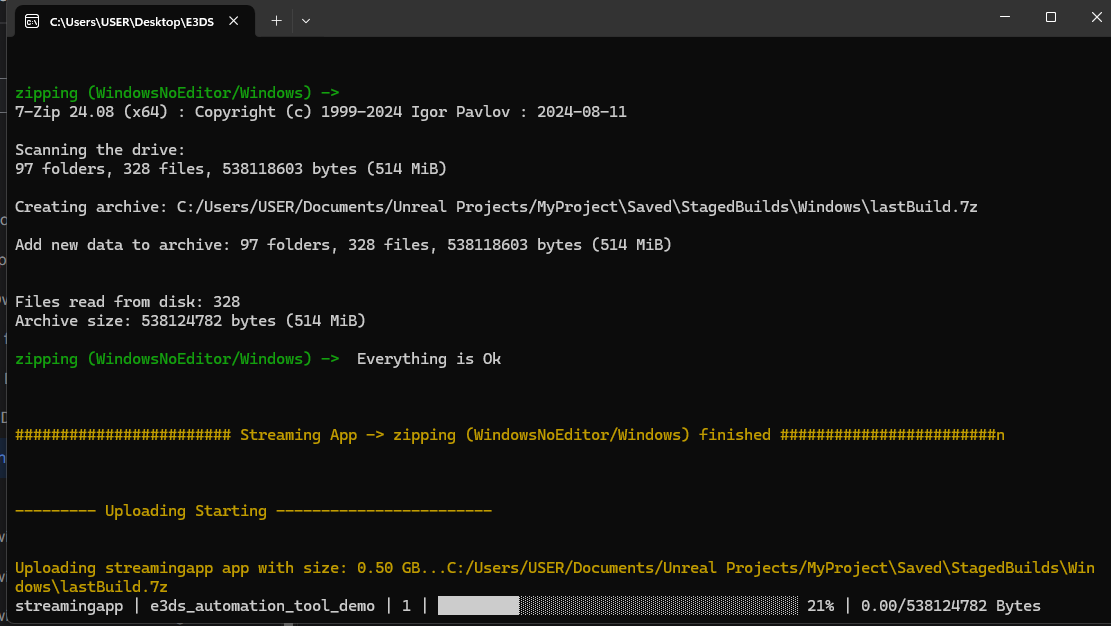
After clicking Launch E3DS Automation Tool you will see a command prompt (Figure 20). Wait a moment and then you will see the message in the command prompt indicating the app is uploaded (Figure 22)
If packaging fails, it might be because of :
-
Insufficient available storage space on the disk where the selected packaged folder is located
-
Incorrectly configured project settings
-
Visual Studio not being properly configured with Unreal Engine
To ensure everything works correctly, please try packaging the project manually at least once.
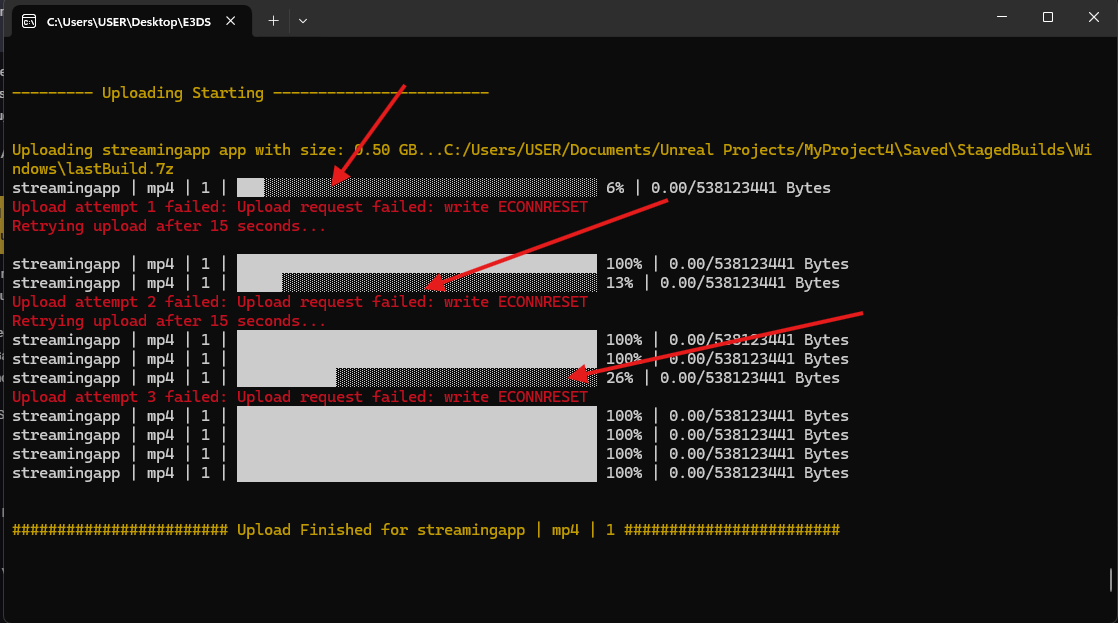
The upload process may be interrupted due to a sudden loss of internet connection or very poor internet speed. However, there's no need to worry, the upload will automatically resume as soon as a stable internet connection is restored.

If you enabled the 'Launch Streaming App URL on Completion' option, the streaming session will automatically launch in your browser.
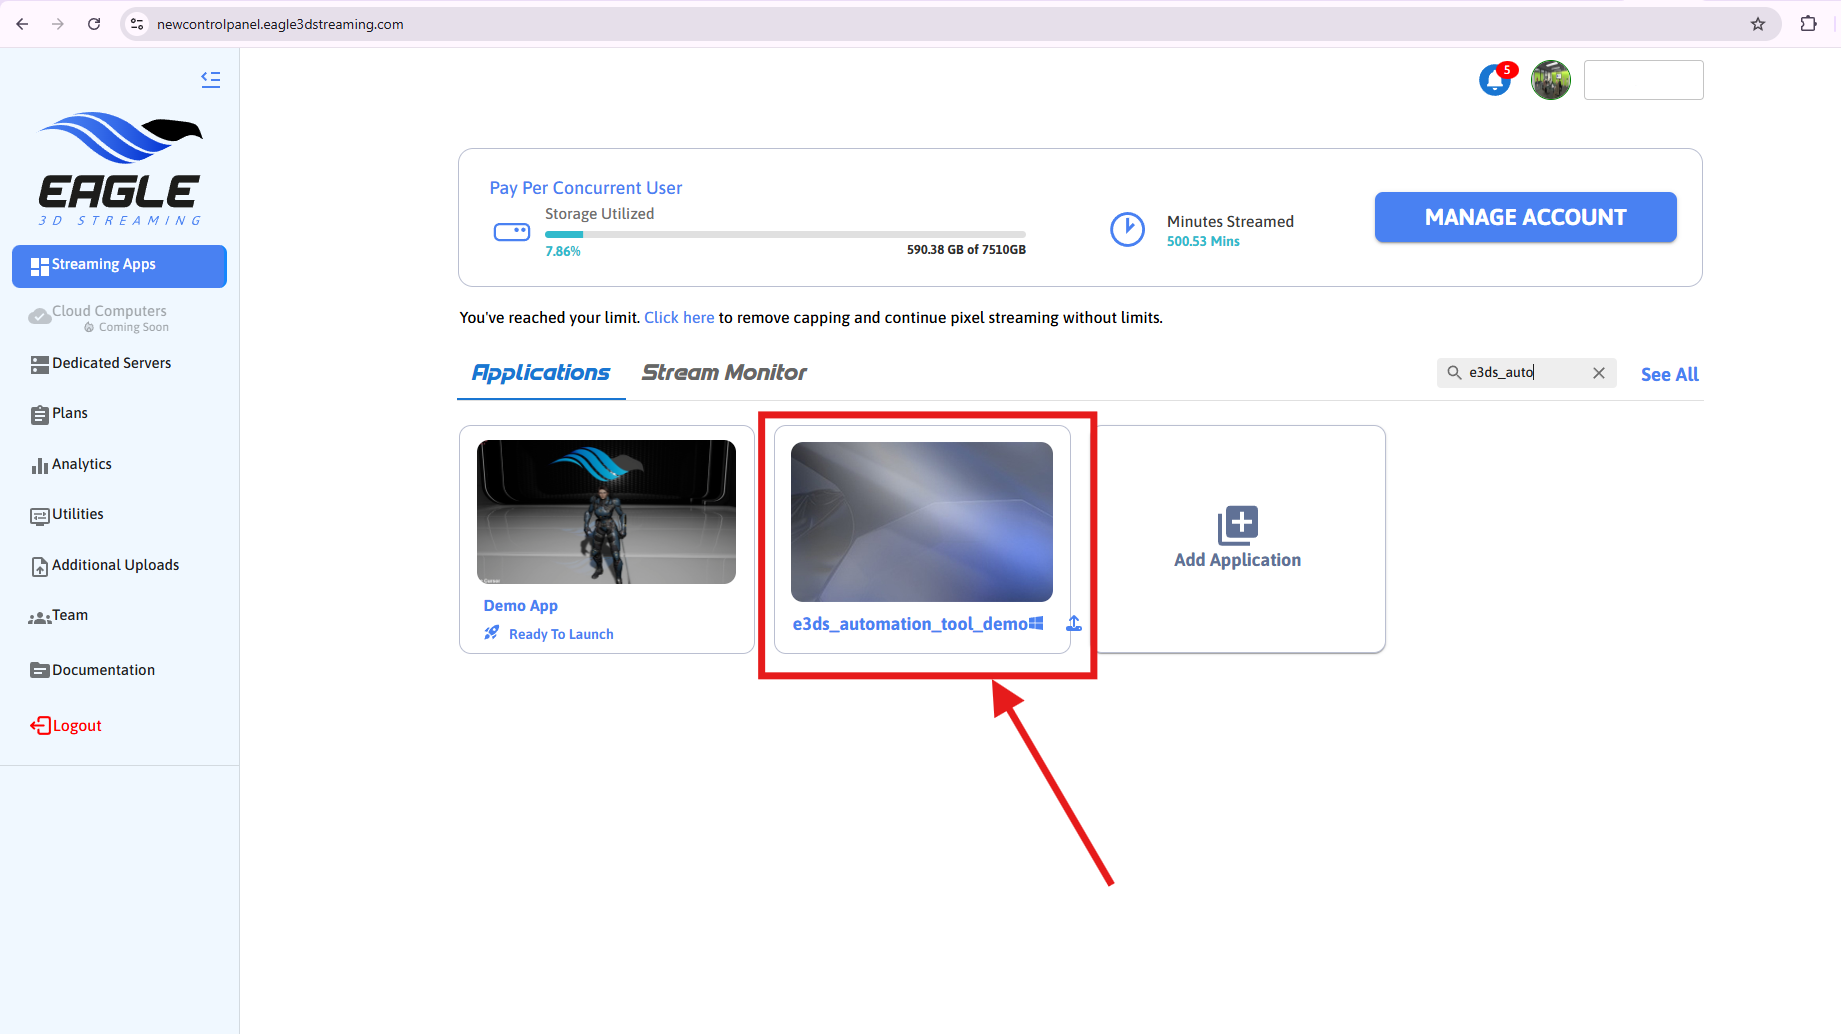
Step 8. Now come to Control Panel and you will see your uploaded app.
If the project is failed to upload, then you should try Package the Project Manually Section to package your the project, then upload it.
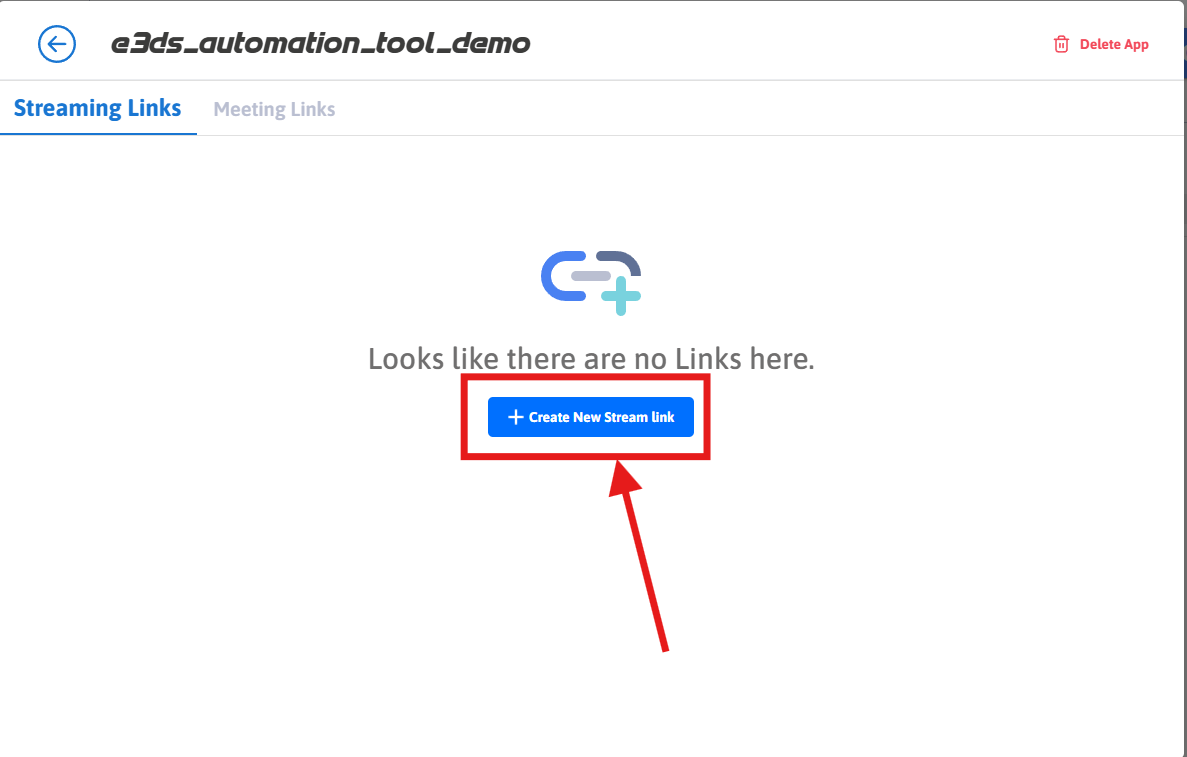
Step 9. Click Create New Stream link.
Step 10. Click Play App.
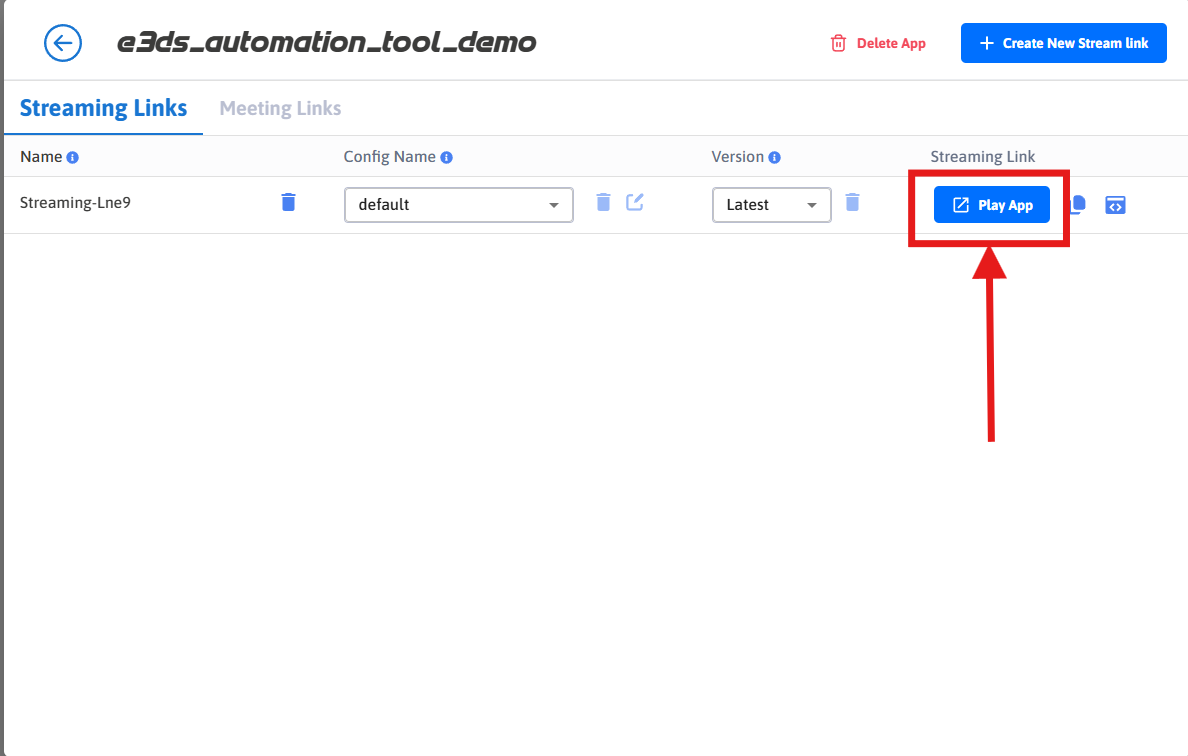
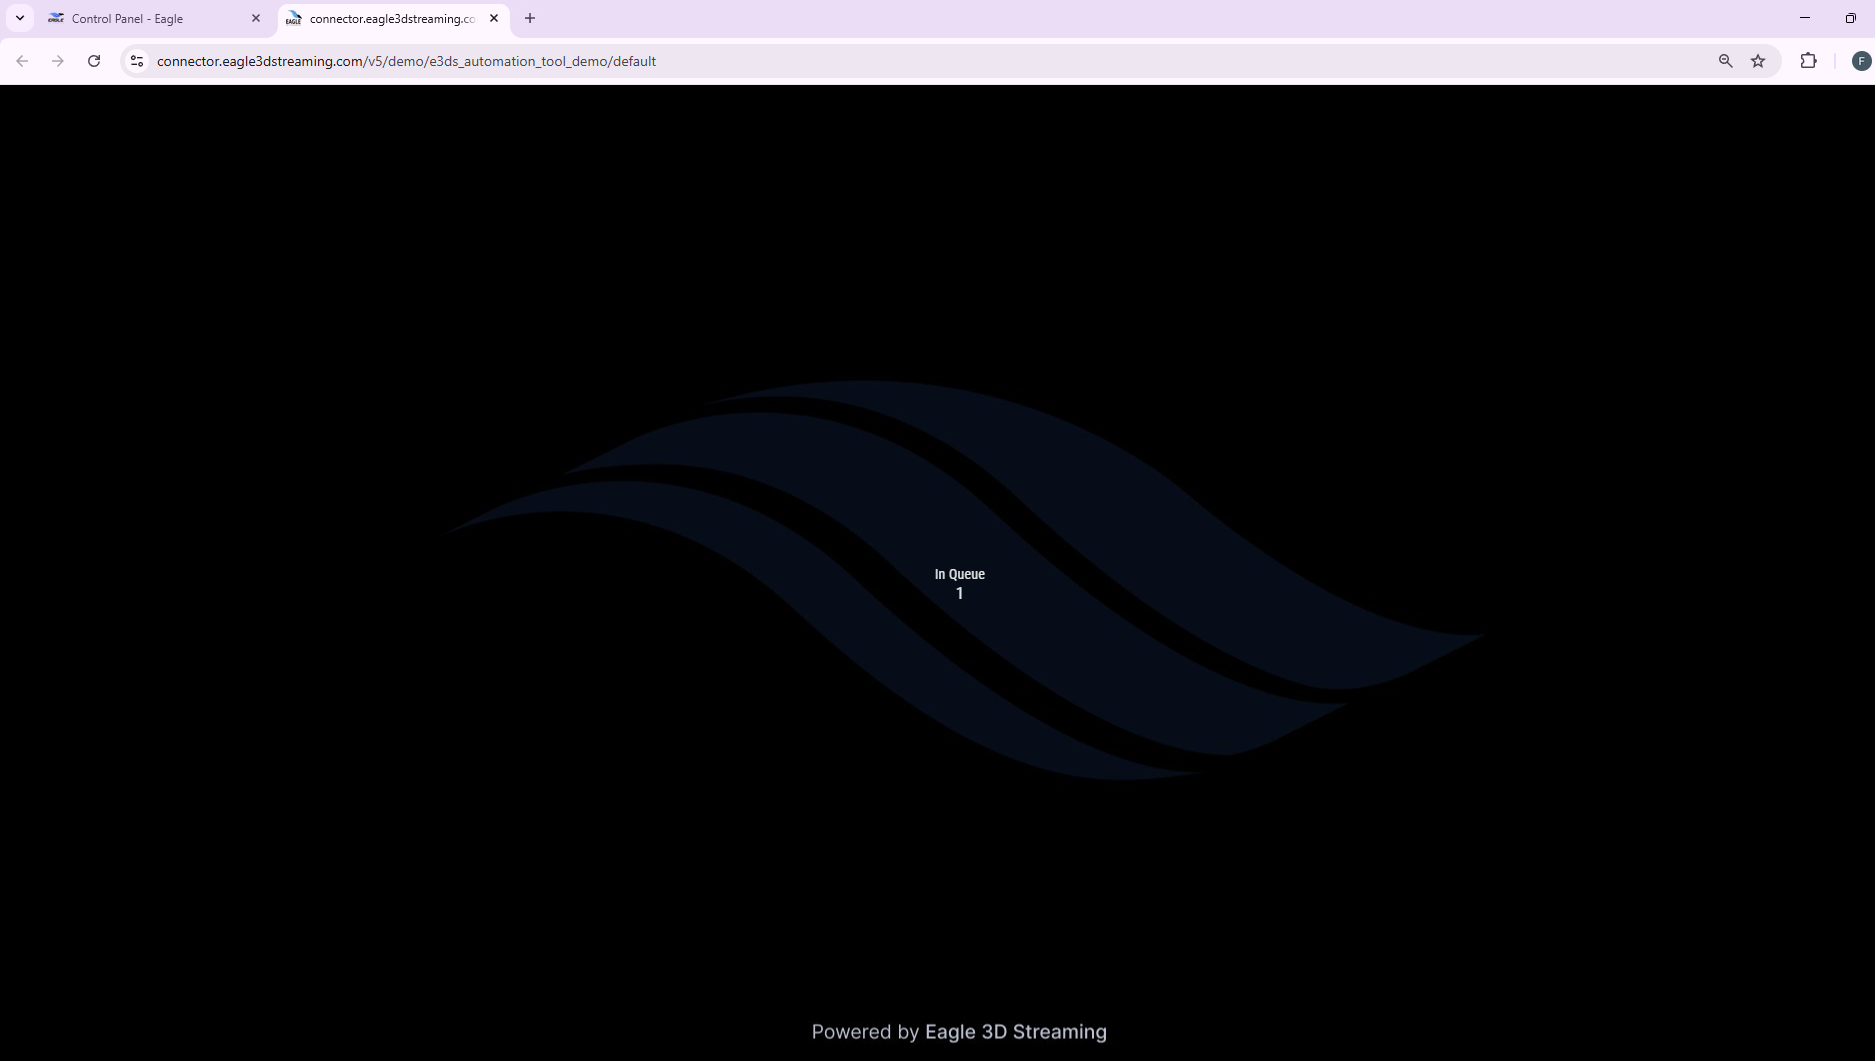
Step 11. Wait for a machine to be allocated.
If the app is stuck in a queue then check this documentation
Step 12. Press Play button.
If play button is not showing, please refer to this documentation
If you want to learn about all the phases after accessing your streaming URL, please refers to this documentation
Step 13. Now you can see the app is streaming.
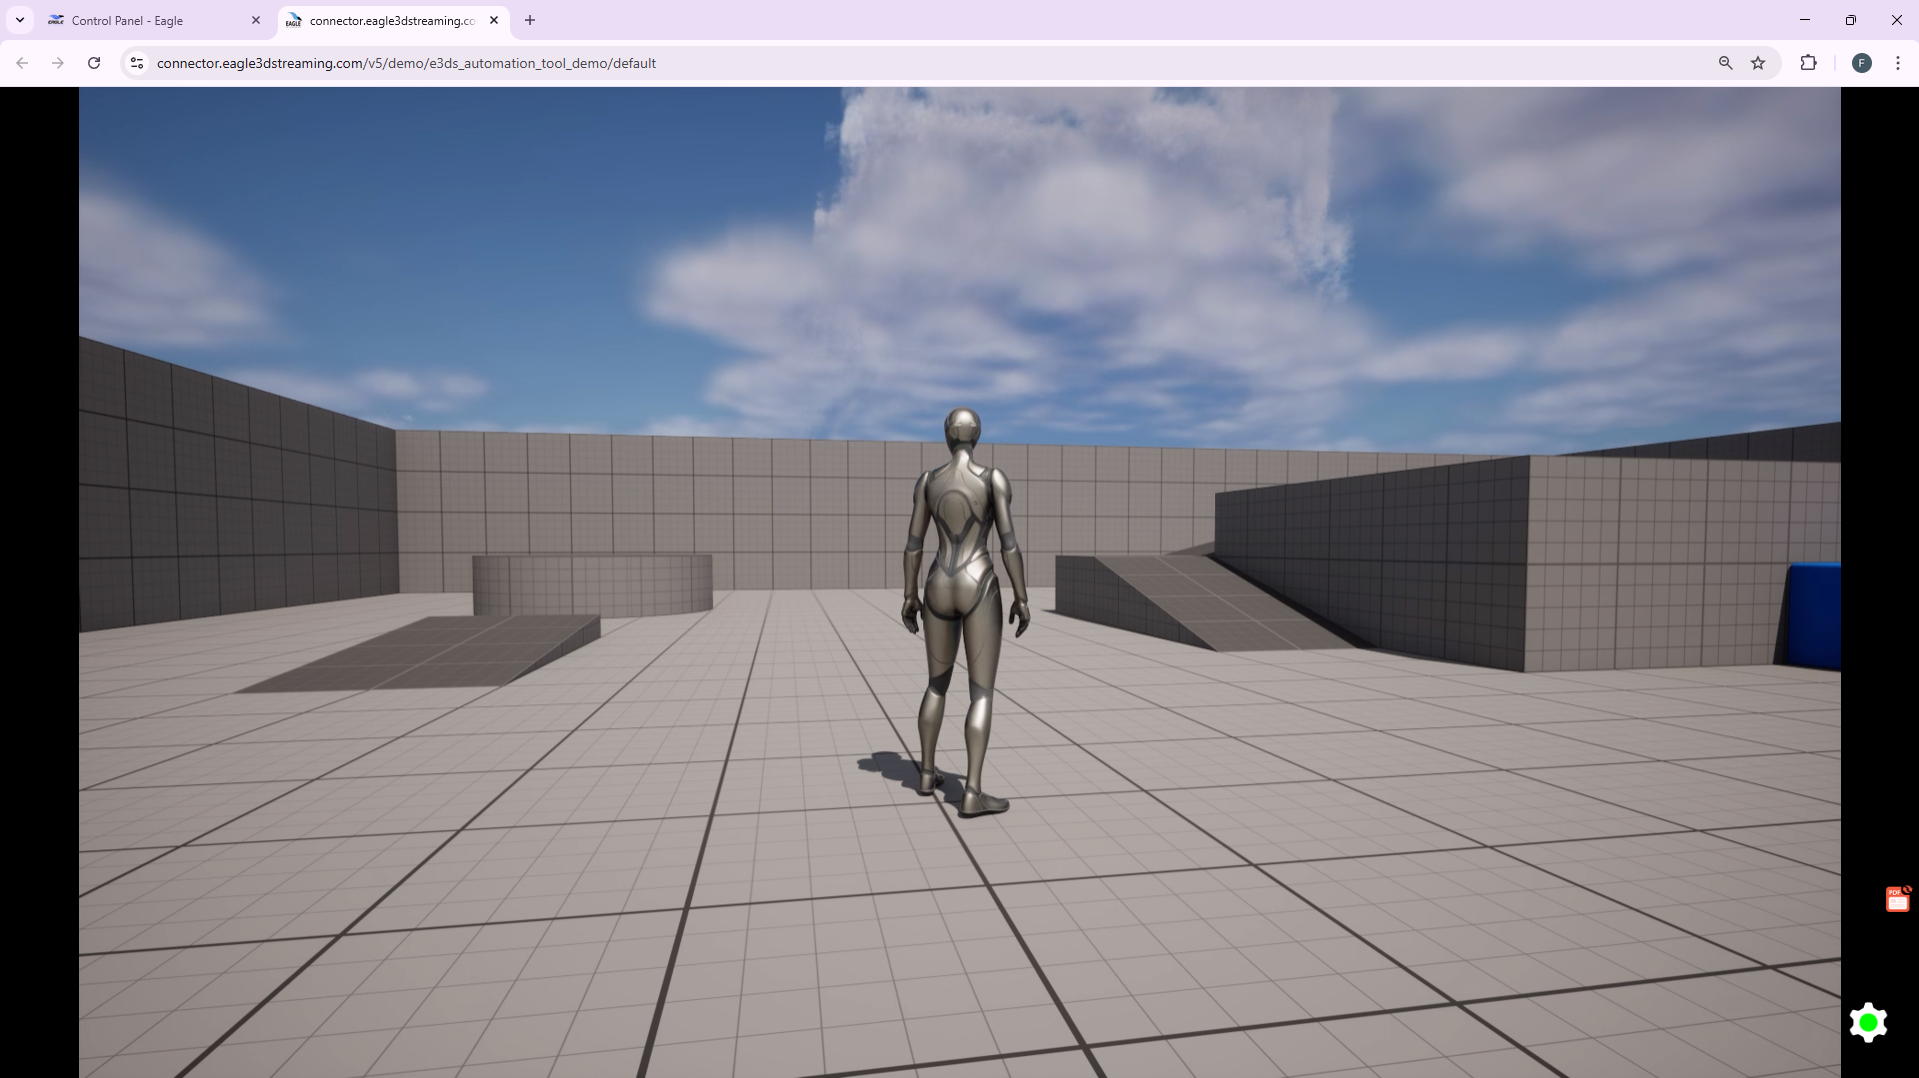
You can view our streaming demo app, uploaded using the E3DS Automation Tools Plugin, at the following URL:
https://connector.eagle3dstreaming.com/v5/demo/e3ds_automation_tool_demo/default
Congratulations! You have streamed your own app successfully.
You can stream your app from mobile browser. For this check this document
Need help?
If you need any assistance, feel free to reach out through any of the following channels:
-
🛠️ Support Portal: Contact Our Support Team
-
💬 Discord Community (Faster Support): Join Our Discord Community
-
📧 Email Support: support@eagle3dstreaming.com
Follow us on: