This guide explains how to manually control the Pixel Streaming video quality using the Eagle 3D Streaming SDK.
Live Streaming URL:
https://e3ds.github.io/pixelstreaming-sdk/e3ds_streaming_FE.html
Demo Project GitHub Repository:
Follow the steps below:
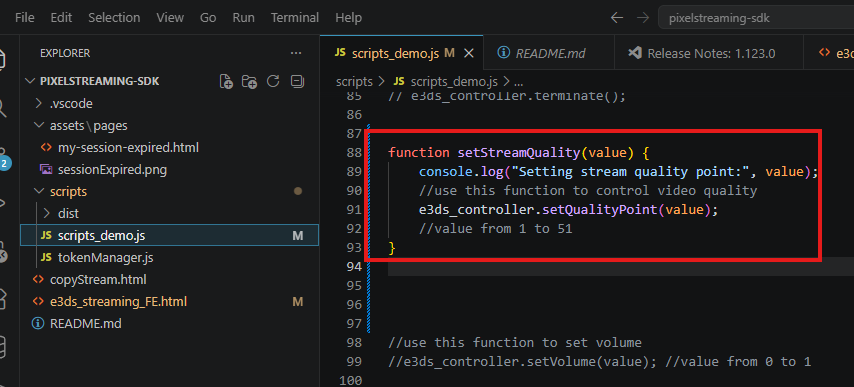
Step 1. Add the Quality Control Function
Add the following function inside your scripts_demo.js file:
function setStreamQuality(value) {
    console.log("Setting stream quality point:", value);

    e3ds_controller.setQualityPoint(value);
}
Explanation
|
Code |
Meaning |
|---|---|
|
|
Creates a function to change stream quality. |
|
|
The quality point value. Accepted range is |
|
|
Prints the selected quality value in the browser console for testing. |
|
|
Sends the selected quality point to the SDK. |
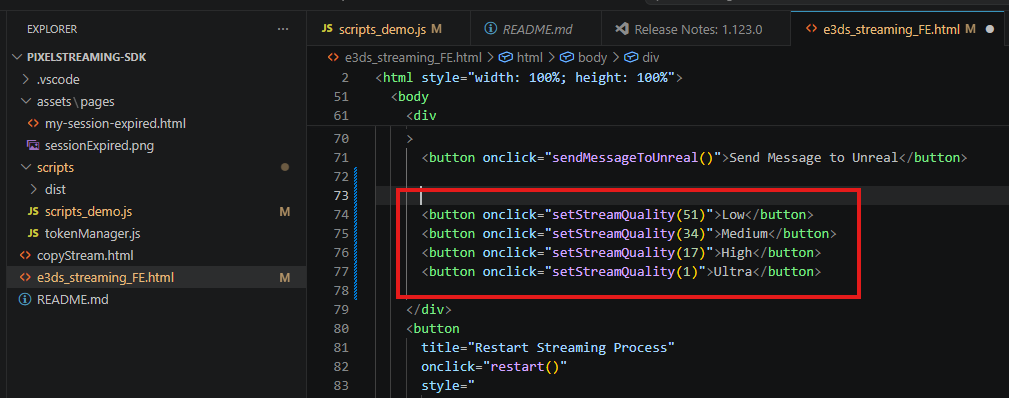
Step 2. Add Quality Buttons in the HTML Page
Add the following buttons in your HTML page:
<button onclick="setStreamQuality(51)">Low</button>
<button onclick="setStreamQuality(34)">Medium</button>
<button onclick="setStreamQuality(17)">High</button>
<button onclick="setStreamQuality(1)">Ultra</button>
Explanation
|
Button |
Value |
Meaning |
|---|---|---|
|
Low |
|
Lowest quality, better for low bandwidth users. |
|
Medium |
|
Balanced quality and performance. |
|
High |
|
Better visual quality. |
|
Ultra |
|
Highest quality. Requires strong network and hardware. |
Step 3. Test the Quality Change
After adding the function and buttons:
-
Run your SDK webpage.
-
Wait until the stream is fully connected.
-
Click any quality button.
-
Check whether the stream quality changes.
You can also open the browser console and check the log:
Setting stream quality point: 17
This confirms that the quality value is being passed from the frontend.
Live Streaming URL:
https://e3ds.github.io/pixelstreaming-sdk/e3ds_streaming_FE.html
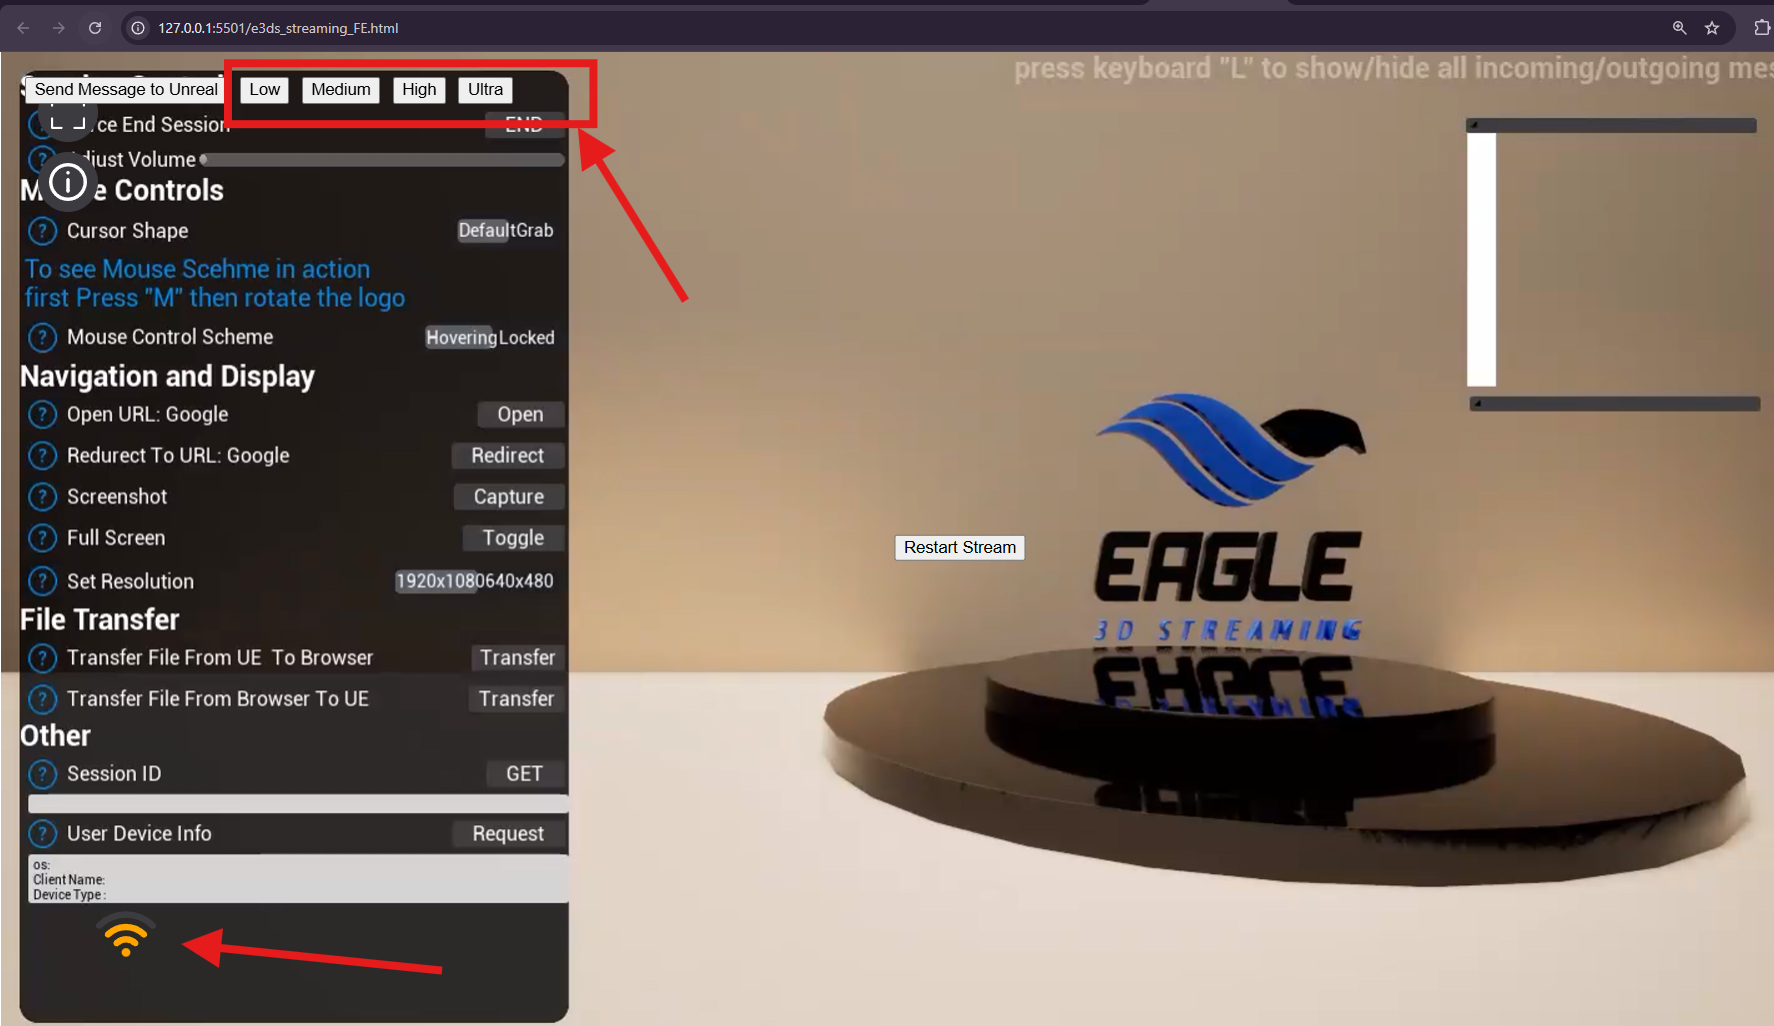
You can also verify the selected quality from the network indicator button (Figure 3) shown on the stream.
|
Selected Quality |
Quality Value |
Network Indicator Color |
|---|---|---|
|
Low |
|
Red |
|
Medium |
|
Yellow |
|
High |
|
Green |
|
Ultra |
|
Dark green |
Important
Accepted quality values:
1 to 51
Lower value means higher quality:
Lower value → Higher quality
Higher value → Lower quality
So:
1 = Best quality
51 = Lowest quality
Recommendations
|
Use Case |
Recommended Quality |
|---|---|
|
Public internet users |
Medium or High |
|
Enterprise / client demos |
High |
|
Internal / LAN usage |
High or Ultra |
|
Detected network instability |
Low or Medium |
|
Low bandwidth users |
Low or Medium |
|
Performance optimization |
Medium or High |
Troubleshooting
|
Issue |
Possible Cause |
Solution |
|---|---|---|
|
Quality button does nothing |
Function name mismatch between HTML button and JavaScript function |
Make sure the button calls the correct function name: |
|
|
The function is not added in |
Add the function in |
|
|
SDK is not loaded yet |
Make sure the SDK is loaded before calling |
|
Quality change is not noticeable |
The difference may be small depending on scene, bitrate, or network condition |
Test with a big difference, such as |
|
Stream becomes laggy after selecting Ultra |
Network or device may not handle very high quality |
Use High, Medium, or Low instead |
|
Video looks blurry |
Quality value may be too high, which means lower quality |
Use a lower value such as |
Need help?
If you need any assistance, feel free to reach out through any of the following channels:
🛠️ Support Portal: Contact Our Support Team
💬 Discord Community (Faster Support): Join Our Discord Community
📧 Email Support: support@eagle3dstreaming.com
Follow us on: