
In this guide, you will learn how to receive and handle data sent from a webpage inside your Unreal Engine (UE) application using Eagle 3D Streaming SDK.
Follow the steps below:
Step 1. Enable Pixel Streaming Plugin
Open your Unreal Engine project and enable the Pixel Streaming plugin.
Refer to the guide How to Enable Pixel Streaming Plugin
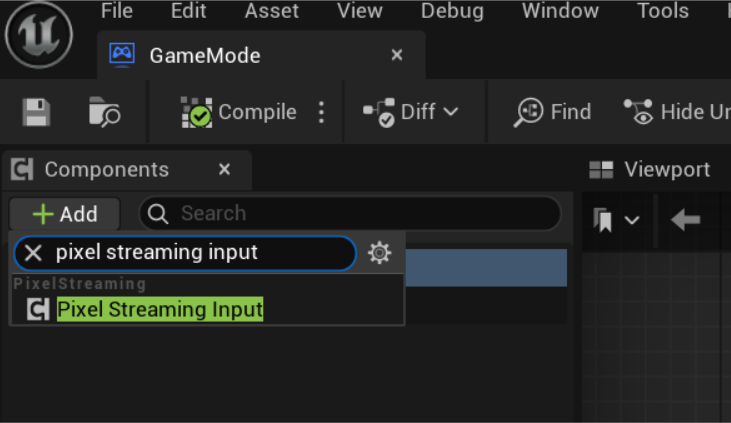
Step 2. Add the Pixel Streaming Input Component
Once the plugin is enabled, add the Pixel Streaming Input component to any Actor Blueprint.
Best Practice: For better organization and scalability, add this component to your GameMode Blueprint, or create a dedicated messaging handler Actor that exists in every level.
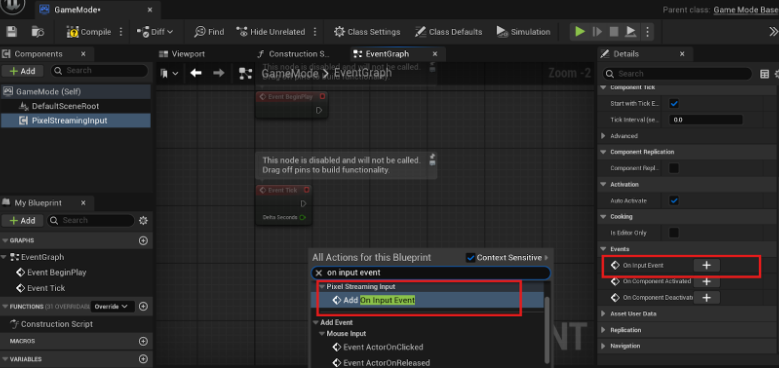
Step 3. Use the "On Input Event"
After adding the Pixel Streaming Input component, a new event becomes available: On Input Event.
You can use it by:
-
Selecting the Pixel Streaming Input component and finding the event under the Details Panel,
or -
Right-clicking in the Blueprint Event Graph and searching for "On Input Event"
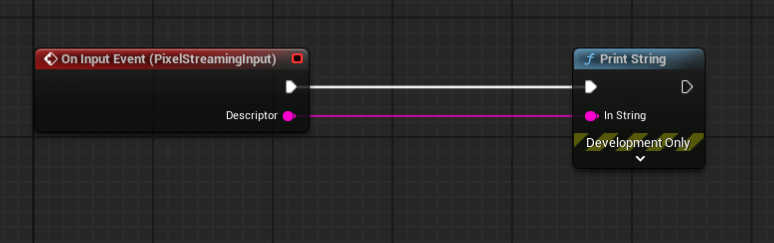
Step 4. Handle and Parse Incoming Messages
The On Input Event is triggered when a message is received from the frontend.
The event passes a string containing the message, which you can parse to trigger actions in UE.
In the below you can get multiple examples on how you can handle and parse incoming messages.
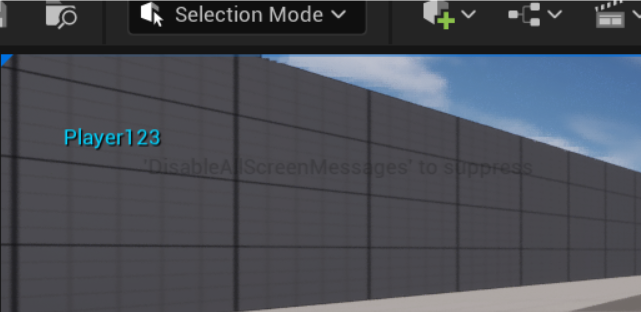
Example 1: Debugging with Print String
Use case: Display incoming messages for debugging.
Frontend sends:
{
  "Player123"
}
In UE:
-
Use Print String to display the incoming message.
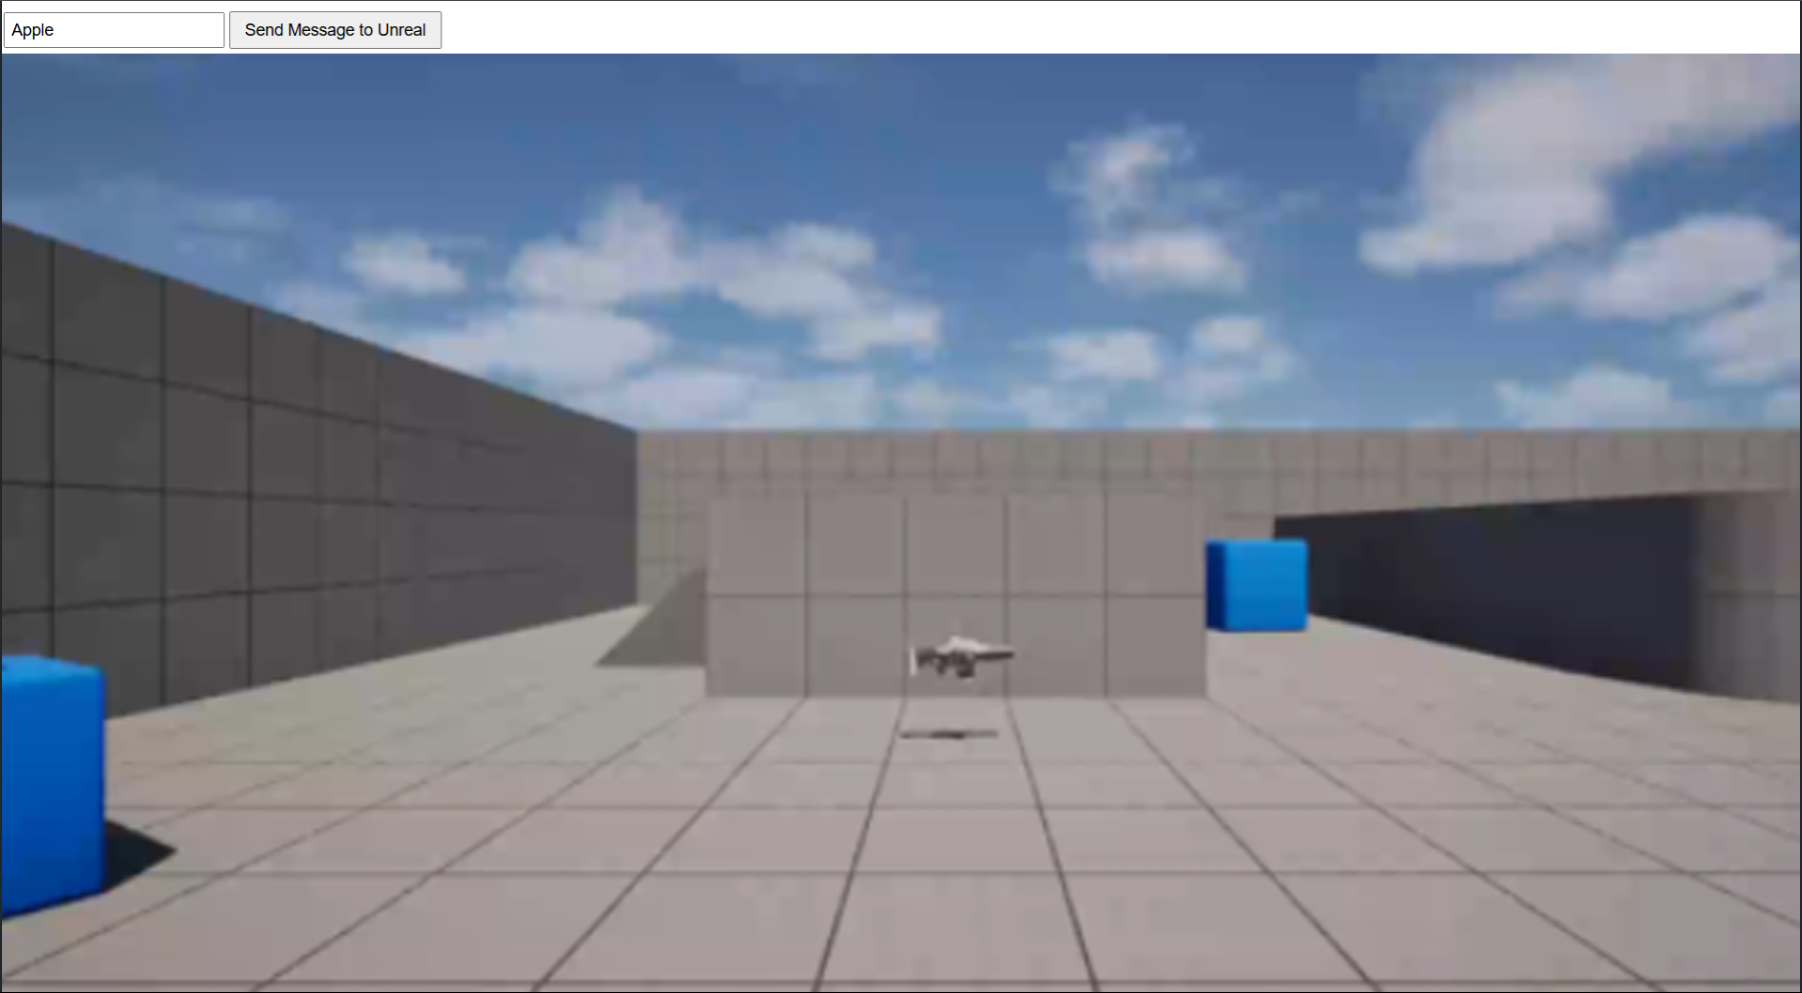
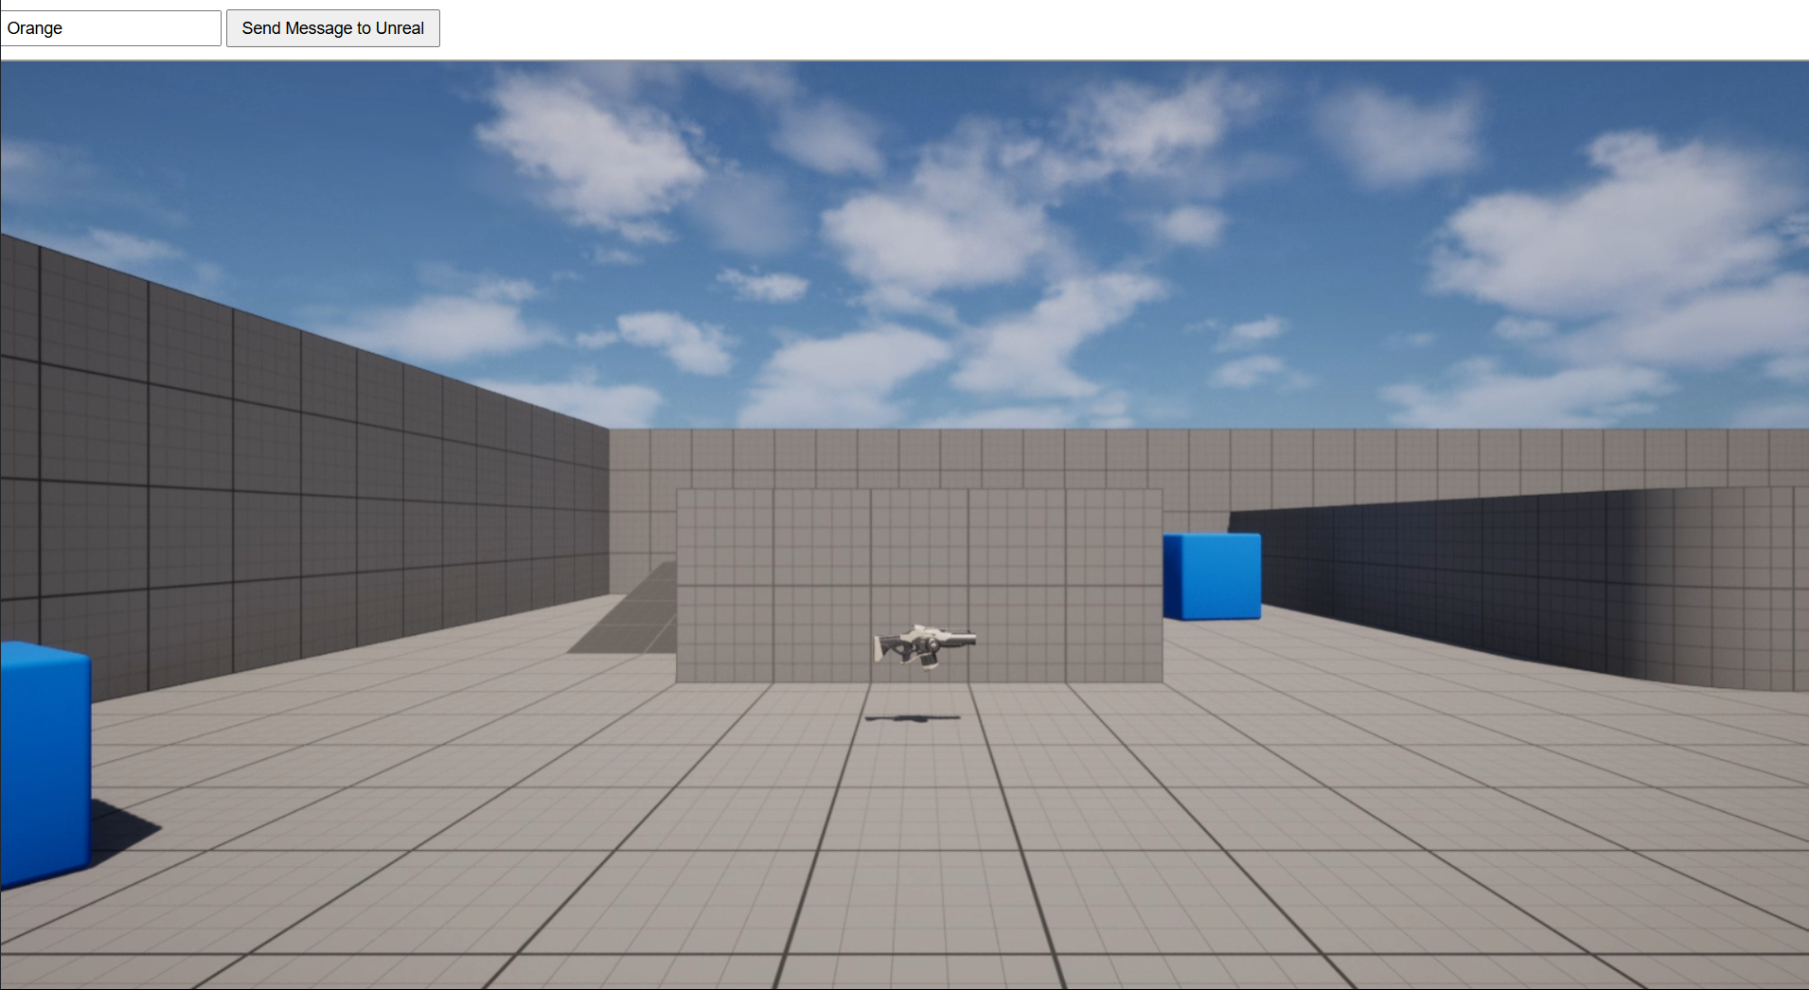
Example 2: Adjusting Stream Quality
Use case: Change stream quality dynamically.
From the previous sample “player name” is replaced with any arbitrary name (e.g., "Orange" or "Apple"). After receiving the value from the JSON message, the following console command is executed to adjust stream quality: PixelStreaming.Encoder.TargetBitrate <value>
Frontend sends:
{ "Quality": "Apple" }
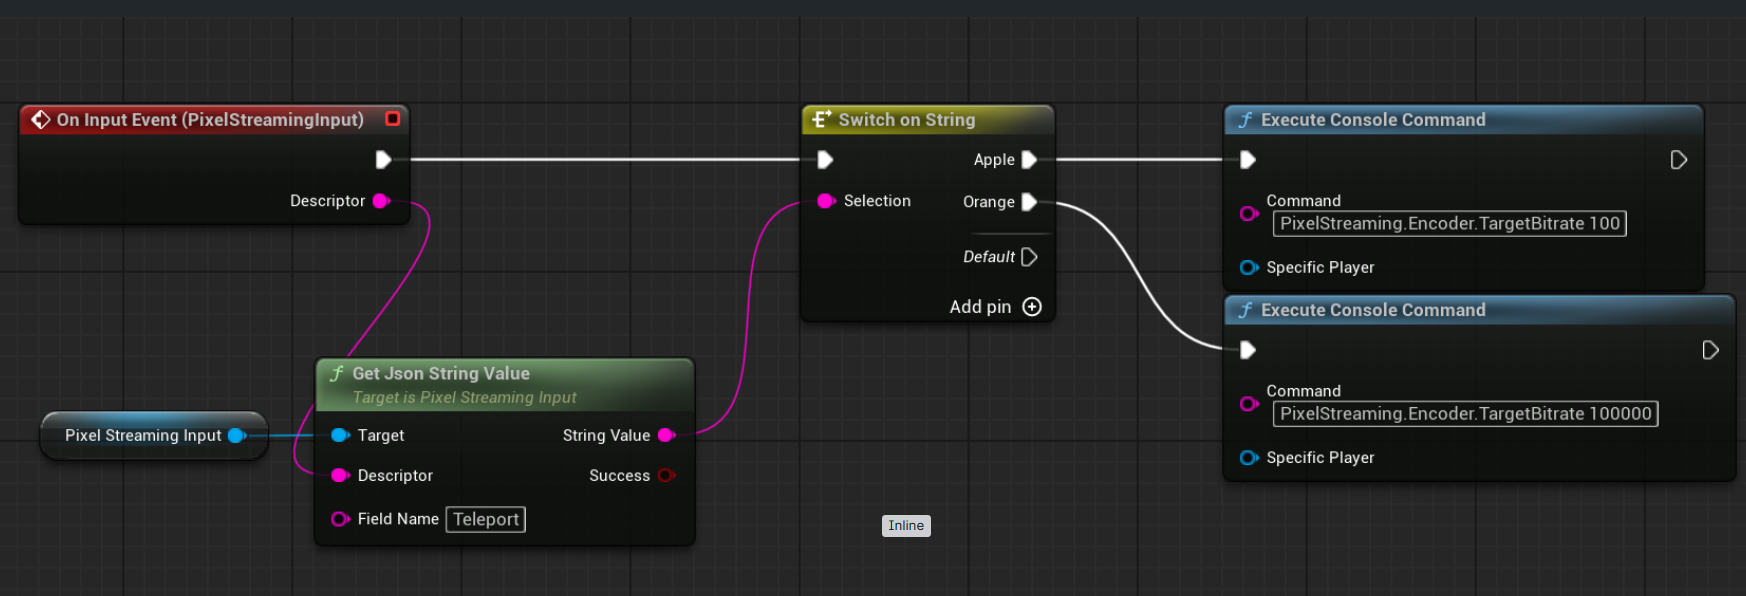
-
"Apple"→ bitrate = 100 (low quality) -
"Orange"→ bitrate = 100000 (high quality)
Example 3: Pause & Resume the Game
Use case: Temporarily halt gameplay for UI interactions.
Frontend sends:
{ "Teleport": "Pause" }
or
{ "Teleport": "Resume" }
-
"Pause"→ SetGamePaused = true -
"Resume"→ SetGamePaused = false
To Pause and Resume the game, in front end two buttons are made which send messages {“Teleport”:Pause”} and {“Teleport”:”Resume”} . When the buttons are pressed Built-in unreal engine node SetGamePaused with values true for pausing and false for resuming are called.
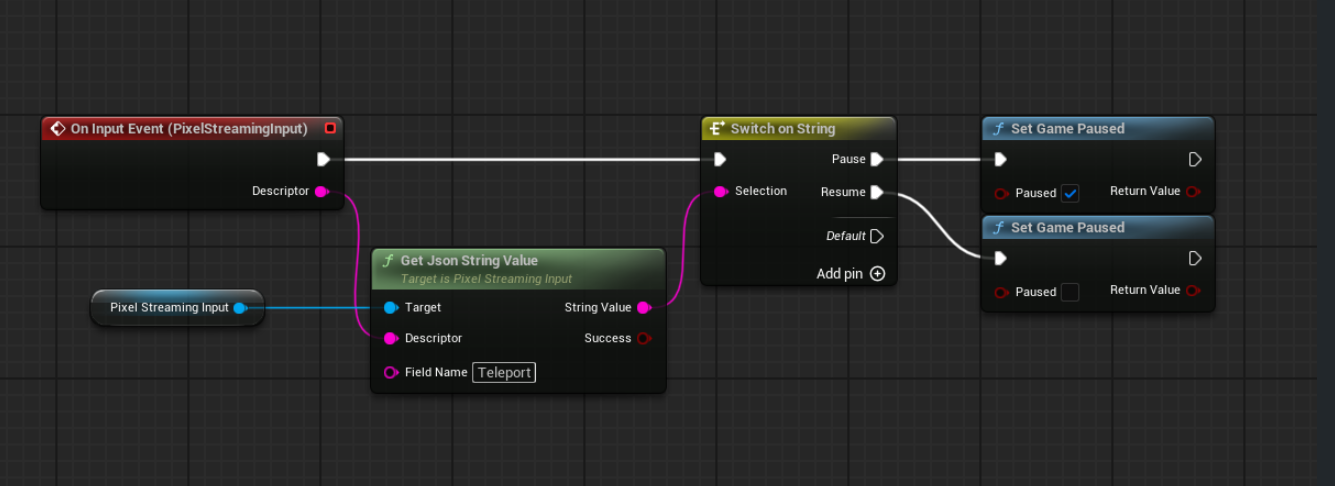
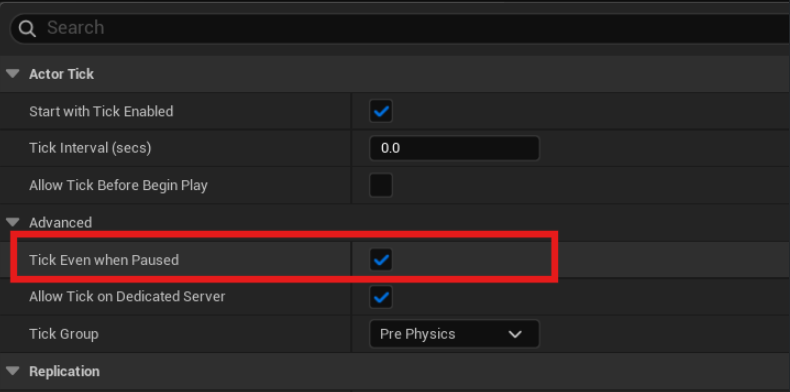
Important: Enable "Tick Even When Paused" in Class Defaults, otherwise the game may not respond when paused.
Video: When pressing the buttons game gets paused and Resumed.
Troubleshooting
If Unreal isn’t detecting messages:
1. Pixel Streaming Input Component
Ensure the component is added to the correct Blueprint.
2. Actor Presence
Ensure the Actor that owns the component is placed in the level and not being unloaded.
Note: If you're using a messaging handler Blueprint in the level, ensure it's not getting culled or deactivated due to distance from the camera or player.
3. Initialization Timing
Pixel streaming components may not be ready instantly at launch. Wait a short time before sending messages, especially during level load.
4. Component Validity
Check whether the component is valid:
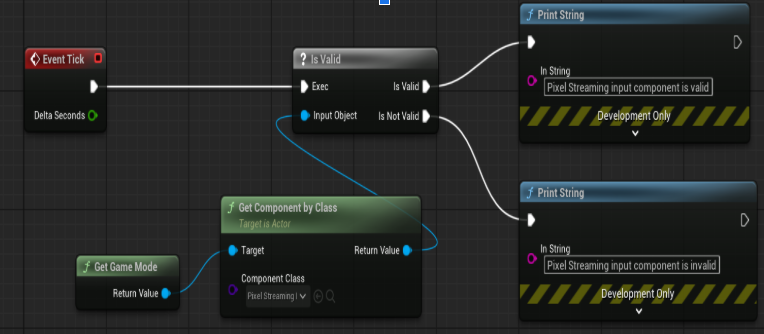
Use the Is Valid node : in the following sample pixel streaming input component is added to game mode, in a separate blueprint (can be any blueprint) we get a reference of game mode then get “pixel streaming input” component by class and check whether it is valid or not and print the results
(For debugging) Print the component’s name on Tick to ensure it's initialized.
Remove Tick prints after debugging to avoid performance issues.
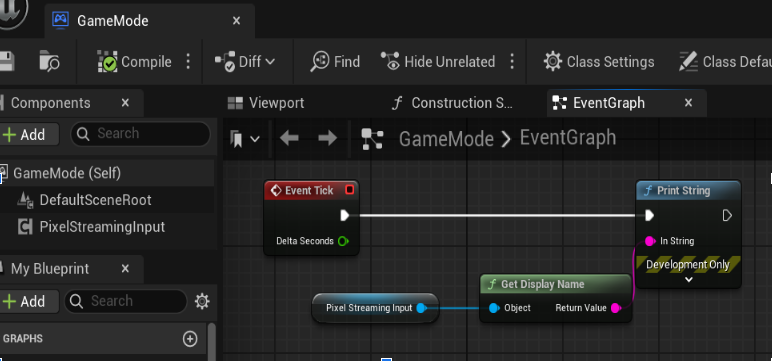
In this example we are simply printing the name of Pixel Streaming Input component on tick in game mode blueprint
When playing the game (play in editor or play a packaged game with packaging mode set to development or debug) you should see a similar print string happen on screen
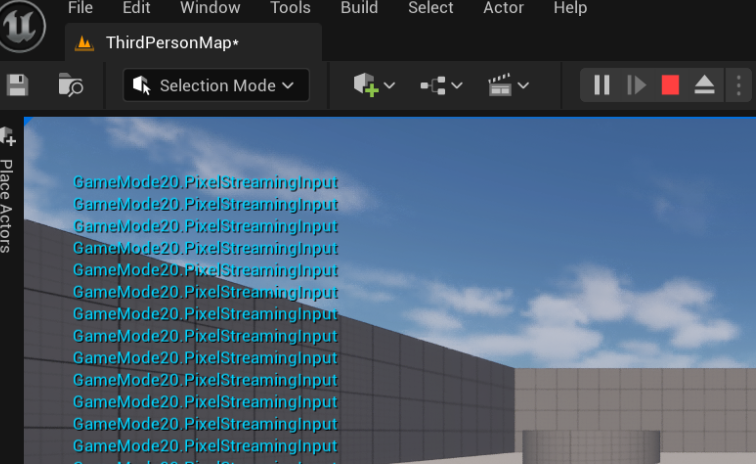
Absence of this string means your Pixel Streaming Input component is not available.(if you need to only see one line of text on screen, in print string node you can set the duration to 0.0 seconds)
Need help?
If you need any assistance, feel free to reach out through any of the following channels:
🛠️ Support Portal: Contact Our Support Team
💬 Discord Community (Faster Support): Join Our Discord Community
📧 Email Support: support@eagle3dstreaming.com
Follow us on: