
The Predefined Streaming Quality setting determines the default streaming quality that is applied whenever a new streaming session starts.
This setting only affects the initial quality of the stream. Users can still change the streaming quality at runtime
Important
Choosing a higher predefined quality (such as High or Ultra) requires more network bandwidth. If the user's internet connection is slow or unstable, selecting these quality levels may result in:
-
Noticeable frame drops
-
Lower FPS
-
Increased latency
-
Reduced overall streaming performance
For the best experience, choose a predefined quality that matches your users' typical network conditions. If your users may have varying internet speeds, Medium is generally the recommended default.
Follow the steps below:
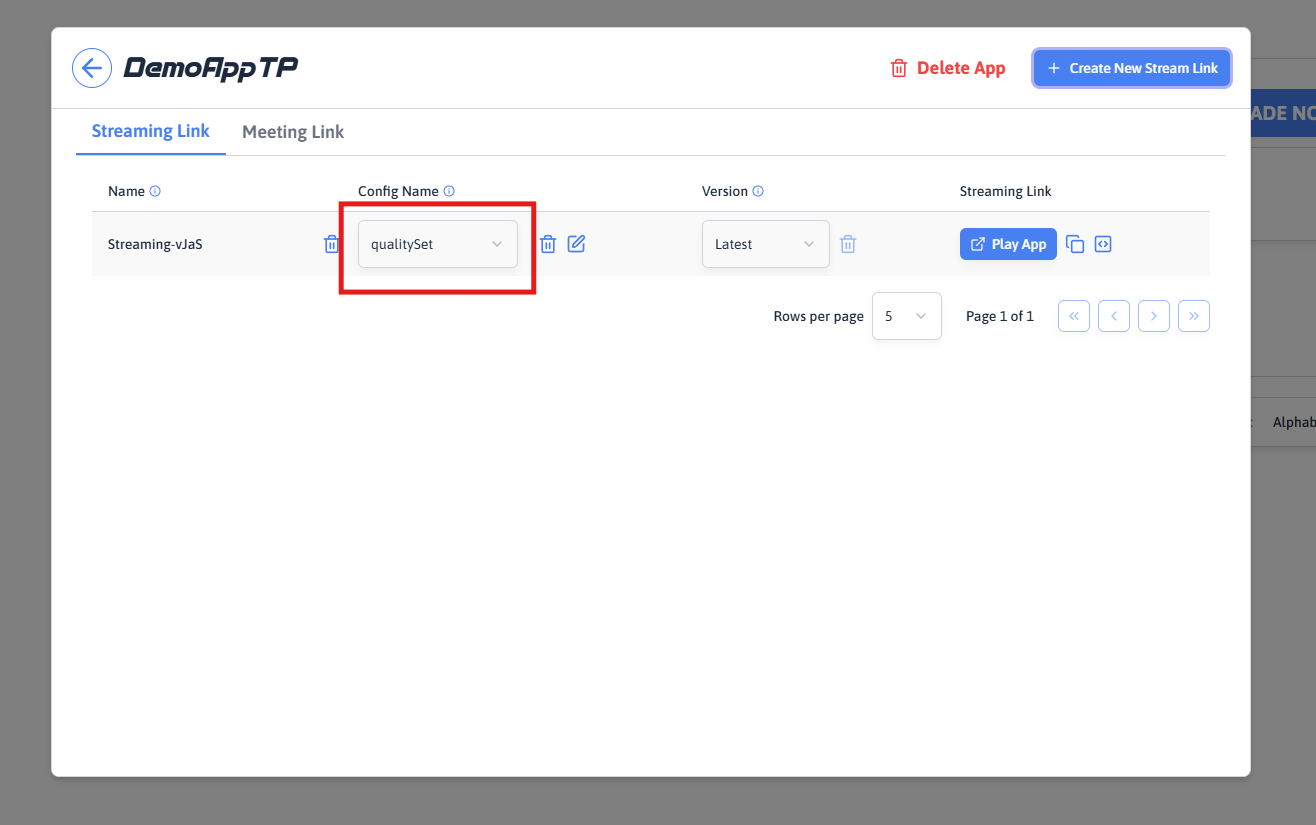
Step 1. Select Your Configuration
From the Control Panel, navigate to your application and select the configuration you want to modify.
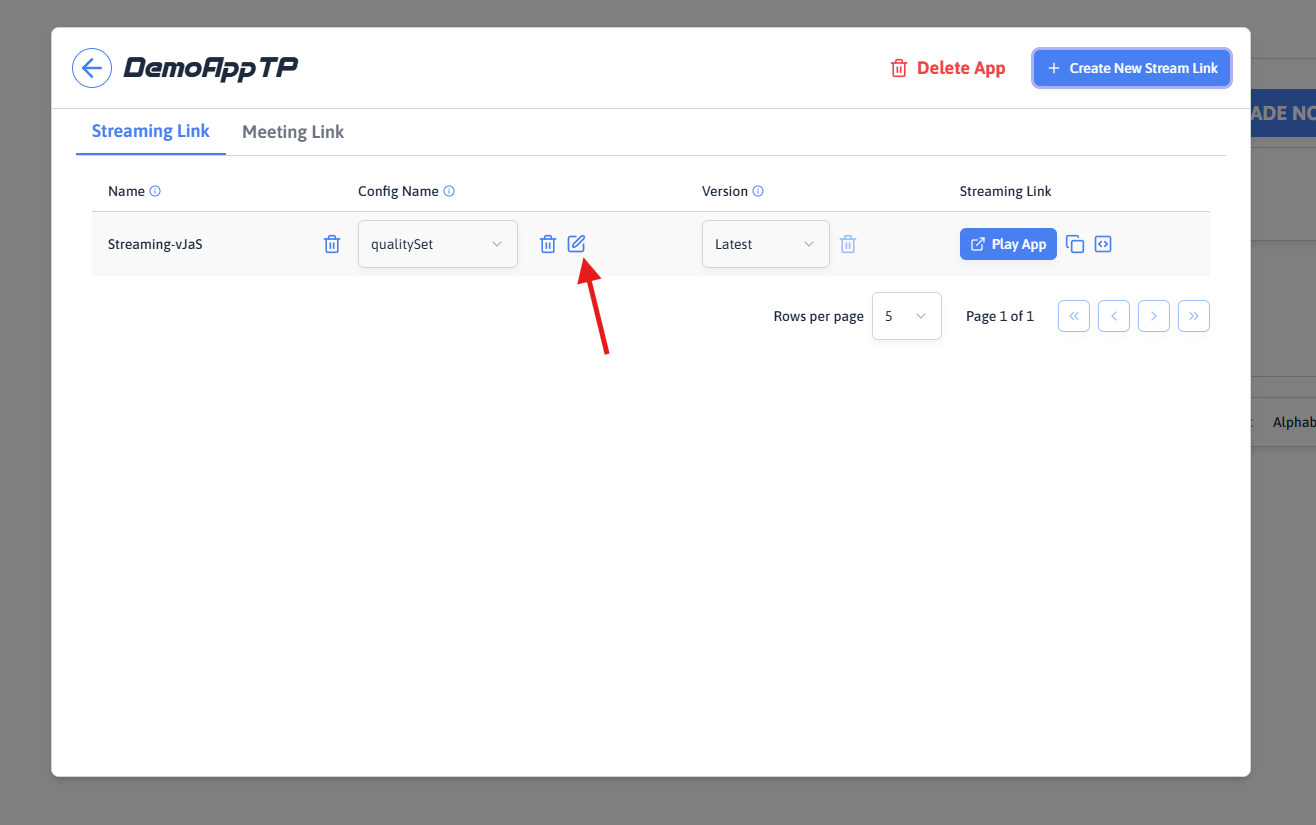
Step 2. Edit the Configuration
Click Edit Config to open the configuration settings.
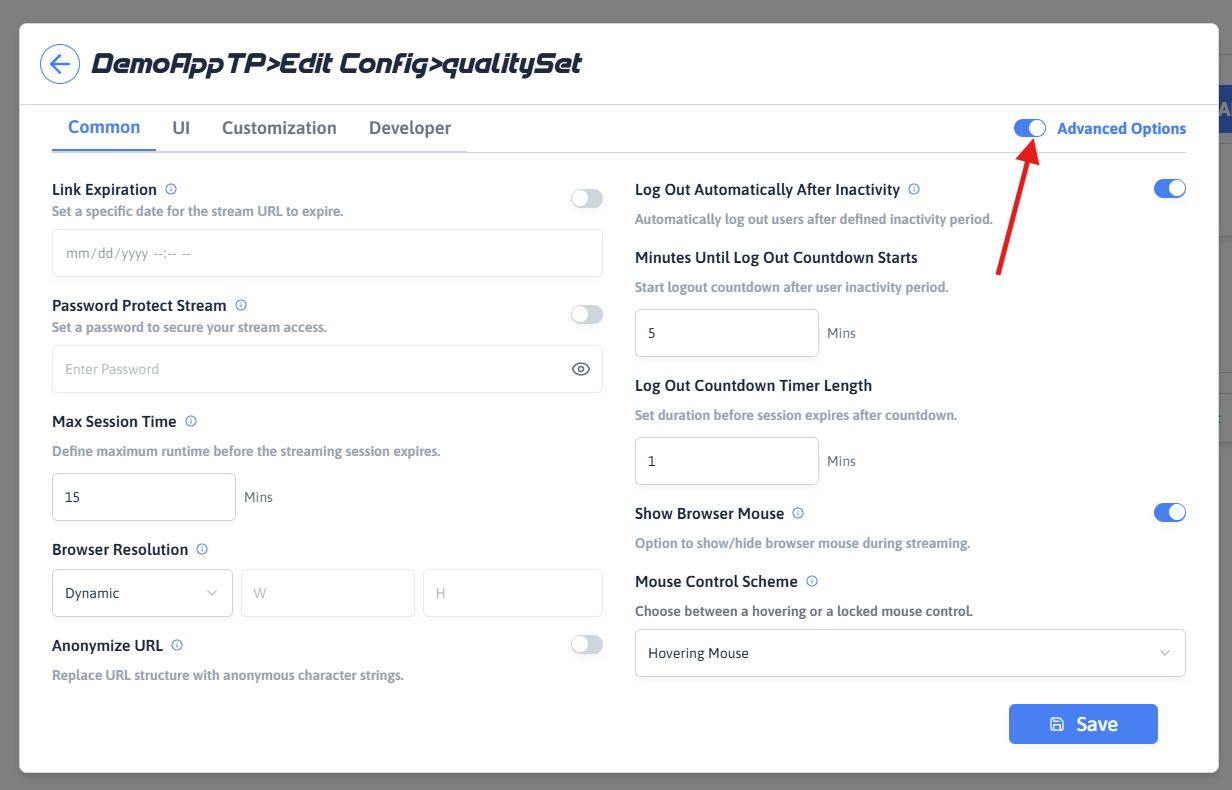
Step 3. Enable Advanced Options
Step 4. Navigate to the Developer tab
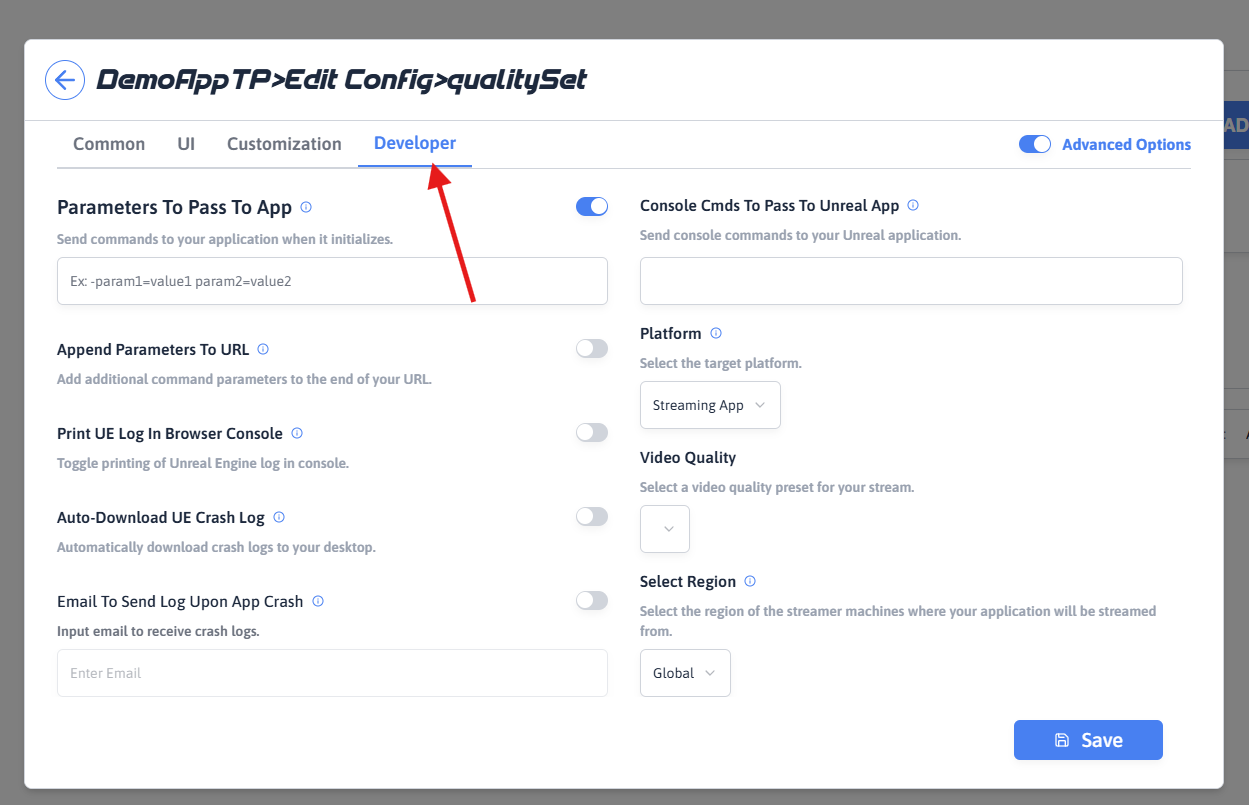
Step 5. Select the Predefined Quality
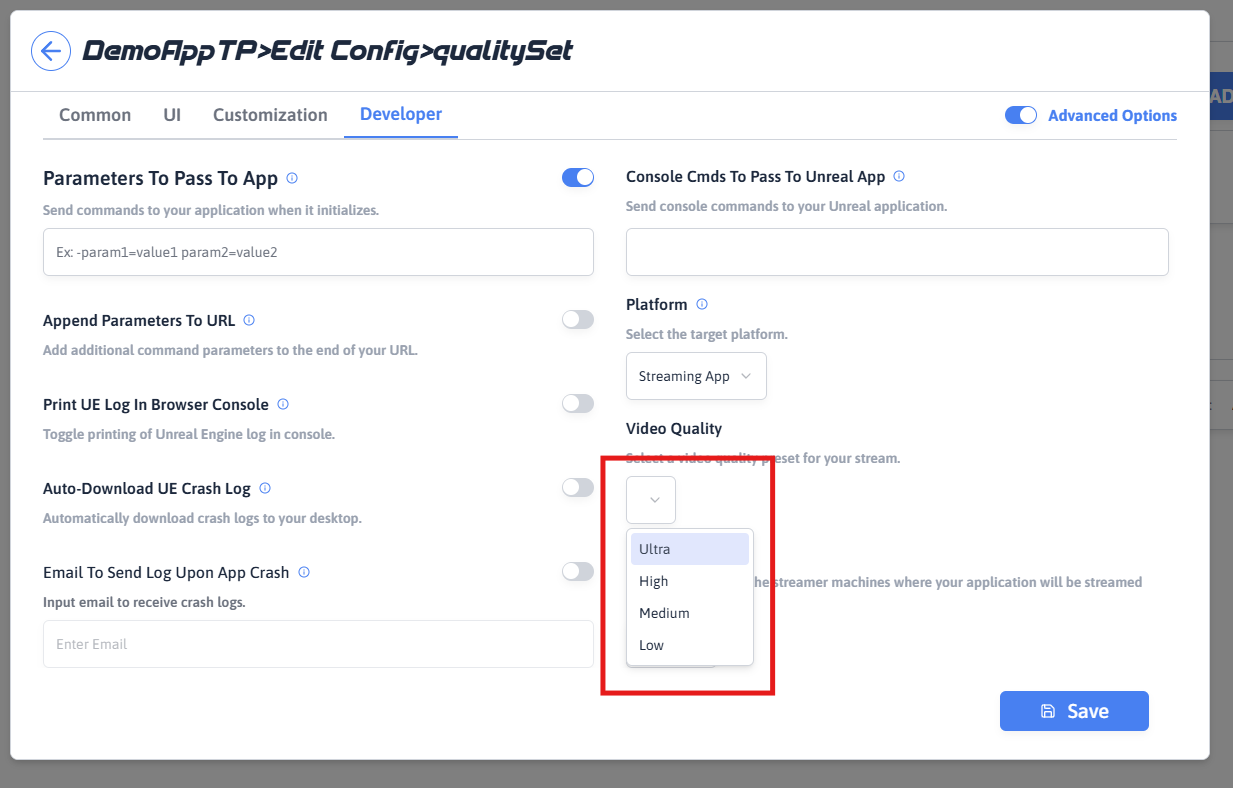
Locate the Predefined Quality option and choose the default streaming quality that should be applied when a new streaming session starts.
Available options are:
-
Low
-
Medium
-
High
-
Ultra
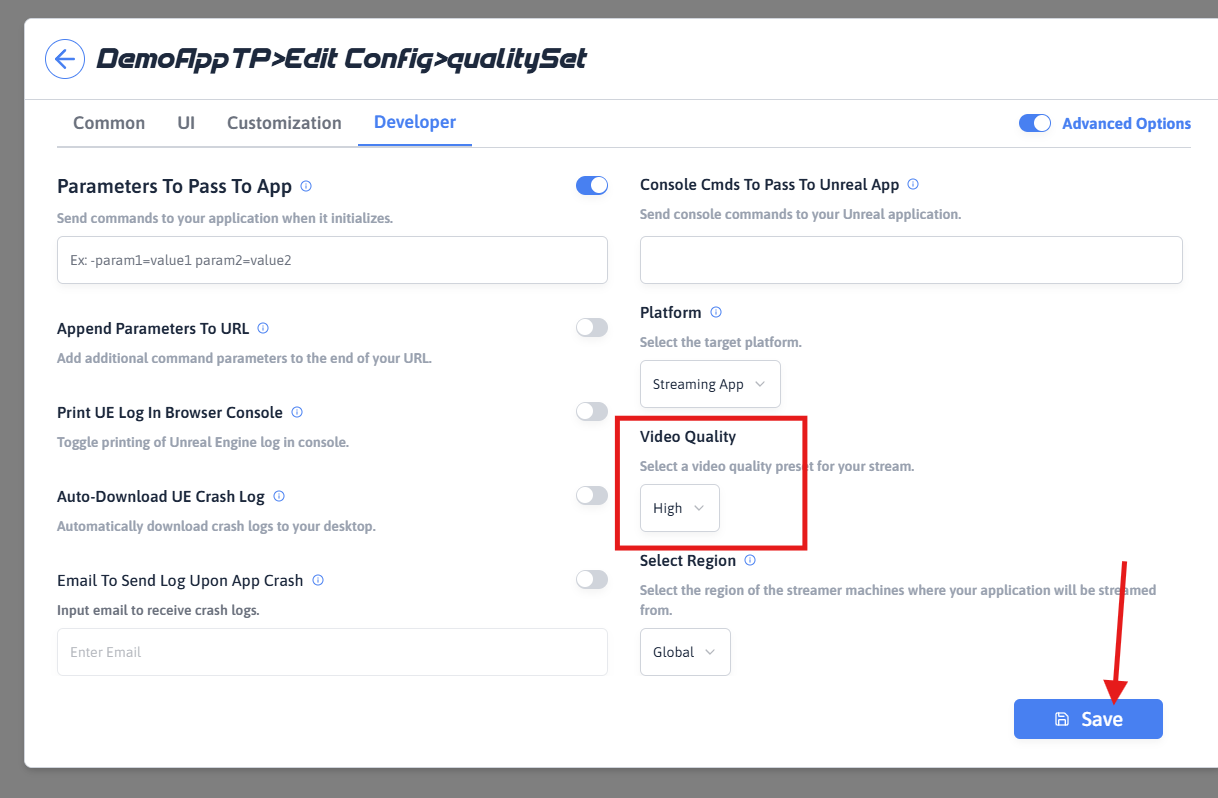
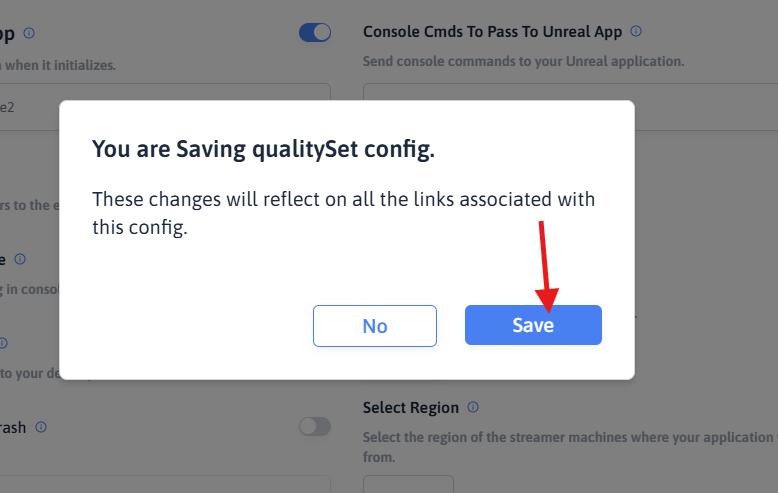
Step 6. Save the Configuration
Click Save to apply your changes.
Step 7. Launch the Application and Verify the Predefined Quality
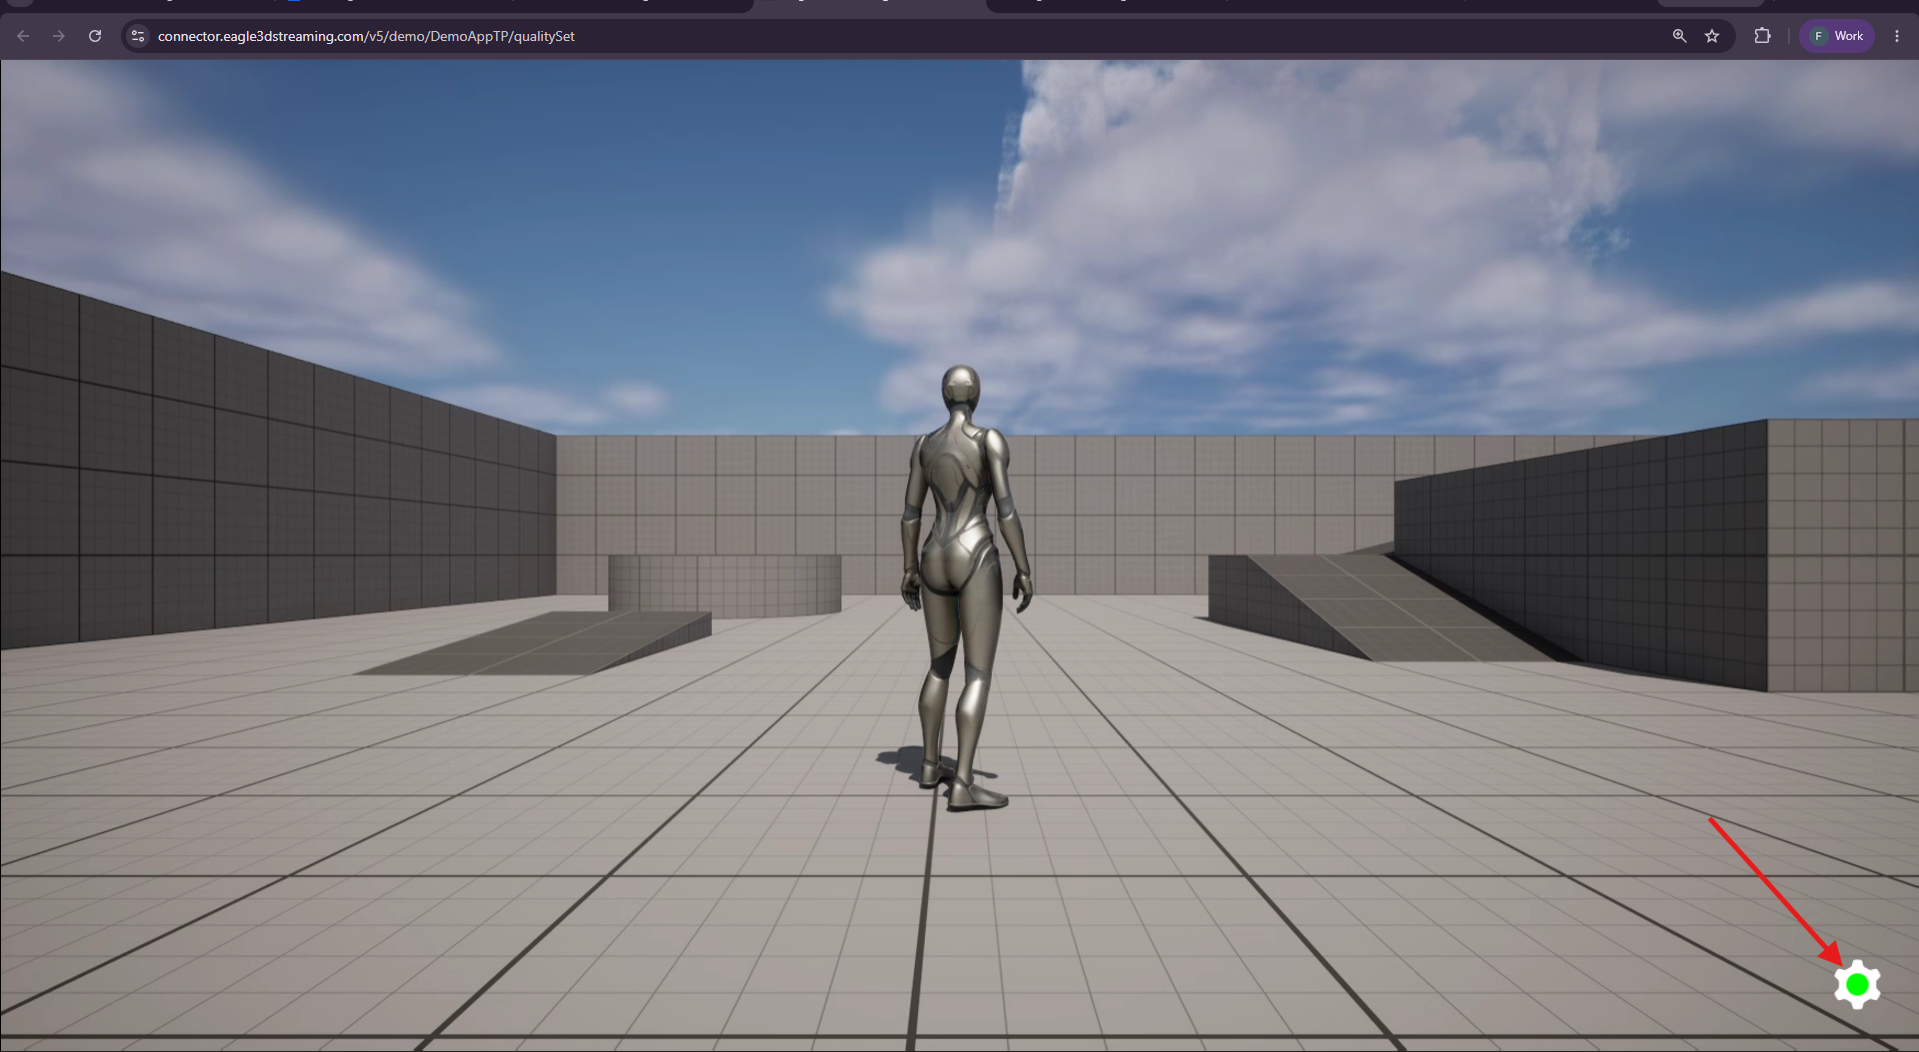
Launch your streaming application and verify that the selected predefined quality is applied when the session starts.
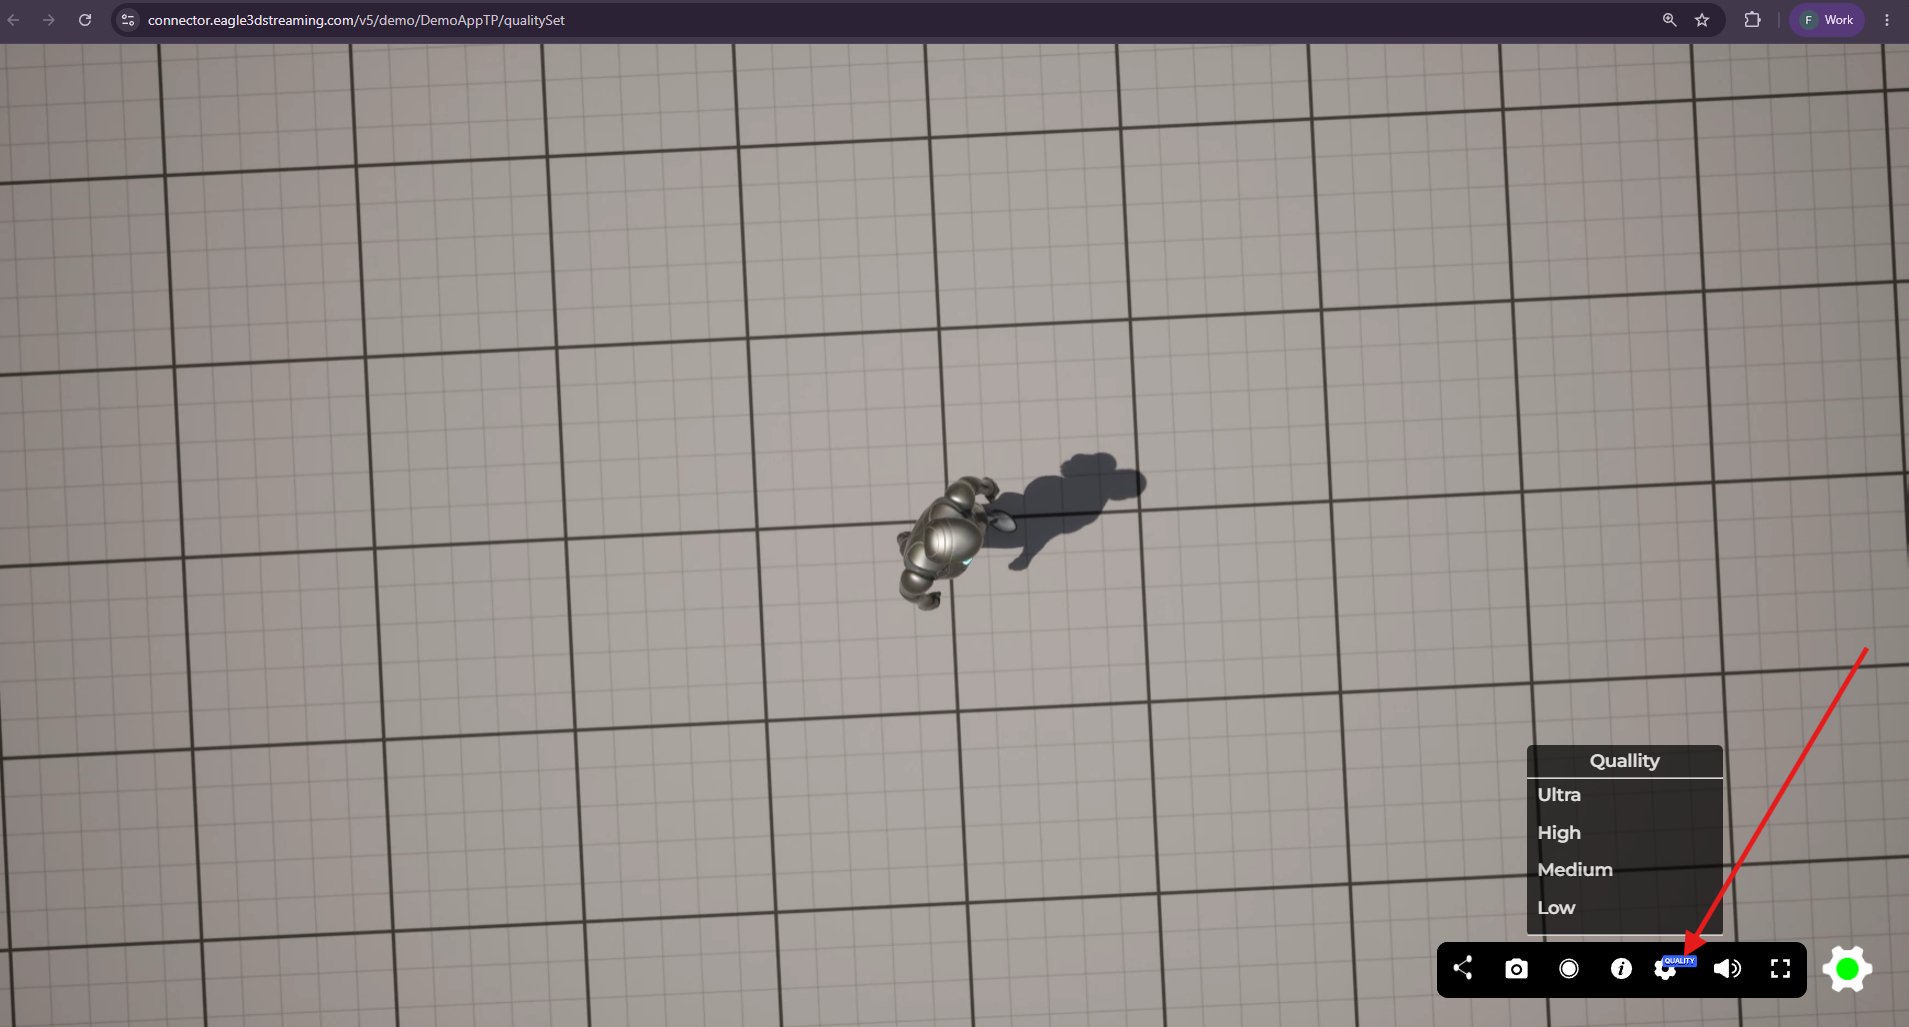
You can identify the active quality by checking the color of the Settings button:
|
Color |
Streaming Quality |
|---|---|
|
🔴 Red |
Low |
|
🟡 Yellow |
Medium |
|
🟢 Green |
High |
|
🟢 Dark Green |
Ultra |
Note
Users can still change the streaming quality during the session if runtime quality switching is enabled. The Predefined Quality setting only determines the quality that is applied when the stream first starts.
Troubleshooting
|
Issue |
Possible Cause |
Solution |
|---|---|---|
|
Predefined quality is not applied when the stream starts |
The configuration was not saved, or the application is using a different configuration. |
Save the configuration, verify you're launching the correct configuration, and start a new streaming session. |
|
Noticeable frame drops or low FPS |
The selected predefined quality (High/Ultra) requires more bandwidth than the user's internet connection can provide. |
Use Medium or Low quality, or ensure the user has a stable, high-speed internet connection before using High or Ultra. |
|
Changing the predefined quality has no effect |
The new predefined quality only applies to new streaming sessions. Existing sessions continue using the quality that was applied when they started. |
End the current session and start a new one. The updated predefined quality will be applied automatically at the beginning of the new session. |
Need help?
If you need any assistance, feel free to reach out through any of the following channels:
🛠️ Support Portal: Contact Our Support Team
💬 Discord Community (Faster Support): Join Our Discord Community
📧 Email Support: support@eagle3dstreaming.com
Follow us on: